features · Sep 18, 2023
Streamline Project Approvals with Quire's Status Changes
Last updated: May 29, 2026
Set up lightweight approval workflows in Quire using custom statuses and Permission Control. Three statuses (Request for Approval, Approved, Rejected) plus role-based Complete permission give you an audit trail on the task itself instead of in email threads. This is the Professional-tier pattern; Premium and Enterprise also have a dedicated Approval feature with built-in actions and categories.
Most approvals at most companies happen in the worst possible place. A Slack DM, a forwarded email, a hallway nod. Three months later when someone asks "who actually approved this?", the answer is buried in a thread nobody can search.
According to governance frameworks like SOX and ISO 27001, decisions need to be recorded against the artifact they apply to, not in a side channel. That audit-trail gap is exactly what those frameworks set out to close. Quire's status-based approval pattern is the lightweight way to close that gap inside your task list, without needing the Premium-tier dedicated Approval feature.
How does Quire's status-based Approval work?
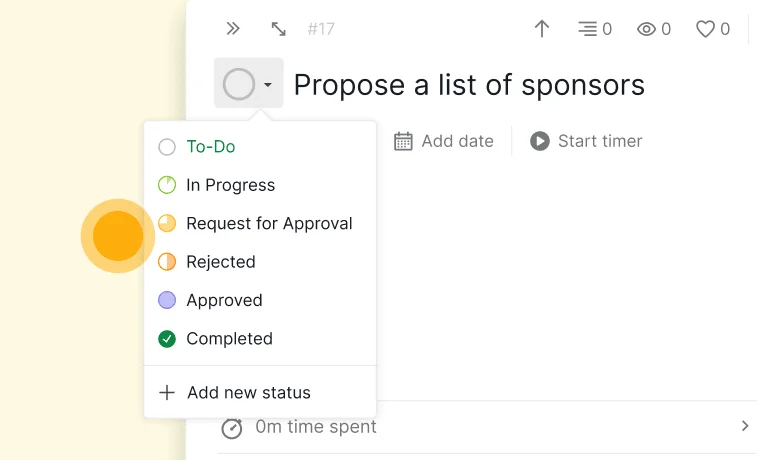
Imagine you're steering a project, juggling numerous tasks and deadlines. Your decisions drive the project's success, but ensuring everyone's on board can be a daunting task. That's where the Request for Approval status shines.
With Quire's Request for Approval, you can effortlessly send specific tasks or entire projects to supervisors or stakeholders for their input and approval. It's like having a built-in review process, ensuring everyone's aligned before proceeding. Say goodbye to endless email chains and miscommunication. Request for Approval is your ticket to clarity and accountability.
Once you've dispatched tasks or projects for review, the Approval action lets team supervisors and stakeholders give the green light or offer constructive feedback. It's a straightforward, efficient way to gather input and guarantee satisfaction with project progress.
How does Quire's status-based approval compare to other PM tools?
Most PM tools eventually shipped some approval pattern. The differences come down to whether it's a first-class workflow or a status-based hack, and what tier it sits on.
The pattern: most PM tools support approval as an emergent behavior on top of their general task and status models. The differentiator is whether the audit trail is built-in and whether the workflow is at the task level or has to be configured per project.
Why do approvals matter in project management?
You might wonder why approvals are worth your attention. Well, let's break it down:
- Streamlined Communication: Bid farewell to juggling multiple communication tools. Quire's Request for Approval and Approval centralize everything, making your workflow smoother.
- Enhanced Accountability: Who's responsible for what? Quire makes it crystal clear. Plus, you can easily track task approvals, eliminating confusion.
- Time Savings: Forget endless meetings and lengthy email threads. Approvals are a breeze with just a few clicks, saving you valuable time.
- Error Reduction: Structured approval processes significantly reduce the chances of missing crucial details or costly mistakes.
- Happy Stakeholders: Your clients and stakeholders will love the transparency and efficiency of the approval process. Happy clients translate to more business opportunities!
How do you manage requests for approval and the approval response?
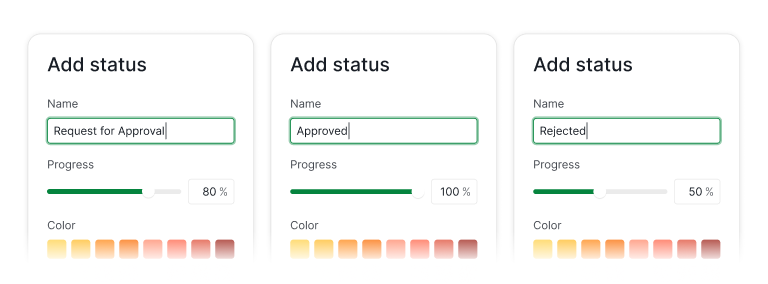
You can add a new status and name it “Request for Approval”. You can set the progress to whatever percentage that you’d like, except 100%.
Then you can create another status and name it “Approved”. Now, set the progress to 100%.
You can also create another status and name it “Rejected” and set a progress percentage to anything but 100%.
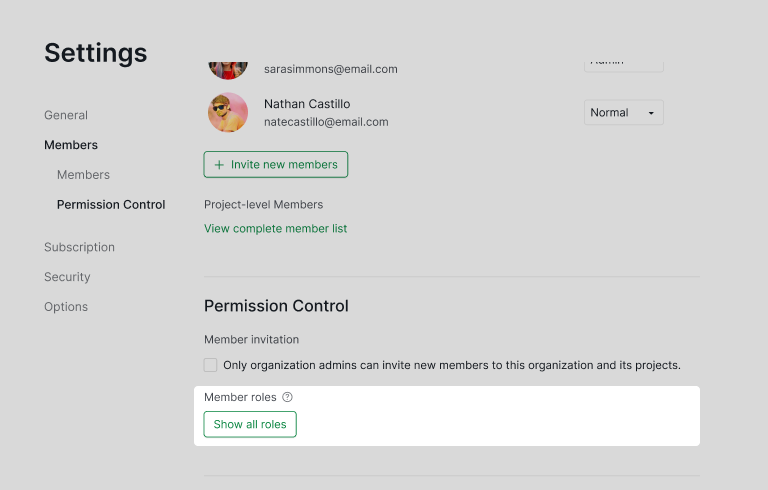
To authorize the approval or rejection of a request, you need to configure the permissions for the designated role responsible for this action.
Permission Control is exclusively made for Professional and higher subscription tiers. More information can be found on our Pricing page.
Go to your Organization and choose Edit members in the dropdown menu, scroll down to the bottom of the page, and choose Show all roles in the Permission Control section.
In this permission roles list, you can decide which role can approve the tasks and select the Complete permission and click Save.
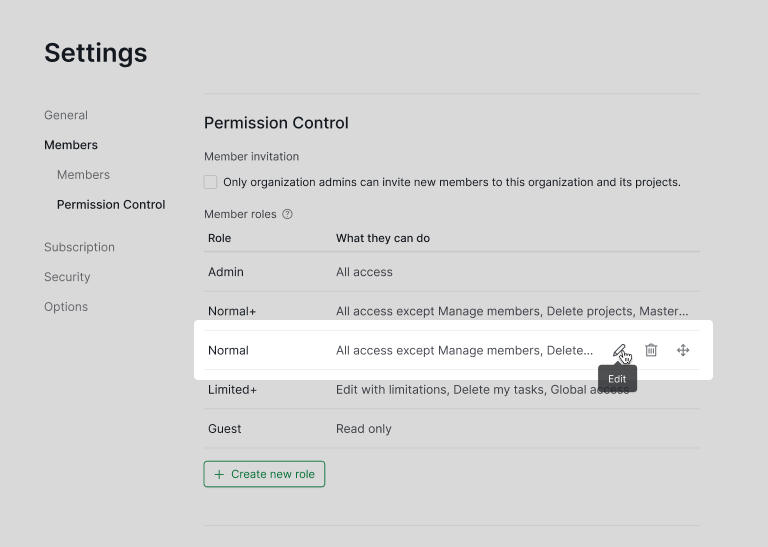
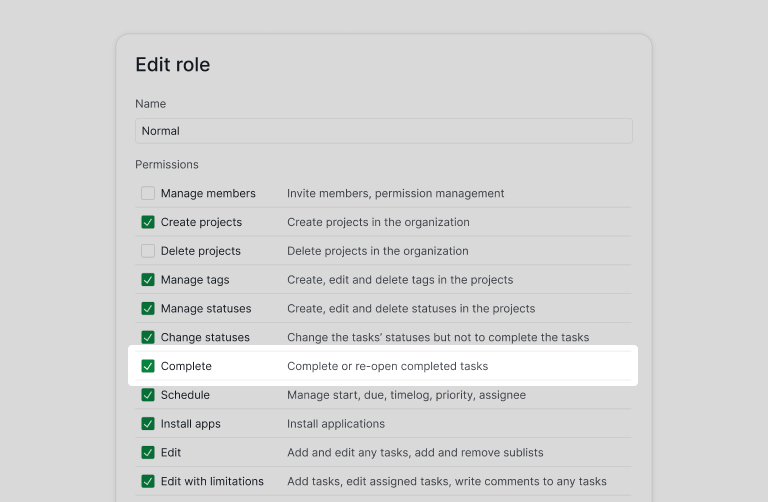
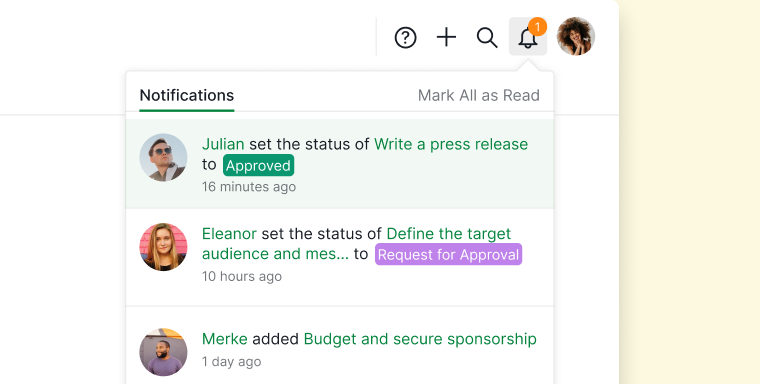
Now whenever a member uses the status Request for Approval, the admin or manager can approve the task by changing the status to Approved or Rejected. The team member who requested the approval will also get a notification.
Ready to set up your first approval workflow in Quire?
Pick one project that has a sign-off step (marketing asset review, design approval, billing release), create the three statuses, configure Permission Control on the approver role, and run two real approvals through it. The first time you can answer "who approved this, when, on which version" without scrolling Slack, you'll know why the audit trail matters.
Status-based approvals work on Professional and higher Quire plans. For dedicated approve / reject / request-changes actions with approval categories, the Premium plan ships the full Approval feature. Full plan details on the pricing page.
