developers · Feb 4, 2026
A Step-by-Step Guide to Setting Up Quire Webhooks
Last updated: July 24, 2026
Quire webhooks push real-time HTTP notifications to your server whenever project activity happens, so your app never has to poll. Setup is three steps: create a Quire app, set your webhook endpoint URL in the Developer Apps portal, then subscribe by adding the app as a project follower via the API. Verify each payload's secret field, and reply with a 2xx to acknowledge (Quire retries after 15 minutes, 1 hour, and 1 day).
Ever wished your apps could talk to each other automatically? That's exactly what webhooks do! Think of them as messengers that notify your server the moment something happens in your Quire projects, whether it's a new task being created, someone updating an assignment, or marking a task complete.
In this guide, we'll show you how to set up webhooks so your applications stay in sync with Quire, without you lifting a finger.
How Do You Get Started With Quire Webhooks?
Step 1: Create Your Quire App
First things first, you'll need a Quire app. If you haven't set one up yet, head over to our guide on Creating a Quire App with the Quire API and we'll walk you through it.
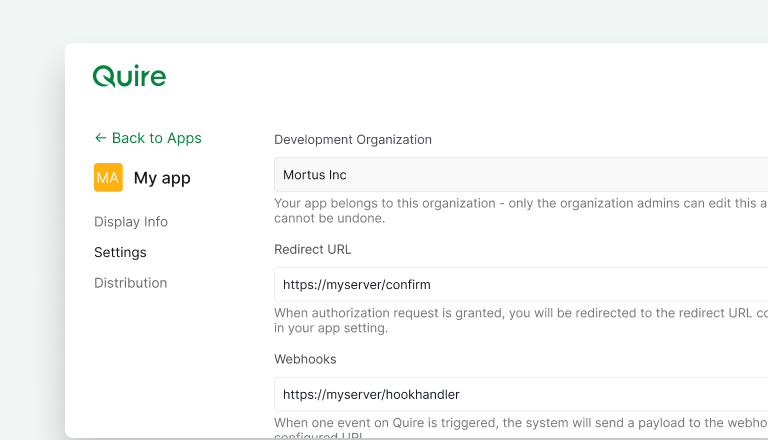
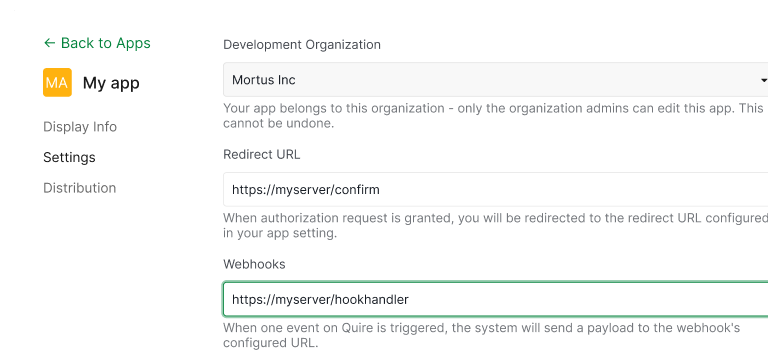
Step 2: Tell Quire Where to Send Updates
Now it's time to set up your webhook endpoint in the Quire Developer Apps portal. This is simply the web address where you want Quire to send notifications, something like http://myserver/hookhandler.
Think of it as giving Quire your mailing address so it knows where to deliver the news.
Step 3: Subscribe to Updates
The final setup step is telling Quire which projects or tasks you want to follow. You do this by adding your app as a "follower" using the Quire API:
curl -H 'Authorization: Bearer {access_token}' -X PUT \
  -d '{"addFollowers":["app"]}' \
  https://quire.io/api/project/projectAOid
Important note: Make sure you've already configured your webhook URL before this step. Without it, adding your app as a follower won't work.
When you no longer need updates, simply remove your app from the followers list. It's that easy!
For more details, check out Update a project by OID in our API reference.
How Do Webhooks Work Behind the Scenes?
What You'll Receive
Once everything's set up, Quire starts sending you notifications whenever something happens in your followed projects. These come as POST requests with all the juicy details in a neat JSON package:
{
  "type": "notification",
  "secret": "your-app-secret",
  "data": {
    "type": 0,
    "when": "2019-09-30T08:20:12.000Z",
    "what": {
      "oid": "YxjapXXRCOYxoaiCT4tT3OQm",
      "id": 101,
      "name": "Brand new start"
    },
    "user": {
      "oid": "1AbDEFed2A5031BEDDweqmde",
      "id": "john.doer",
      "name": "John Doer"
    },
    "message": "<a href=\"https://quire.io/u/john.doer\">John Doer</a> added <a href=\"https://quire.io/w/MyProjects/101\">Brand new start</a>",
    "text": "John Doer added Brand new start",
    "url": "https://quire.io/w/MyProjects/101"
  }
}
Security First: Verify the Source
Each webhook includes your app's secret key. This is your way of confirming that the message really came from Quire and not someone pretending to be us. Always check this before processing any data!
Responding to Different Events
Different things happen in your projects, and you'll want to handle them differently. Here's a simple example of how to respond based on what happened:
switch(json["data"]["type"]) {
  case 0:
    // new task added
    log("New task: " + json["data"]["what"]["name"]);
    break;
  case 1:
    // task removed
    log(json["data"]["user"]["name"] + " deleted " + json["data"]["what"]["name"]);
    break;
}

What Event Types Does Quire Send?
Quire can notify you about all sorts of activities. Here are some of the most common ones:
Want the full list? Head over to our activity types documentation to see everything Quire can tell you about.
Letting Quire Know You Got the Message
When your webhook receives a notification, just send back a success status code (anything from 200 to 299). This tells Quire, "Got it, thanks!"
If something goes wrong and you send back a different status code, no worries, Quire will try sending the notification again after 15 minutes, then after 1 hour, and finally after 1 day.
For more details, see "Responding and Retries" in our API documentation.
How Do You Manage Webhooks Across Multiple Projects?
Working with several Quire projects on the same server? We've got you covered with two flexible approaches:
Option 1: Use Custom Labels
You can add a custom label when subscribing to project updates:
curl -H 'Authorization: Bearer {access_token}' -X PUT \
  -d '{"addFollowers":["app|handleProjectA"]}' \
  https://quire.io/api/project/projectAOid
Quire will include this label in every webhook notification, making it easy to identify which project sent it:
{
  "type": "notification",
  "team": "handleProjectA",
  "data": {
    // event details...
  }
}
Then in your code, you can route notifications accordingly:
switch(json["data"]["type"]) {
  case 0:
    // new task added
    if (json["team"] == "handleProjectA") {
      log("ProjectA has a new task: " + json["data"]["what"]["name"]);
    }
    break;
}
Option 2: Use Different Paths
Prefer to keep things separate? Set up unique paths for each project:
curl -H 'Authorization: Bearer {access_token}' -X PUT \
  -d '{"addFollowers":["app|/projectAUpdate"]}' \
  https://quire.io/api/project/projectAOid
This way, Quire sends notifications to different subpaths of your main endpoint (like http://myserver/hookhandler/projectAUpdate), and you can handle each project with its own dedicated handler.
What's the Quickest Path to Your First Webhook?
That's it! You now know how to set up webhooks and keep your applications in perfect sync with Quire. For the complete technical documentation, check out the Webhook section in our API reference.
Building for an AI assistant instead of a custom server? See Quire MCP Setup in 5 Minutes to connect Claude, ChatGPT, or any AI client directly.
Happy building!

Frequently Asked Questions
What is a Quire webhook?
An automated HTTP notification Quire sends to a URL you control the moment something happens in a followed project — so your app stays in sync without polling.
How do I set up a webhook in Quire?
Create a Quire app, register your endpoint URL in the Developer Apps portal, then add your app as a project follower via the API. Configure the URL before subscribing, or the call will fail.
How do I verify that a webhook request actually came from Quire?
Every payload includes your app's secret field — compare it against your stored secret and reject any request that doesn't match.
What happens if my server is down when a webhook fires?
Quire retries three times — after 15 minutes, 1 hour, and 1 day. Return a 2xx status as soon as you receive the payload to stop further retries.
How do I handle webhooks for multiple Quire projects on one server?
Either attach a custom label when subscribing (for example app|handleProjectA) and route on the team field, or give each project its own subpath on your webhook URL.