Switch to Timeline View from Tree View
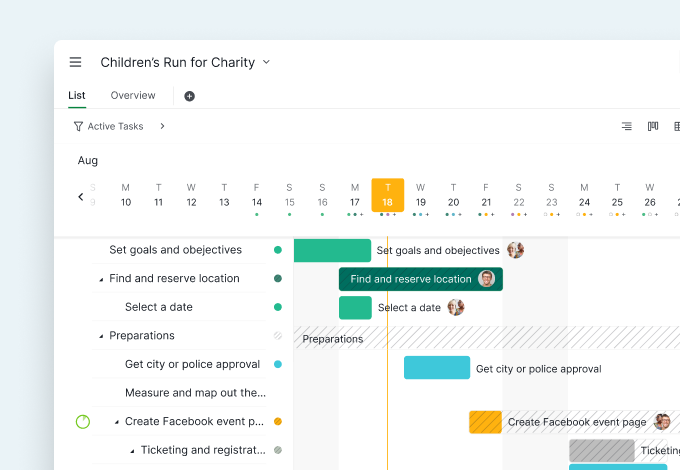
On the upper right corner, you will see three buttons that associate with different views of your project and sublists. Click on the Timeline button to switch your project into a Gantt Chart (Timeline) view and all of your tasks will map out their deadlines.
Tip: Each task list has its own Tree view, Board view and Timeline view.

View Timeline Side-by-side with Nested Task List
Your main screen will be divided into two views: on the left side is the nested task list that keeps you in context and on the right side is the Timeline view. You can resize the task list by hovering over the separating line between the list and the Timeline view.

If your task has been scheduled before (either having a start date or a due date), there will be a dot at the end of the task that indicates there's a time frame associated with this task. Click on the dot to quickly slide to the task timespan bar.
Tip: You can click on the dropdown menu next to the project name and choose “Enter full screen” to view more details in the Timeline.
You can reorder the task list by dragging the task itself or grabbing the timespan bar to rearrange the task order.
Add New Tasks in Timeline View
Open the nested task list and select an existing task then press “Enter” to create a new same-level task, or “Shift + Enter” to create a subtask.
Tip: You can choose to hide the nested list view after creating a new task to expand the Timeline view.

Reschedule your timeline
It's ideal when all of the deadlines are met, but sometimes life gets in the way. That's why you should always rearrange your schedule to better manage the project bandwidth.
If you want to see the duration of your task, you can hover on the timespan bar and the task's schedule will be shown under the timespan bar.
Simply hover over the start or due date of the task and extend or shorten the time duration. You can click to move or drag the whole bar altogether.
Tip: If you're not so confident with the dragging and dropping the timespan bar, you can actually change the start or due date at the grid column or in the task's detail panel.
Made mistakes? No worries, you can always click on the Undo button in the upper corner and undo your move.
Color Timeline View in Any Way You Want
Timeline is mainly for visualizing, so it's important to let each task stand out visually. You can choose to color your tasks by priority, tag, date or just leave it as none.
Tip: The colors meanings can be found in this detailed guide.
If a parent task has a different duration as its subtasks, in Timeline view, the timespan bar of the parent task will also mark as a grayed slashed bar that covers the time duration of the subtasks as well.

Customize Task List with Grid View
Since the timeline view can only show very limited details of the task list, you can tap on the timeline button and toggle on Grid View.
You can choose which task details you would like to show on your list, the default selections are “Status”, “Priority”, “Assignee”, “Tags”, “Start”, and “Due”. After choosing which option you want to show, you can resize the column if needed.

Navigate around the timeline
- Multi-select tasks by using “Shift” and reschedule them all at once.
- Grab on the calendar header and move right or left.
- Click on the “Today” button on the upper right corner to jump to Today date.
- Change the timeline view to Day view, Week view, Month view, Year view and choose to show weekends or not.
- Use Filter to sort and group your timeline in however order you may like. You can choose to view your timeline by task status, assignees, or priority.
Now you have learned everything about Quire Timeline and ready to achieve your next project milestone! Go wild and have fun!

Quire Timeline view is only available in the Professional, Premium and Enterprise subscription plans. More information can be found on our Pricing page.
Let's get started in Quire today!


