Project Settings in Quire Permalink
If you are a project admin, you can customize how features behave in a project using the Project Settings page. These settings help teams control task creation, comments, permissions, notifications, and email-based task creation.
Access Project Settings
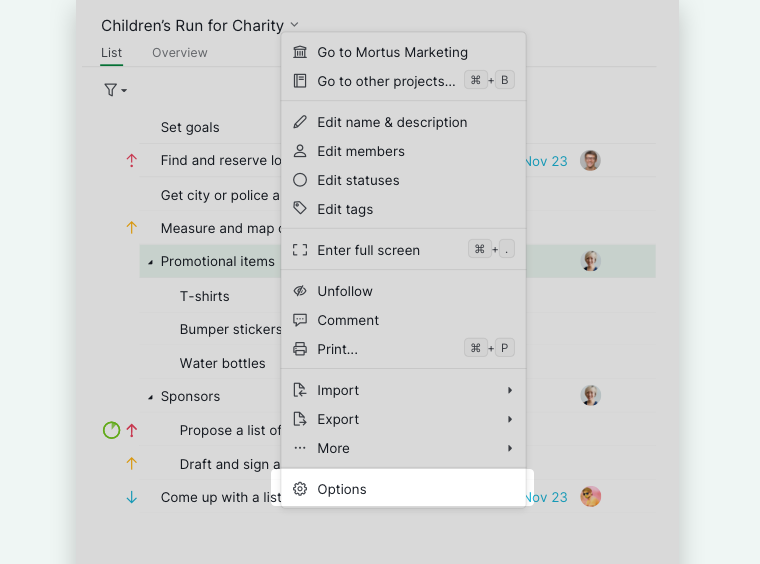
You can access project settings in two ways:
- Click the dropdown menu icon next to the project name.
-
Select Options.

Or:
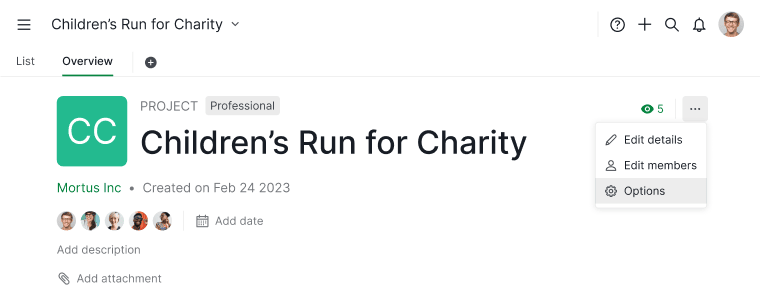
- Go to the project Overview tab.
- Click the More Options icon in the upper-right corner.
-
Select Options.

Feature Settings
Feature settings control how tasks, comments, dates, time tracking, and permissions behave inside a project.
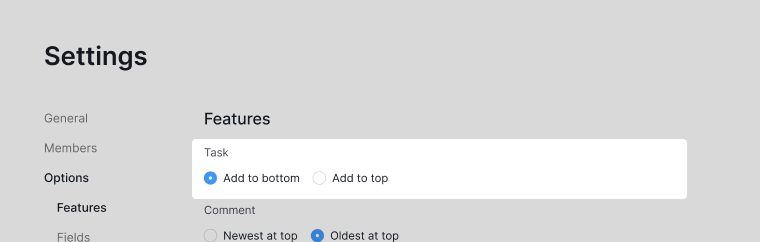
Task Creation Position
You can choose where newly created tasks appear in the task tree:
- Add tasks to the top of the list
-
Add tasks to the bottom of the list

Comment Display Order
You can choose how comments are ordered within a task:
- Show newest comments at the top
-
Show newest comments at the bottom
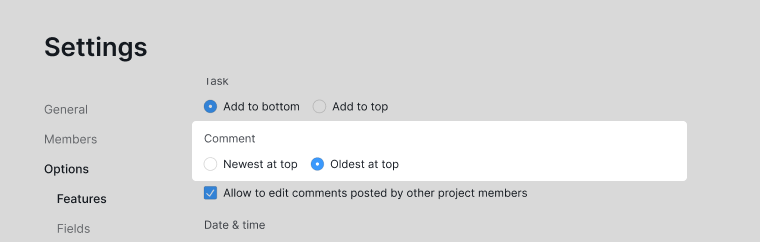

Member Comment Editing
Project admins can decide whether members are allowed to edit comments created by others.

Status
You can configure how task completion and status updates are handled in the project:
- Block task completion if the task or any subtask has an open predecessor
- Block task completion if the task or any subtask has a pending approval
-
Update task status by clicking the status circle
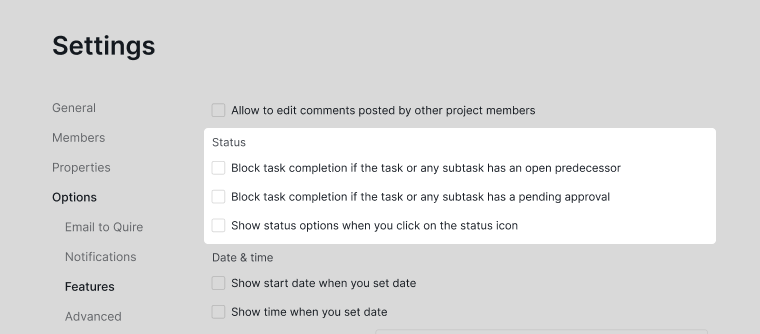

Start Date and Time Display
You can choose to always display the start date or start time when assigning dates to tasks.

Time Duration and Log Format
You can customize:
- The input format for task duration
- The display format for time logs
The default format is hh:mm:ss.

Other Settings
Additional project options include:
- Allow multiple assignees without replacing existing ones
- Allow members to favorite tasks
- Hide time logs and activity logs from guests which include members invited as “Guests” or users who can access via share project link and public project
- Allow members to create new tags from the tag picker
- Automatically inherit tags from parent tasks
- Enable right-to-left text support
-
Allow executable file uploads
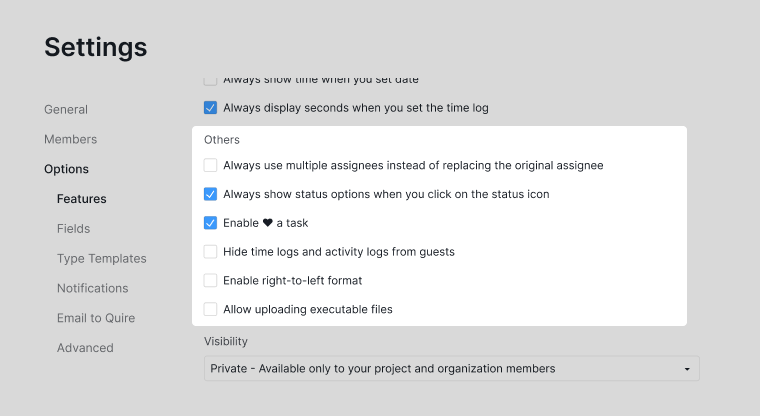

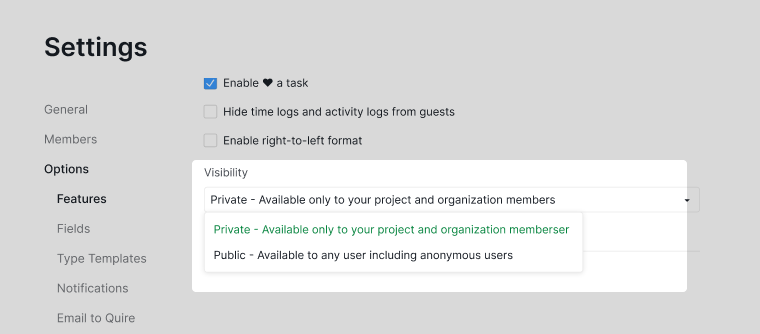
Project Visibility
Setting your project to public is only available in the Professional, Premium, Enterprise plans. More information can be found on our pricing page.
You can choose between:
- Private: Accessible only to invited members
-
Public: Accessible to anyone with access permissions

Notification Settings
Notification settings let you control which project events trigger notifications for your account only.
- Click the dropdown menu icon next to the project name.
- Select Options.
- Navigate to the Notifications section.
By default, notifications include:
- Task reminders
- New comments
- Task activity updates
You can adjust these preferences based on your needs.

Note: Notification settings apply only to your own account, not other project members.
Email to Quire
Email to Quire is only available in the Professional, Premium, Enterprise plans. More information can be found on our pricing page.
Email to Quire allows you to create tasks by sending emails directly to a project-specific email address.
Enable Email to Quire
Only Organization Admins or Project Admins can enable this feature.
- Open Project Settings.
- Navigate to the Email to Quire section.
-
Copy the project’s unique email address.
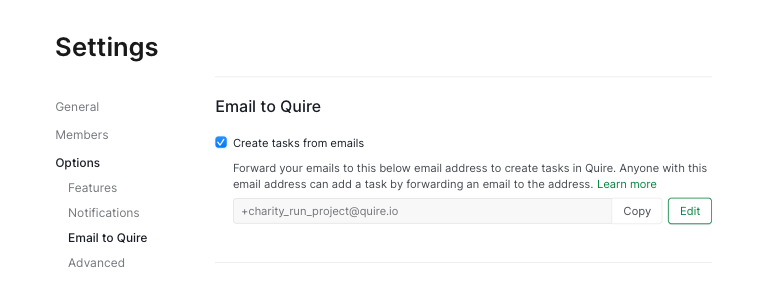

Each project has a unique email address. Custom email addresses are available on Premium and Enterprise plans.
Email Field Mapping
| Email Field | Becomes in Quire |
|---|---|
| Email Subject | Task name |
| Email Body | Task description |
| To | Task’s assignees |
| Cc | Task’s followers |
| Email attachment | Task attachment |
Tip: You can also create tasks from your inbox using the Google Add-on integration.
How the email will be translated into Quire’s task:
| Email Field | Becomes in Quire |
|---|---|
| Email Subject | Task name |
| Email Body | Task description |
| To | Task’s assignees |
| Cc | Task’s followers |
| Email attachment | Task attachment |
Note:
- Emails sent via BCC are not recognized
- CC’d users must already be members of the project to be assigned
Frequently Asked Questions
How do I open project settings in Quire?
Click the dropdown menu icon next to the project name and select Options, or go to the Overview tab > More Options > Options. Only project admins can change project settings.
How do I make a Quire project public or private?
In project settings, find the visibility section and choose Private (invited members only) or Public (accessible to anyone with access permissions). Setting a project to public requires a Professional, Premium, or Enterprise plan.
How do I customize project notifications in Quire?
In project settings, navigate to the Notifications section and adjust which events send you notifications. Notification settings apply only to your own account.
How do I enable Email to Quire so tasks can be created by email?
In project settings, navigate to the Email to Quire section and copy the project’s unique email address. Emails sent to that address create tasks. Requires a Professional, Premium, or Enterprise plan.
Can I control where new tasks are added in the Quire task list?
Yes. In project settings under Feature settings, choose whether new tasks are added to the top or bottom of the task list.
Can project admins allow members to edit each other’s comments in Quire?
Yes. In project settings under Feature settings, there is a toggle to allow members to edit comments created by other members.
Can I block task completion when a task has a pending approval in Quire?
Yes. In project settings under Feature settings, enable Block task completion if the task or any subtask has a pending approval. When on, a task cannot be marked complete while it or any of its subtasks still has an unresolved approval request.
Can I block task completion when a task’s predecessor is not yet done in Quire?
Yes. In project settings under Feature settings, enable Block task completion if the task or any subtask has an open predecessor. When on, a task cannot be marked complete while it or any of its subtasks still has an incomplete predecessor.