Create and Manage Sections in Quire Permalink
When working on a project with multiple team members, task lists can quickly become overwhelming. Sections help project managers organize tasks into manageable parts, making it easier to track progress, categorize work, or define project stages.

Create a Section
- Click the + icon in the upper-right corner of your workspace.
- Select Add section.
- Type the section name directly.
Note: Only description, comments, and attachments can be added to a section. Other task details are not available.

Tip: Press * to create a section using the keyboard.
Add Tasks to a Section
Add New Tasks
- Click the

-
Or press Shift + Enter to add a new task.


Add Existing Tasks
- Drag and drop tasks into the desired section.
- Or click the More Options icon in the task detail panel.
- Select Make a subtask of.
-
Or right-click the task and select Make a subtask of in the More menu.


Tip: Press Ctrl + P (Windows) or ⌘ + P (Mac) to move tasks to another section without the mouse.
Turn a Task into a Section
If you have already organized your tasks in a tree structure manner (with parent task and subtask), you can turn a task into a section in order for your project to be more manageable and well structured.
- Select the task you want to convert.
- Click the More Options icon in the task’s detail panel.
- Select Turn to a section.
-
Or right-click and select Turn to a section in the More menu.
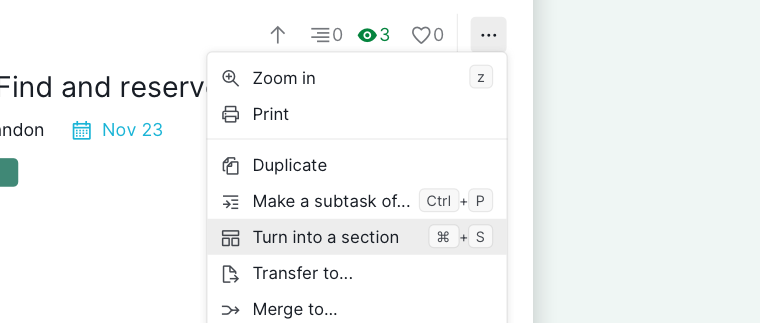

Tip: Press Ctrl + S (Windows) or ⌘ + S (Mac) to convert a task into a section using the keyboard.
You can also reverse this process to turn a section back into a task.
Note: When converting a task into a section, all details except description, comments, and attachments will be removed.
Jump to a Section
Use the dropdown menu next to the project name at the top of your workspace to jump directly to a section. This is helpful for navigating long task lists.

Delete a Section
- Click the More Options icon in the task’s detail panel.
- Select Delete.
-
Or right-click on the section and select Delete in the More menu.
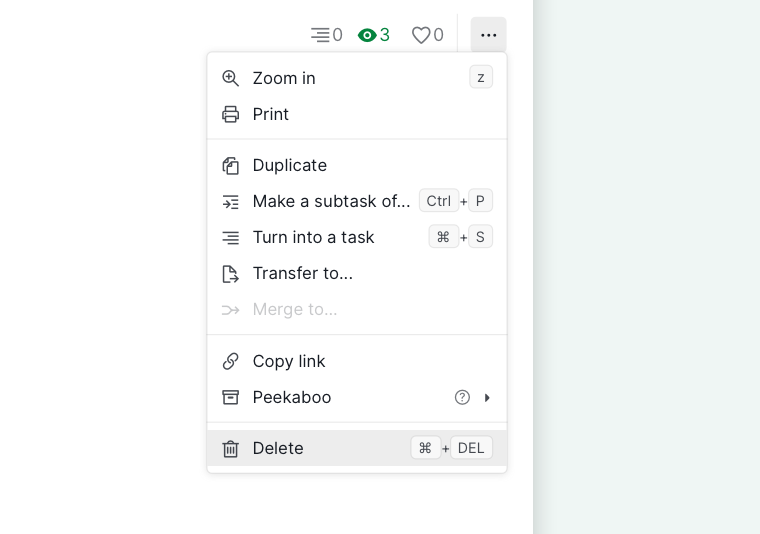

Note: Deleting a section removes all tasks within it. Mistakes can be undone via the Undo menu within 6 days by pressing Ctrl + Z (Windows) or ⌘ + Z (Mac).
Read more on our blog about Quire sections.
Frequently Asked Questions
Can sections be completed or assigned in Quire?
No. Sections don’t have a status and can’t be completed. Only descriptions, comments, and attachments can be added.
How many sections can I add to a project in Quire?
No limit.
How do I create a section in Quire?
Click the + icon and select Add section, or press *.
What’s the quickest way to move an existing task into a section in Quire?
Drag and drop it, or right-click > More > Make a subtask of. Keyboard: Ctrl+P (Mac: ⌘+P).
How do I convert a task into a section in Quire?
Detail panel > More Options > Turn to a section, or right-click > More > Turn to a section. Keyboard: Ctrl+S (Mac: ⌘+S). Assignees, dates, and tags are removed.
Can I turn a section back into a task in Quire?
Yes. Assignees, dates, and tags removed during the original conversion will not be restored.
How do I navigate to a specific section in Quire?
Use the dropdown menu next to the project name to jump directly to any section.
What happens when I delete a section in Quire?
All tasks inside it are deleted. Undo within 6 days via Ctrl+Z (Mac: ⌘+Z) from the Undo menu.