Quire Table View Permalink
A table view lays out tasks in a grid with columns for attributes like status, assignee, priority, and due date. This makes it faster to scan and compare tasks across a project without opening each one individually. In Quire, the Table view supports custom fields and inline editing, so teams can manage structured task data the same way they would in a spreadsheet, alongside Quire’s other project views.
The Table view is only available in the Professional, Premium, Enterprise plans. More information can be found on our pricing page.
With customizable fields, you can track structured task data such as URLs, email addresses, dates, numbers, currencies, and formula-based fields — ideal for inventory tracking, budget management, and other data-driven workflows.

To switch, click the Table icon in the upper-right corner of the main panel.

Note: Each sublist has its own Table view configuration. Columns shown or hidden in one sublist will not affect others.
Tip: Press 3 to switch to Table view. Press 3 again to open the Table view options menu.
Manage Table Fields
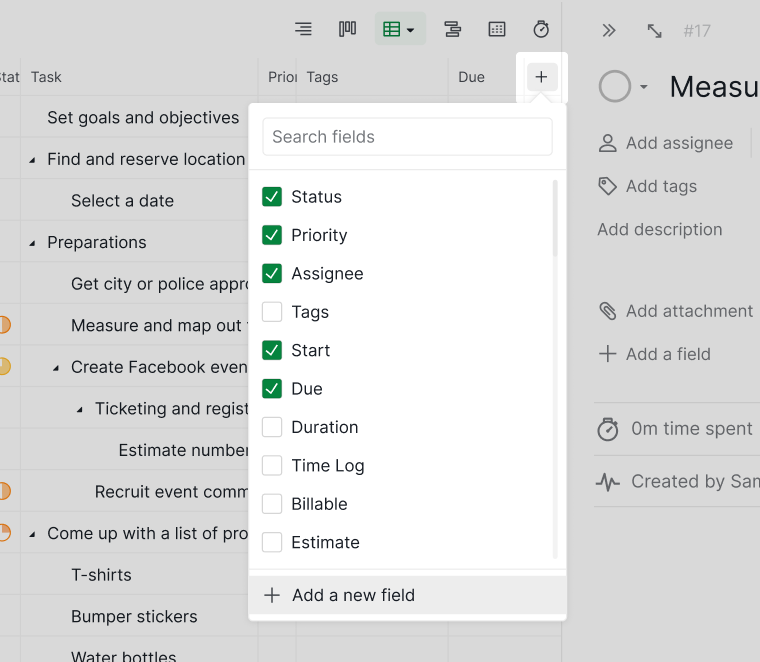
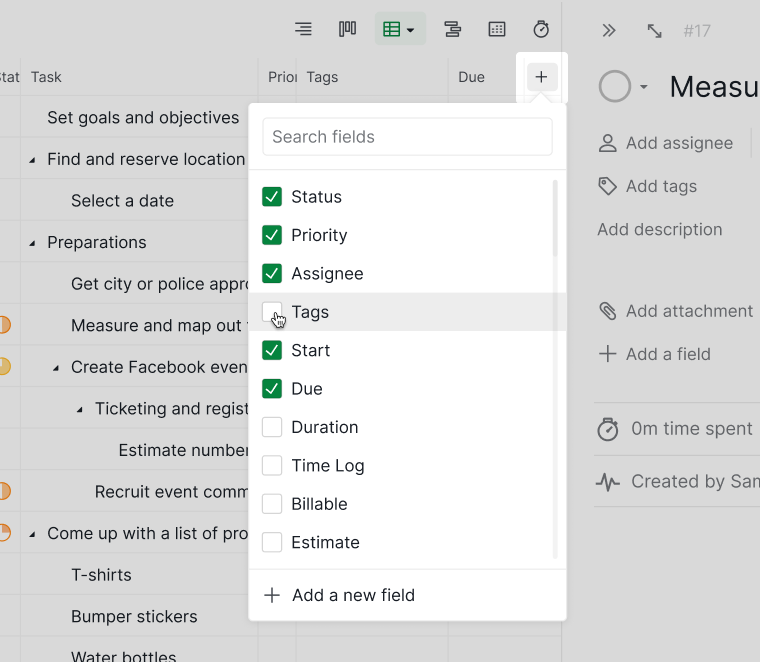
Add a Field
- Switch to Table view.
- Click the Table icon.
- Select + Add a new field.
-
Choose the field type and confirm to create the custom field.

Or:
- Click the + icon at the far right of the table.
- Select + Add a new field.
-
Choose a field type and configure its settings.

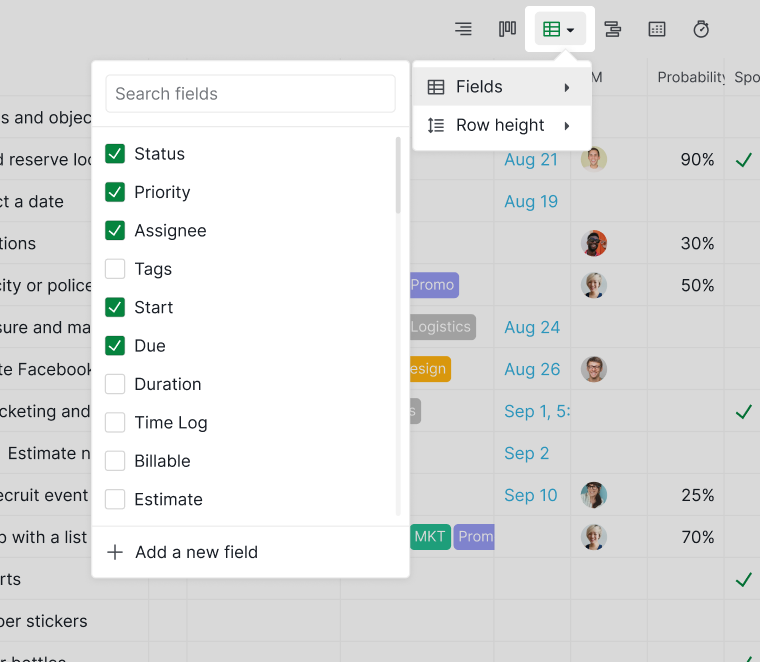
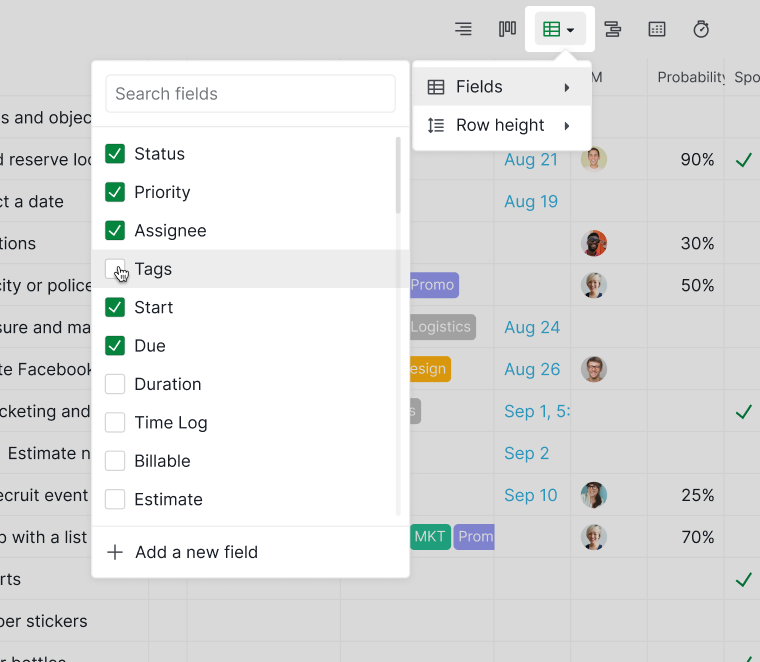
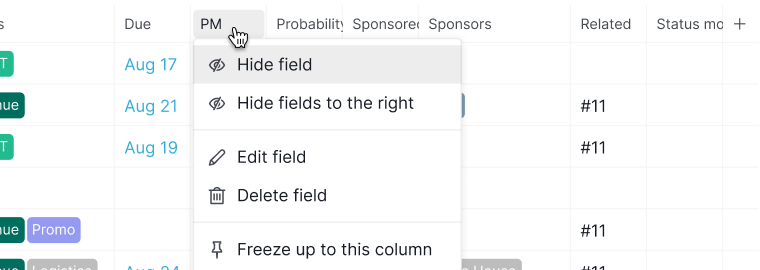
Show or Hide Fields
To show or hide existing fields:
- Click the Table icon.
-
Use the checkboxes to toggle fields on or off.

Tip: Press 3 to switch to Table view. Press 3 again to open the Table view options menu.
You can also:
-
Click the + icon to open the same field menu.
-
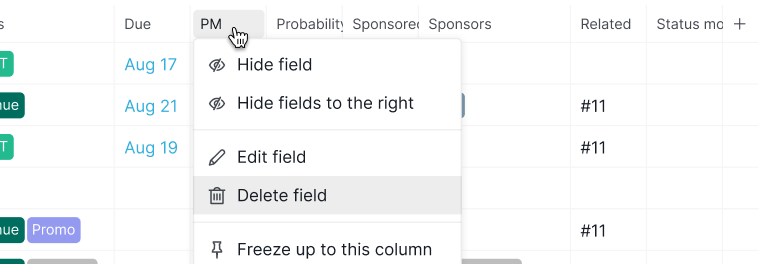
Click a column header and select Hide field or Hide fields to the right.


Rearrange Fields
To change the column order:
- Click and hold a field name in the column header.
-
Drag it to your preferred position.

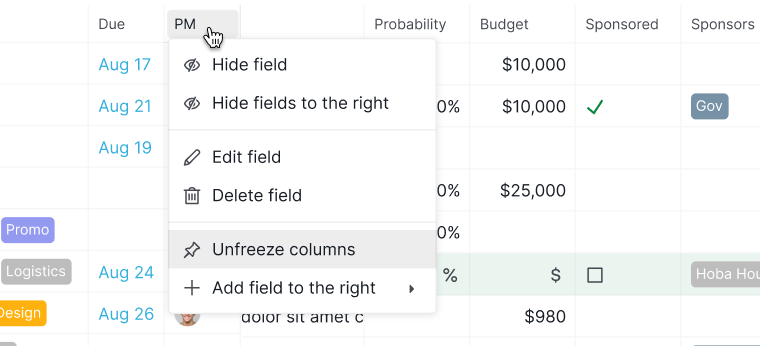
Freeze and Unfreeze Columns
To freeze columns:
- Right-click a column header.
-
Select Freeze up to this column.


To unfreeze columns:
- Right-click any column header.
-
Select Unfreeze columns.

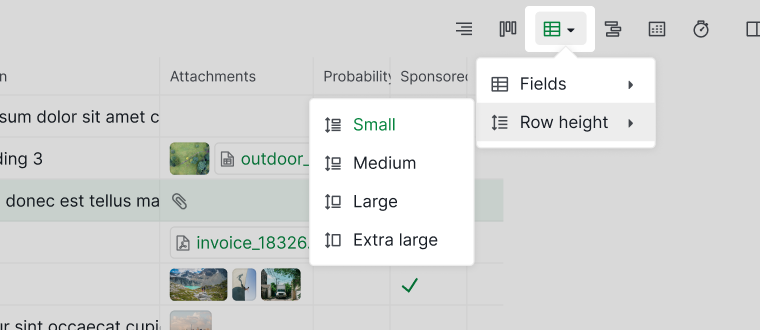
Adjust Table Layout
To adjust how much information each row displays:
- Click the Table icon.
- Select Row height.
-
Choose from four available row height options.

Edit and Delete Fields
Edit a Field
You can edit fields in two ways:
From project settings
- Click the project dropdown menu.
- Select Edit fields.
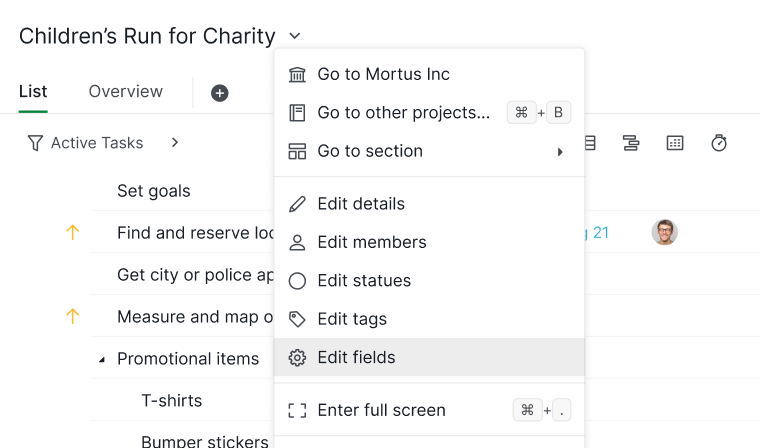
- Choose a field to modify.


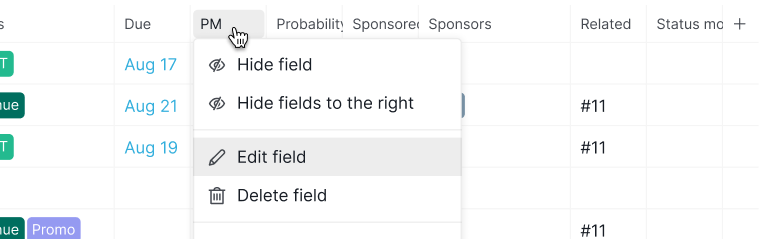
Directly from Table view
- Click the field name in the column header.
-
Select Edit field.

Delete a Field
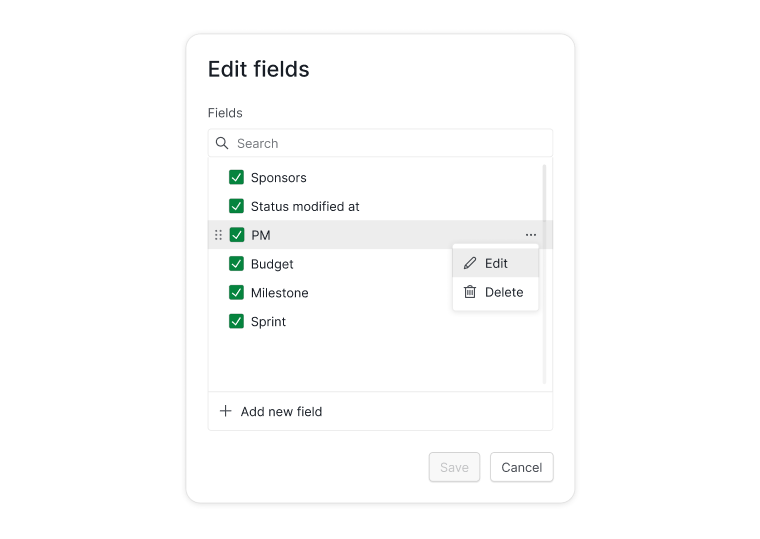
From project settings
- Open Edit fields from the project menu.
- Hover over a field.
- Click the More options (… ) icon and select Delete.

Directly from Table view
- Click the field name in Table view.
-
Select Delete field.

Apply Conditional Colors
Conditional colors help highlight values based on rules you define.
Note: Supported field types: Date, Number, Currency, Duration, Formula.
- Create or edit a custom field.
- Click Add a new condition.
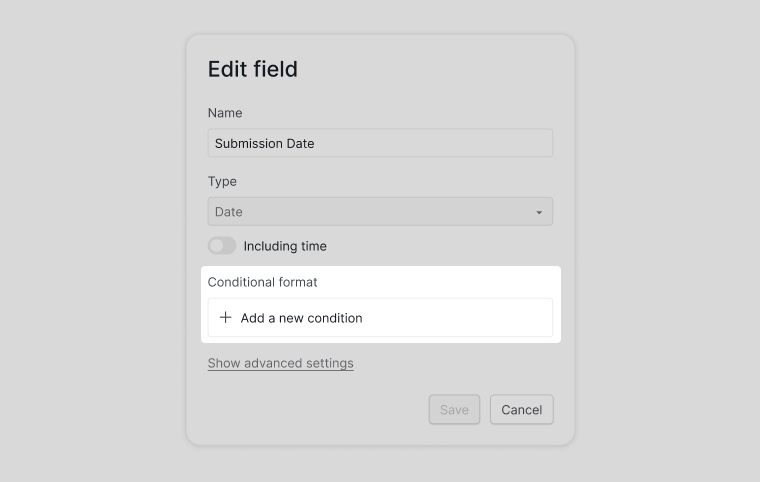
- Define the rule and select a color.
- Click Save.
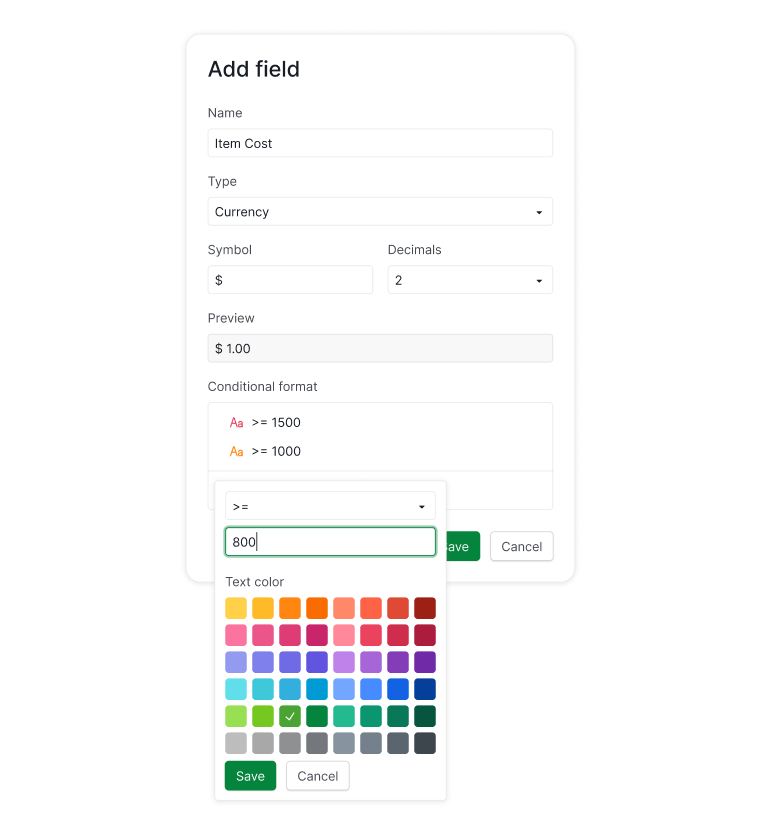


Note: Conditions are applied top to bottom. You can reorder them by dragging the handle next to each rule.

For Formula fields, open the Format tab before adding conditions.

Manage Tasks in Table View
You can add tasks directly from Table view:
- Press Enter while inspecting a task.
- Press T to add a task at the bottom of the list.
Or:
- Click the + icon in the upper-right corner of your workspace.
-
Select Add task.


Frequently Asked Questions
What is Table View in Quire?
Table View displays tasks in a spreadsheet-style layout, letting you view and edit multiple task attributes at once. It supports custom fields like URLs, dates, numbers, currencies, and formulas — useful for inventory tracking, budget management, and data-driven workflows. Available on Professional, Premium, and Enterprise plans.
Does Table View configuration apply across all sublists in Quire?
No. Each sublist has its own Table View configuration. Fields shown or hidden in one sublist do not affect others.
How do I switch to Table View in Quire?
Click the Table icon in the upper-right corner of the main panel, or press 3. Press 3 again to open the Table view options menu.
How do I add a new field in Quire Table View?
Click the Table icon and select + Add a new field, or click the + icon at the far right of the table and select + Add a new field.
How do I show or hide fields in Quire Table View?
Click the Table icon and use the checkboxes to toggle fields. Or click a column header and select Hide field or Hide fields to the right.
How do I freeze columns in Quire Table View?
Right-click a column header and select Freeze up to this column. To unfreeze, right-click any column header and select Unfreeze columns.
How do I add conditional colors to a field in Quire Table View?
Open the field’s settings, click Add a new condition, define the rule, select a color, and save. Supported for Date, Number, Currency, Duration, and Formula fields. Conditions are applied top to bottom and can be reordered by dragging.