Quire Time Tracking View Permalink
Time tracking records how long team members spend on individual tasks. It gives managers data to spot workload imbalances, improve future estimates, and keep projects accountable to their schedules. In Quire, you can track time using a Stopwatch, a Pomodoro timer, or by adding time entries manually, alongside Quire’s other project views. Project managers can review the results in Time Reports and Timesheets. This page covers the timer and manual entry methods. For viewing aggregated data, see Time Reports and Timesheets.
Time Tracking is only available in the Professional, Premium, Enterprise plans. More information can be found on our pricing page.
Time Tracking Options
Quire supports two built-in timers and manual time entry:
- Stopwatch timer – tracks continuous work time
- Pomodoro timer – tracks work in 25-minute focus sessions
- Manual time entry – add time after work is completed
Managers can review time data in:
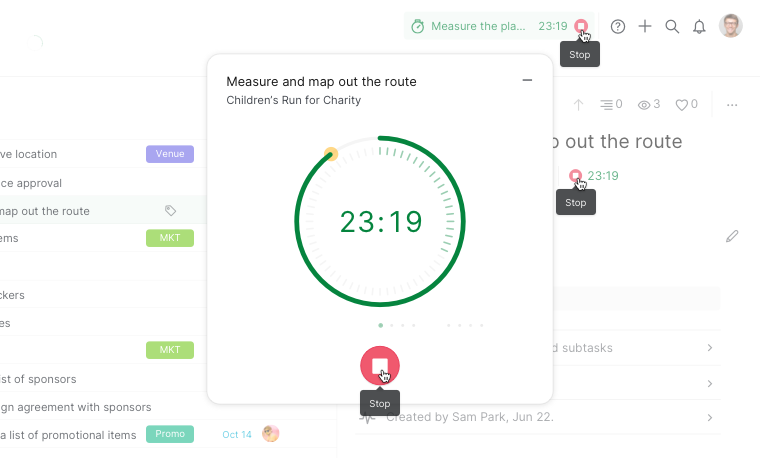
Stopwatch Timer
The Stopwatch timer automatically records the total time spent on a task. Each start and stop creates a new time entry.
From the Workspace
- Click the + icon in the upper-right corner.
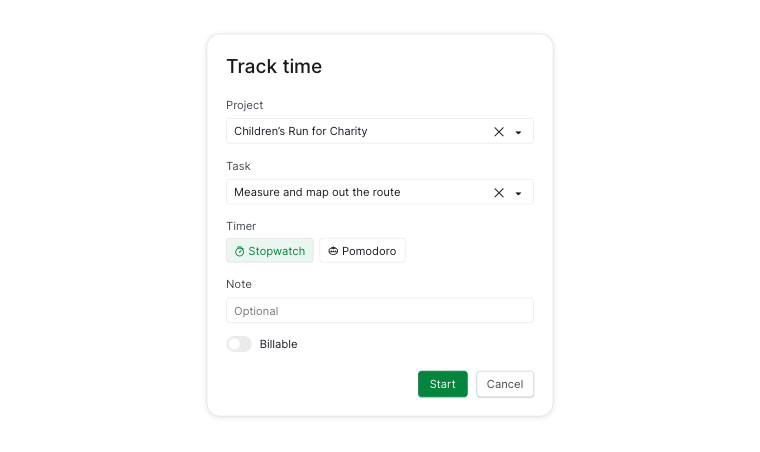
- Select Track time.

- Choose a task.
- Select Stopwatch.
- (Optional) Add notes or mark the entry as Billable.
- Click Start.


Note: When you mark an entry as billable or add a note, a dollar sign or a note icon will appear next to the time entries and in the time reports for your reference. Hover over the icons to see more detailed information.
From a Task
- Press Space to open the task detail panel.
- Click Start Timer or press X on your keyboard.
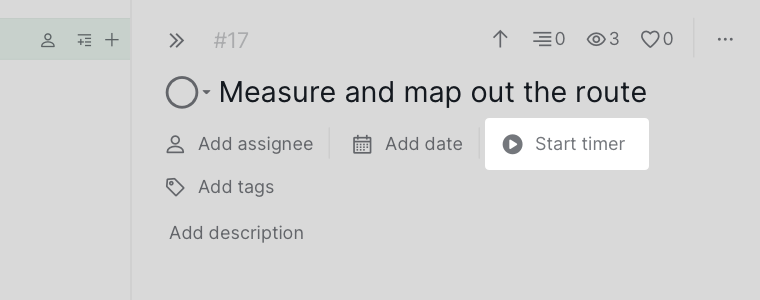
- Click Start.

The timer will appear in the upper right corner for quick access when you close the timer’s popup window.

Note: If Start Timer is missing, enable it from + Add or edit field.
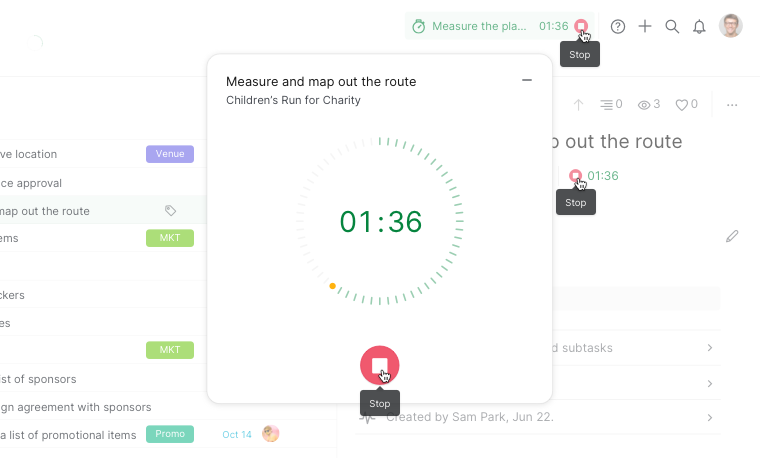
Stop the Timer
Click the red stop button from:
- The timer popup
- The upper-right corner
-
The task detail panel

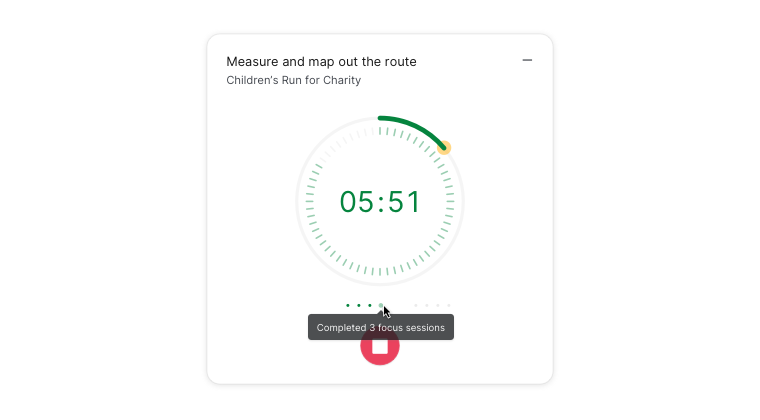
Pomodoro Timer
The Pomodoro timer helps you work in focused intervals:
- 25 minutes of work
- 5-minute short breaks
- Longer break after four sessions
This method improves focus and prevents burnout.
From the Workspace
- Click the + icon in the upper-right corner.
- Select Track time.
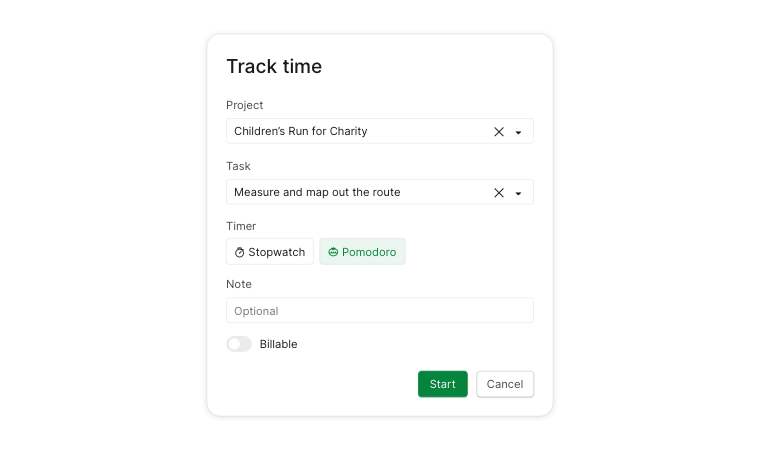
- Choose a task.
- Select Pomodoro.
- (Optional) Add notes or mark as Billable.
- Click Start.

Note: When you mark an entry as billable or add a note, a dollar sign or a note icon will appear next to the time entries and in the time reports for your reference. Hover over the icons to see more detailed information.
From a Task
- Press Space to open the task detail panel.
- Click Start Timer or press X on your keyboard.
- Click Start.
The timer will appear in the upper right corner for quick access when you close the timer’s popup window.

Note: If Start Timer is missing, enable it from + Add or edit field.
Sessions
- One dot appears after each 25-minute session
-
Four dots indicate it’s time for a long break

Stop the Timer
Click the red stop button from:
- The timer popup
- The upper-right corner
-
The task detail panel

Switch Between Timers
While a timer is running, click the timer clock icon to switch between Stopwatch and Pomodoro without stopping the timer.
The person tracking time appears next to the task name in the main panel.

Add Time Entries Manually
Manual entries are useful if you forgot to start a timer.
- Open the task detail panel.
- Expand the Time tracking section.
- Click Add new entry.
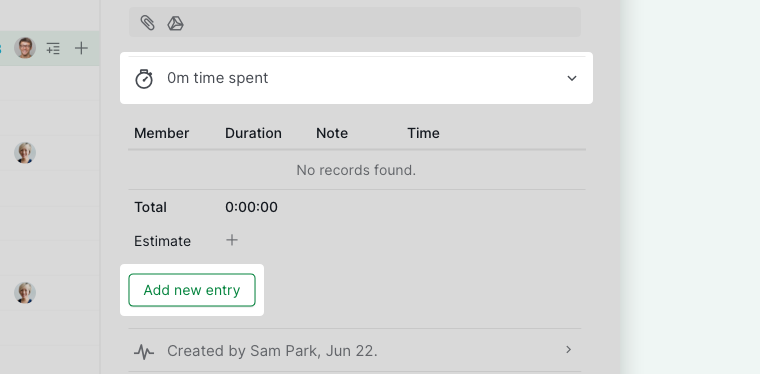
- Enter the time details.
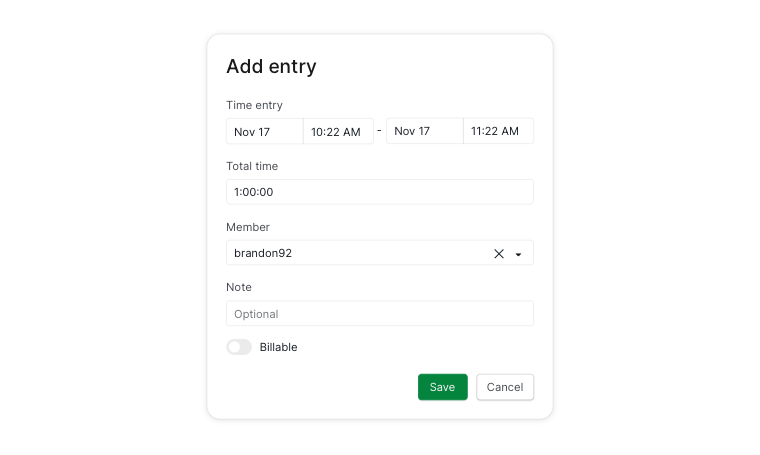

Tip: Use Tab and Shift + Tab to move between fields quickly.
View and Manage Time Entries
You can view time entries:
- Directly in the task’s Time tracking section
-
In Time Reports or Timesheets view
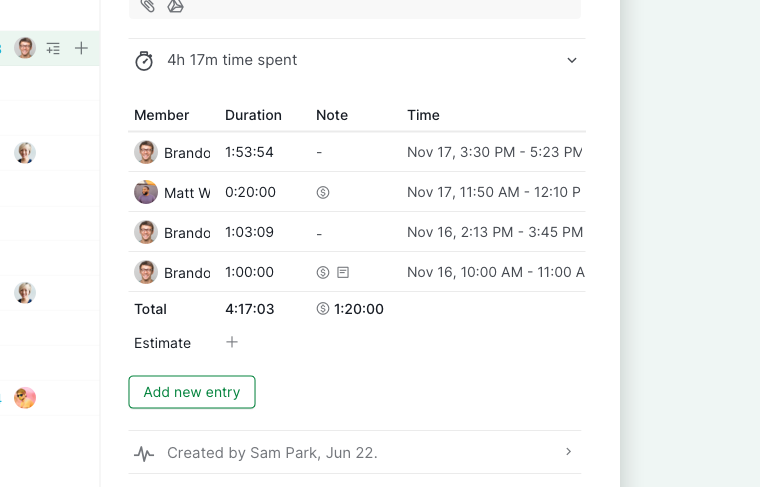

Tip: You can set it to not display the seconds when tracking time for your task. Navigate to the Project Settings > Date & time and unselect the option for Always display seconds when set time tracking.
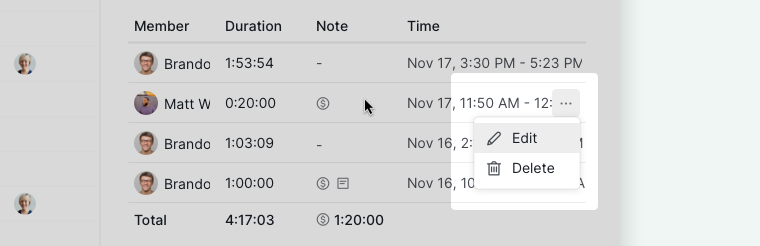
Edit or Delete
- Hover over a time entry.
- Click the More options icon.
-
Select Edit or Delete.

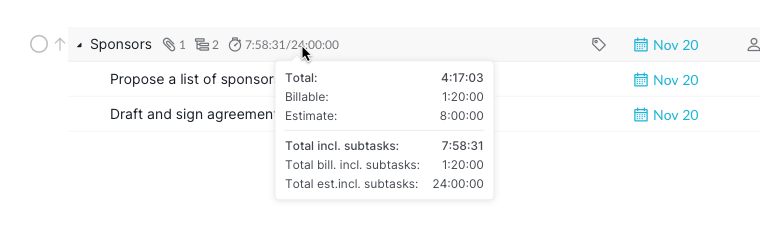
Advanced Mode
Advanced Mode shows:
- Total time spent (including subtasks)
- Billable indicators
-
Estimated time (if set)


Tip: Press I (or ⌥ on Mac) to toggle it on or off.
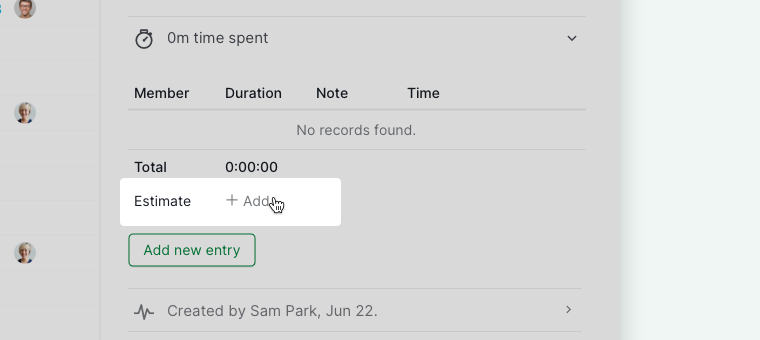
Add and Manage Estimated Time
- Open the task detail panel.
- Expand Time tracking.
- Click + Add under total time spent.

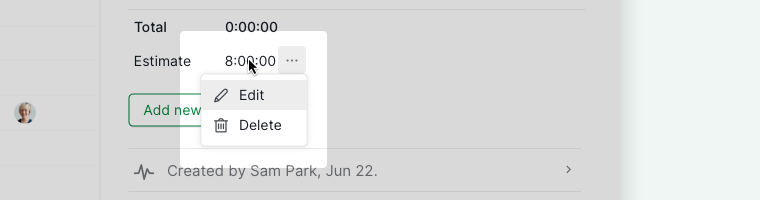
Edit or Remove
- Hover over the estimated time in the task’s time tracking section.
- Click the More Options icon.
- Select Edit or Delete from the menu.

Once added, the estimated time appears in:
- The time tracking section header
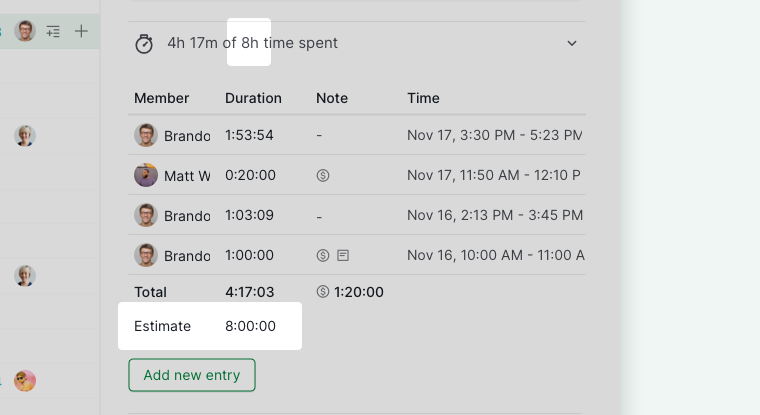
- Advanced Mode next to the task name


Tip: Press I (or ⌥ on Mac) to toggle the Advanced Mode on or off.
Frequently Asked Questions
What is task time tracking and why do teams use it?
Task time tracking records how long team members actually spend on individual pieces of work. This data helps managers spot workload imbalances before they become a problem, build more realistic estimates for future projects, and give stakeholders a clear picture of where effort is going. Teams that track time often find that certain tasks consistently take longer than estimated, which helps them plan more accurately over time. In Quire, time can be logged using a Stopwatch for continuous work, a Pomodoro timer for focused sessions, or by entering time manually. Project managers can review results in Time Reports and Timesheets.
What is the difference between the Stopwatch and Pomodoro timer in Quire?
The Stopwatch records continuous work time. Each start and stop creates a new time entry. The Pomodoro timer works in 25-minute focused sessions with 5-minute short breaks and a longer break after four sessions.
How do I track time on a task in Quire?
Click the + icon in the upper-right corner, select Track time, choose a task, pick Stopwatch or Pomodoro, and click Start. You can also open the task detail panel and click Start Timer or press X.
How do I stop a timer in Quire?
Click the red stop button from the timer popup, the upper-right corner widget, or the task detail panel.
How do I manually add a time entry in Quire?
Open the task detail panel, expand the Time tracking section, and click Add new entry. Use Tab and Shift+Tab to move between fields quickly.
How do I edit or delete a time entry in Quire?
In the task’s Time tracking section, hover over the entry, click the More options icon, and select Edit or Delete.
How do I mark a time entry as billable in Quire?
When starting a timer or adding a manual entry, check the Billable option in the dialog. A dollar sign icon will appear next to the entry and in Time Reports for reference.
How do I add an estimated time to a task in Quire?
Open the task detail panel, expand Time tracking, and click + Add under total time spent. Once set, the estimate appears in the time tracking header and in Advanced mode next to the task name.
Where can I see total time spent including subtasks in Quire?
Toggle on Advanced mode (press I, or ⌥ on Mac) to see total time spent including subtasks, billable indicators, and estimated time alongside each task.