Break Down a Task in the Mobile App Permalink
You can manage assignees, due dates, tags, status, time tracking, dependencies, custom fields, and attachments in the task detail panel.
Check out our Youtube channel for mobile tutorial videos!
See Quire on Mobile and Integrations for related guides.
Set Assignees
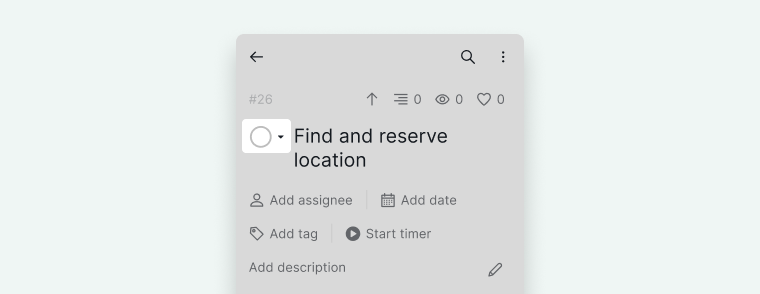
- Open the task detail panel.
- Tap Add assignee.
- Select a project member, or enter an email address to invite a new member and assign the task.
The newly invited user will be added as a Normal project member by default. You can later change their permission role in the Project Members settings.

Remove or Change Assignee
- Select the assignee.
- Tap the X icon.
Note: When the task already has an assignee, selecting another member will replace the existing one. If you would like to assign this task to multiple assignees, tap on the blank area first, then add other assignees to this task.
Tip: In the project settings, you can toggle on Multiple assignees. This way, as default, when you tap on a member’s name, he will be set as the task assignee.
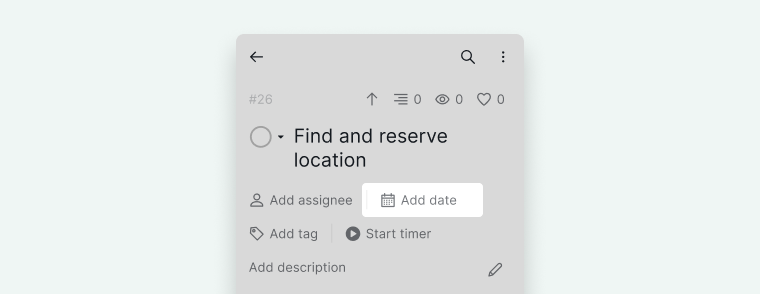
Set Due Date and Time
- Open the task detail panel.
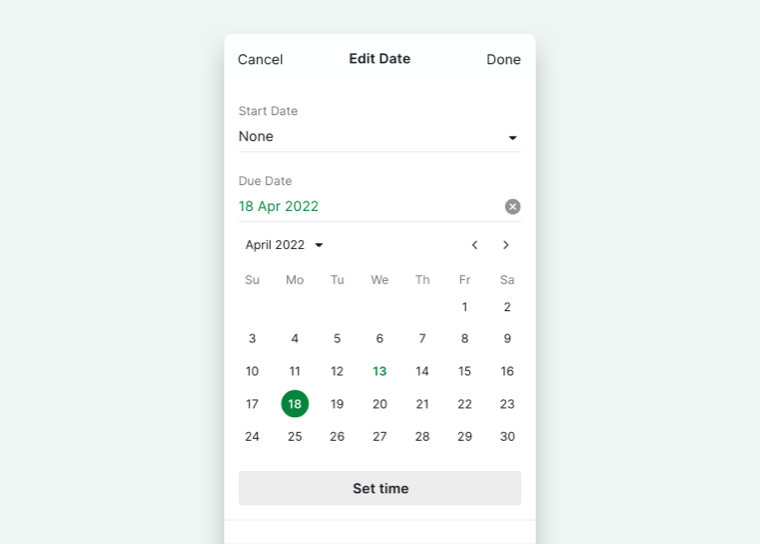
- Tap Add Date.
-
Select the start date and due date.


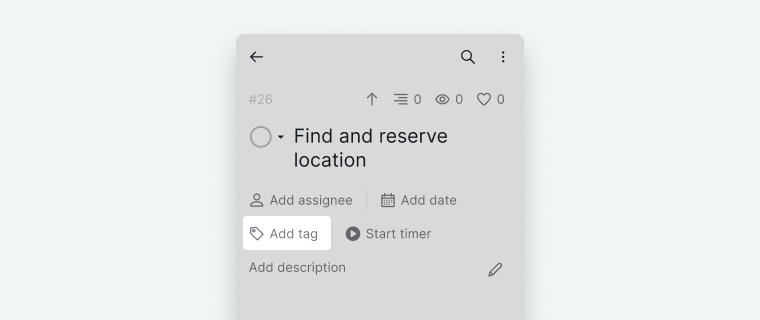
Set Tags
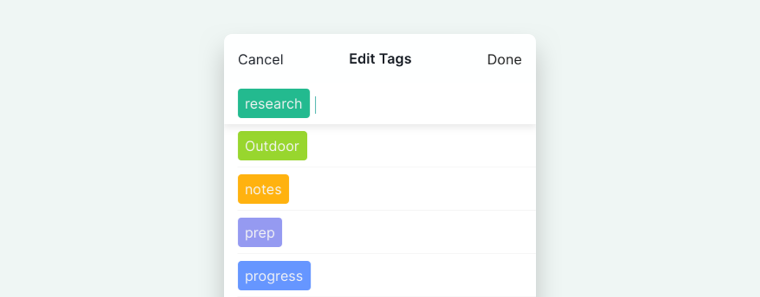
- Tap Add tag in the detail panel.
-
Select the desired tags.


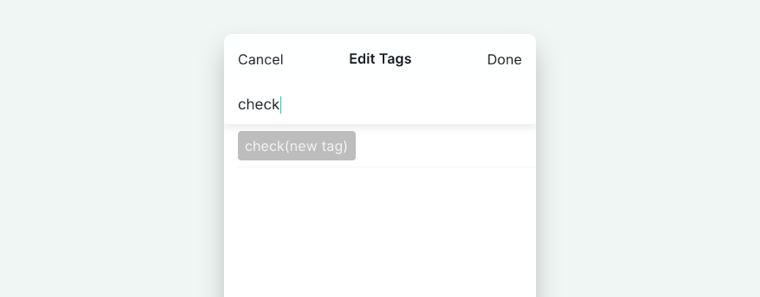
Create a New Tag
- Tap Add tag.
- Enter the tag name.
-
Select it from the dropdown list.

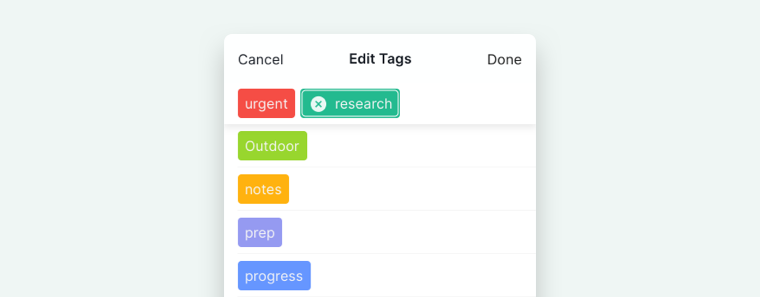
Remove a Tag
- Open Add tag.
- Select the tag.
-
Tap the X to remove it.

Set Task Status
You can update task status in two ways:
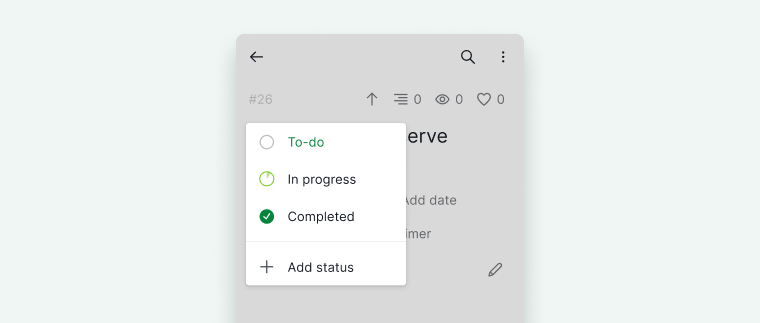
From the Task Detail Panel
- Tap the status circle icon.
-
Select the desired status.


From List View
- Swipe right on the task.
- Tap the status icon.
-
Choose the status.

Discover more useful gestures for the Quire mobile app.
Create a New Status
- Tap the status circle icon.
- Select + Add status.
-
Create and save the new status.


Track Time
Time Tracking is only available in the Professional, Premium, Enterprise plans. More information can be found on our pricing page.
Start Time Tracking
- Tap Start timer in the detail panel.
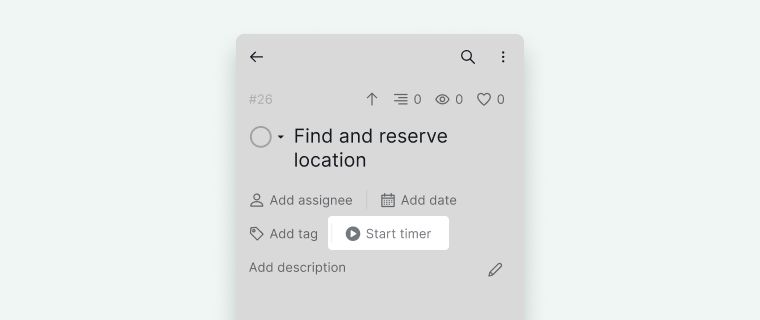
- Choose between:
- Stopwatch (continuous tracking)
- Pomodoro (25-minute sessions)
- Optionally add notes.
- Mark time as billable if needed.
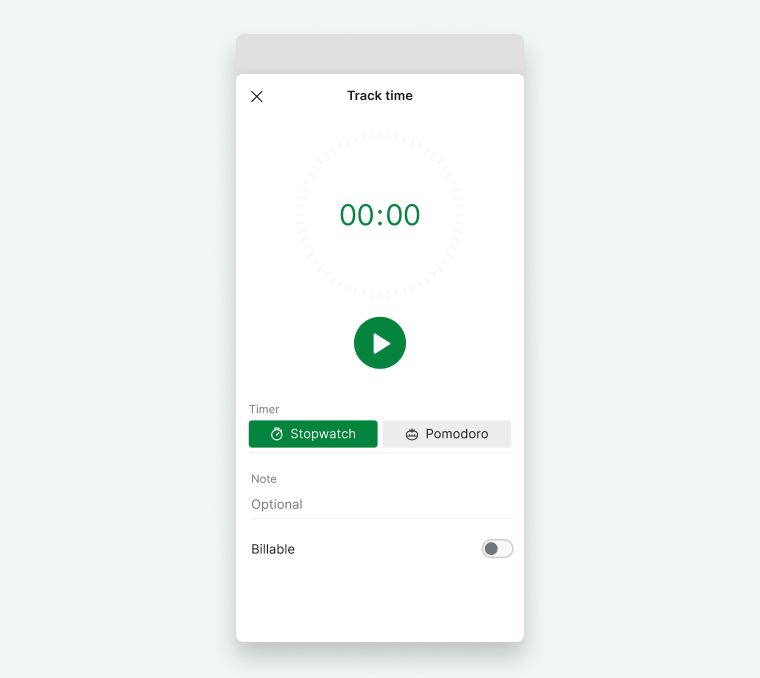
- Start the timer.


Tip: If you wish to hide the timer option from your detail panel, you can click the +Add or edit field button and disable the timer option.
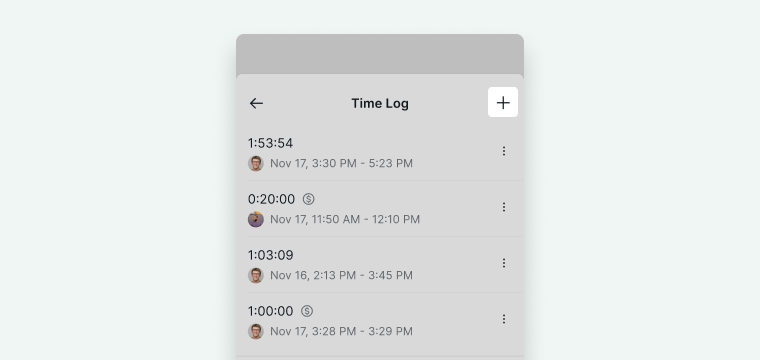
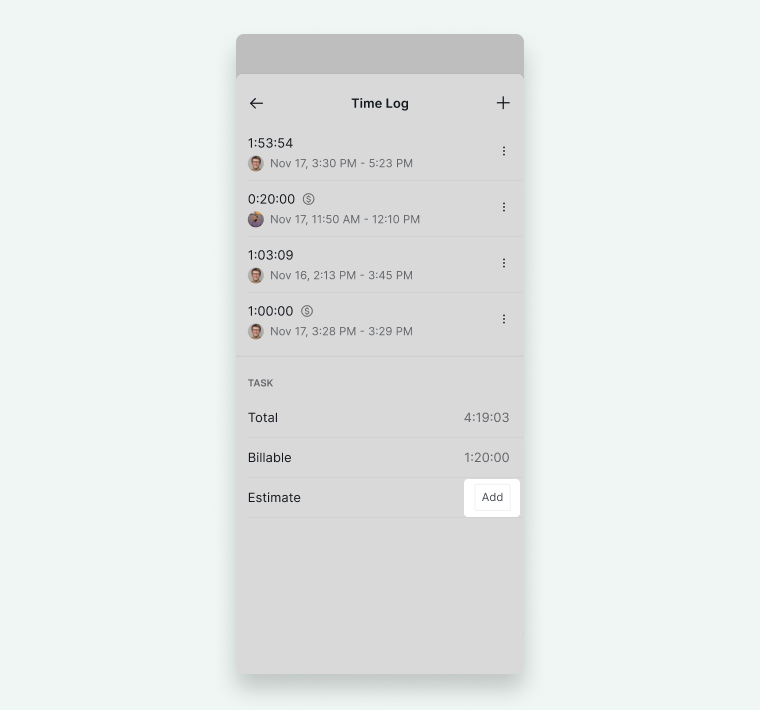
View and Manage Time Entries
To view time log, tap the Time Tracking section in the detail panel.

To add a manual entry:
- Tap the + icon.
-
Enter the time details.

Add Estimated Time
- Open the Time Tracking section.
- Tap Add.
-
Enter the estimated time.

Display Task Dependencies
Task dependency is only available in Professional, Premium, Enterprise plan. More information can be found at our pricing page.
- Open the task detail panel.
- Tap the Dependency button.
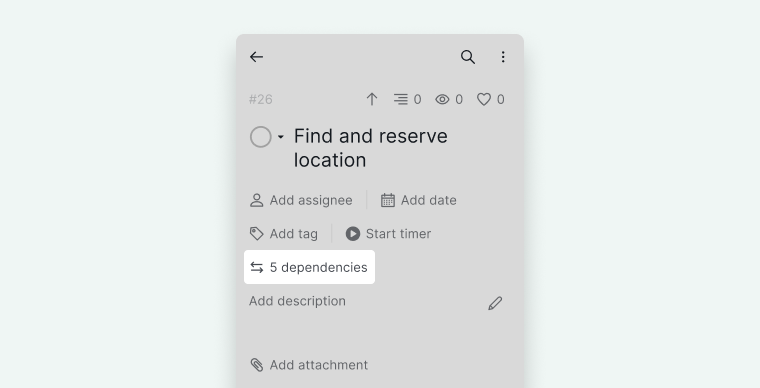
- View predecessor or successor tasks.
- Tap a task to navigate to it.
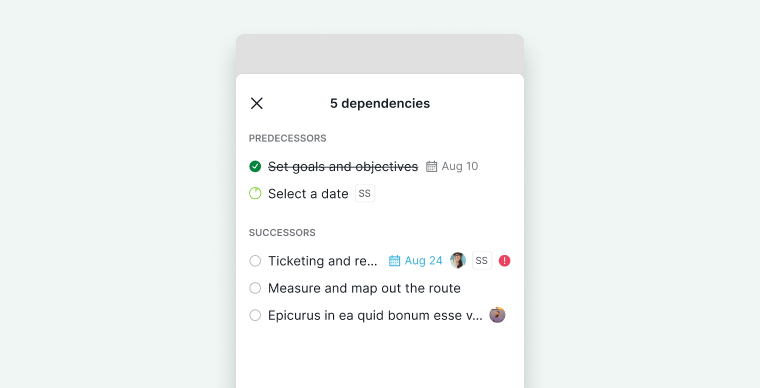


Note: Setting dependencies is currently available in the web version only.
Tip: If you wish to hide the task dependency option from your detail panel, you can click the +Add or edit field button and disable the dependency option.
Create Custom Fields
- Tap + Add or edit field.

- Select Add a new field.
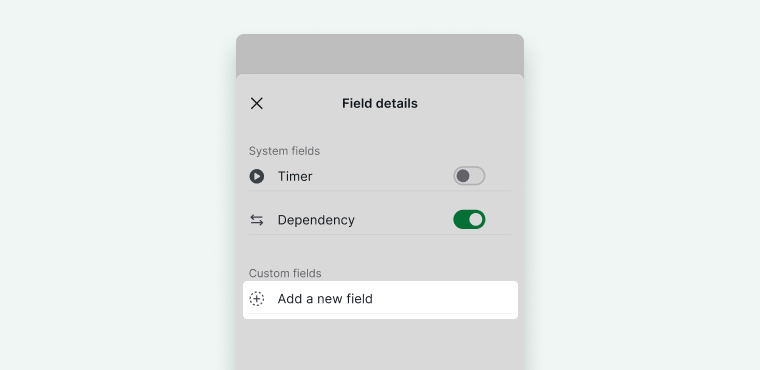
- Enter the field name.
- Choose the field type.


Available field types include: Text, Number, Currency, Date, Duration, Selection, Checkbox, User, Attachment, Email, Task, URL, and Formula.
Custom fields will appear in:
- Task detail panel
- Board view cards
- Table view
Tip: To hide a specific custom field from your detail panel, click the +Add or edit field button and disable the field.
Add Attachments
- Open the task detail panel.
- Tap Add attachment.
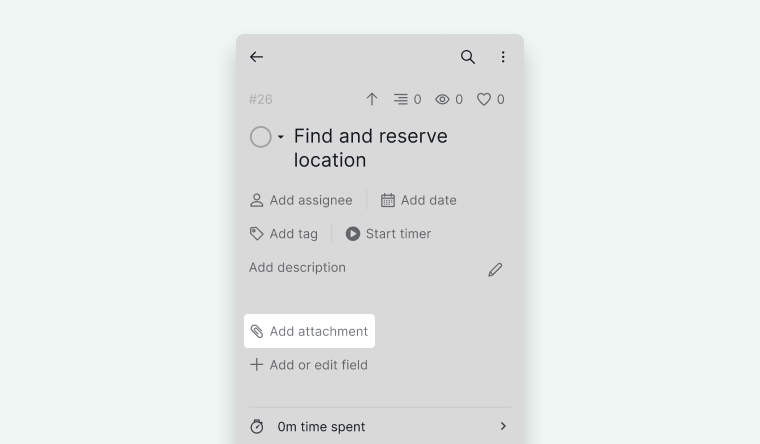
- Select the file location.
- Follow the prompts to upload.

Manage Tasks Offline
Quire works 100% offline on mobile. You can create tasks, edit task details, and add comments without an internet connection for projects previously opened while online. All changes sync automatically once your connection is restored.
Frequently Asked Questions
How do I assign a task to multiple people in the Quire mobile app?
Open the task detail panel and tap Add assignee. When a task already has one assignee, tapping another member replaces the existing one. To add multiple assignees, tap the blank area first, then add each person individually.
How do I change a task status in the Quire mobile app?
Open the task detail panel and tap the status circle icon. You can also swipe right on the task in list view to reveal the status icon, then tap it to change status.
How do I track time on a task in the Quire mobile app?
Open the task detail panel, tap Start timer, and choose Stopwatch or Pomodoro. Time tracking is available on Professional, Premium, and Enterprise plans.
Can I set task dependencies in the Quire mobile app?
You can view dependencies in the task detail panel, but setting them is only available in the web version.
How do I add a custom field to a task in the Quire mobile app?
Tap + Add or edit field, select Add a new field, enter the field name, and choose a field type. Available types include Text, Number, Currency, Date, Selection, Checkbox, User, and more.
How do I add or remove a tag on a task in the Quire mobile app?
Tap Add tag in the detail panel and select the desired tags. To remove a tag, open Add tag, select the tag, and tap X.
How do I attach a file to a task in the Quire mobile app?
Open the task detail panel, tap Add attachment, select the file location, and follow the prompts to upload.
Can I manage tasks offline in the Quire mobile app?
Yes. You can create tasks, edit task details, and add comments offline for projects previously opened while online. Changes sync automatically once you’re back online.