Create and Manage Sublists in Quire Permalink
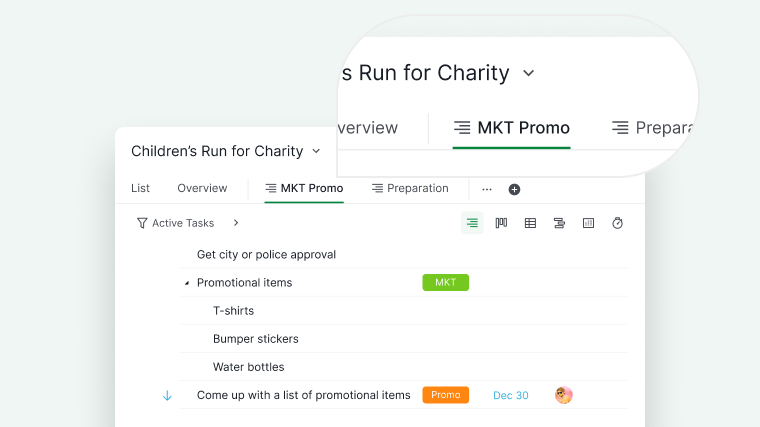
A sublist is a personalized or filtered view of the same project. It helps team members focus on their tasks without getting lost in a large project list.
- Sublist can help create a focused view for project members or External Team members sharing the workload.
-
Changes in a sublist mirror the main List. Reordering tasks in a sublist updates the main List automatically.

Read more on our blog about Quire sublist.
Create a Sublist
In the Free subscription plan, you can create two sublists for each project. Upgrade your subscription plan to create more sublists. More information can be found on our pricing page.
You can create sublists in multiple areas: Projects, Organizations, Folders, Smart Folders, My Tasks, or a member’s profile.
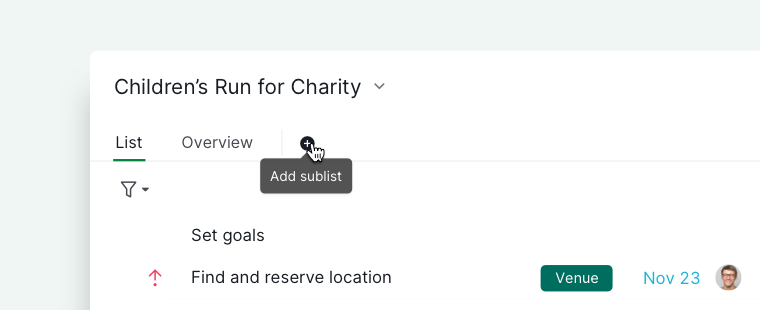
- Click the + icon next to the List tab.
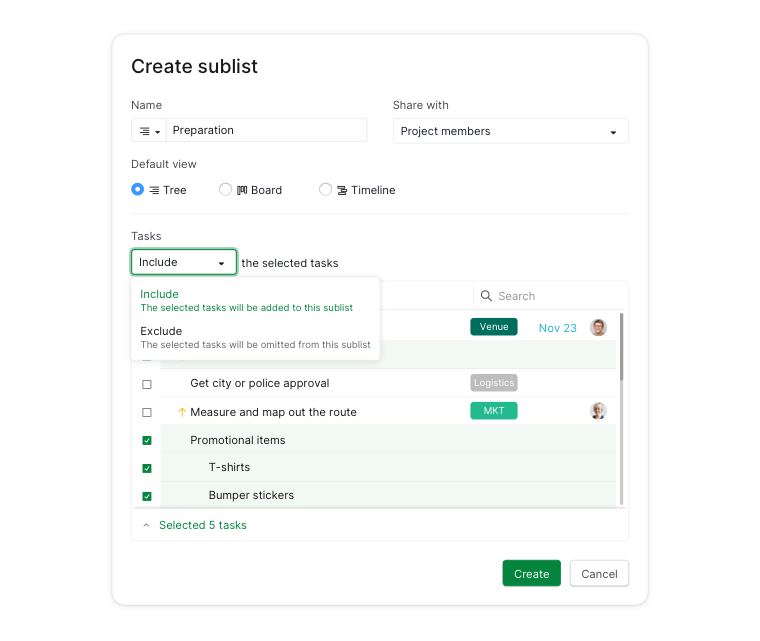
- Enter a name for your sublist.
- Select a customized icon.
- Choose who can access the sublist:
- All project members
- Project admins
- Selected members
- External team
- Private (only you)

Tip: You can press L to create a new sublist without using your mouse.
Add Tasks to a Sublist
Manual
- Include or exclude tasks from the main List when creating a new sublist.
- Or drag tasks from the main List to the sublist. The task will be removed from the former and added to the latter.
- Hold Alt to copy tasks to multiple sublists, the tasks will be added to both sublists.
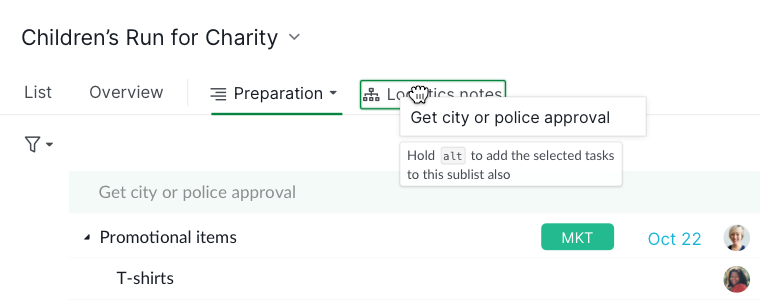
- Hold Alt to copy tasks to multiple sublists, the tasks will be added to both sublists.
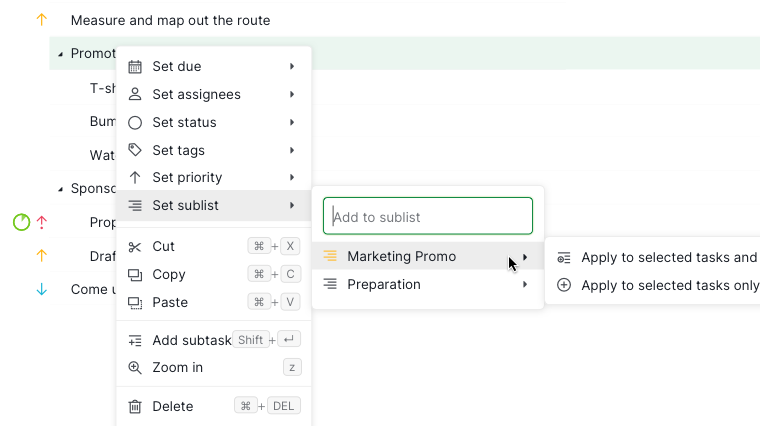
- Or right-click tasks and select Set sublist.
- Or use keyboard shortcut ^ and the arrow keys to select sublist.


Note:
- If you select a root task, the relevant subtasks will also be automatically selected. You can deselect the subtask to choose the tasks you need only. On the other hand, subtasks can be selected separately from their root task.
- When you drag and drop a parent task, its subtasks will also be added to the sublist tab.
Automatic (Filter-Based)
This filter automatically adds newly created tasks that meet the specified criteria to the designated sublist.
- Choose Filter tasks with pre-set conditions when creating a sublist.
- Define filter criteria via dropdown menus.
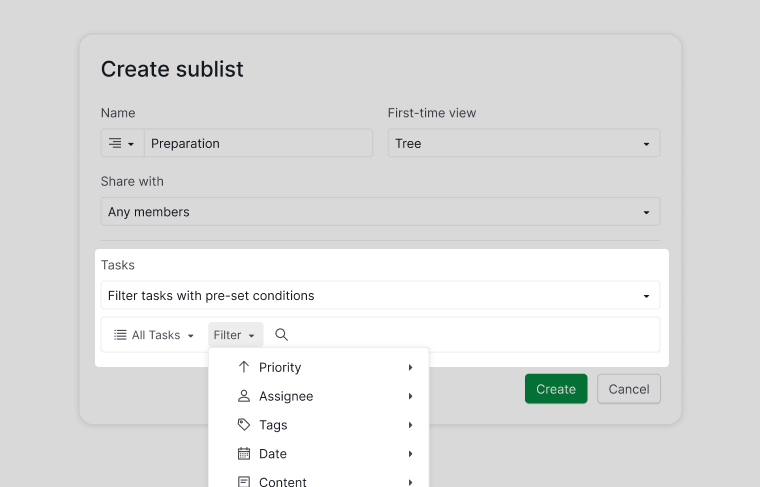
- Click Create to automatically add tasks meeting criteria.

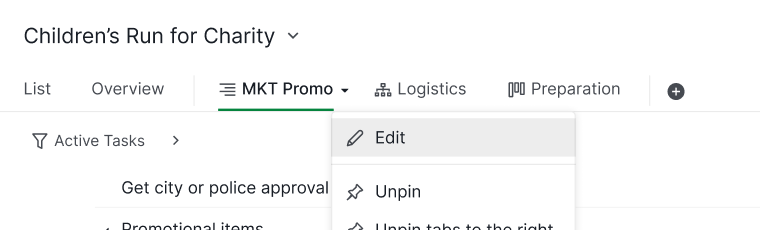
If you want to adjust filter criteria, right-click the sublist and select Edit tasks.

Remove Tasks From a Sublist
- Right-click the sublist name and select tasks in Edit task list menu.
- Or drag them back to the main List tab.
- Right-click tasks and then select Set sublist to remove them.
Note: Removing a parent task also removes subtasks.
Edit Sublist Name and URL
- Right-click the sublist name and select Edit details to edit a sublist URL.
- Then copy the URL to share with team members.
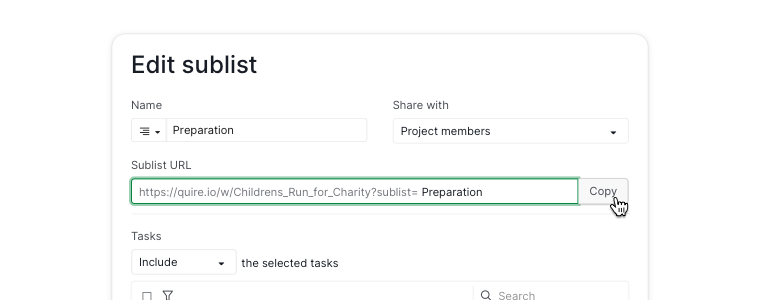
- Or use references in descriptions, comments, or documents:
- Same project:
#=sublist_id - Different project:
#{project_id=sublist_id}
- Same project:


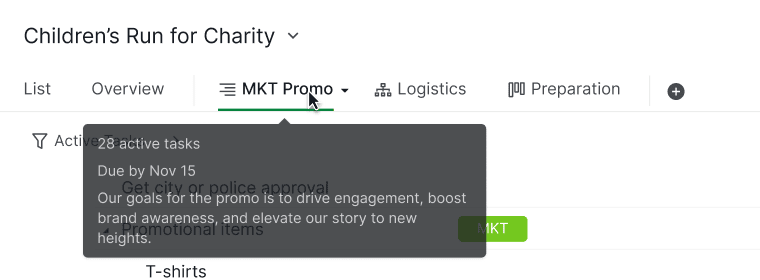
Add Details to a Sublist
- Right-click the sublist name and select Edit details.
- Add start date, due date, and description.
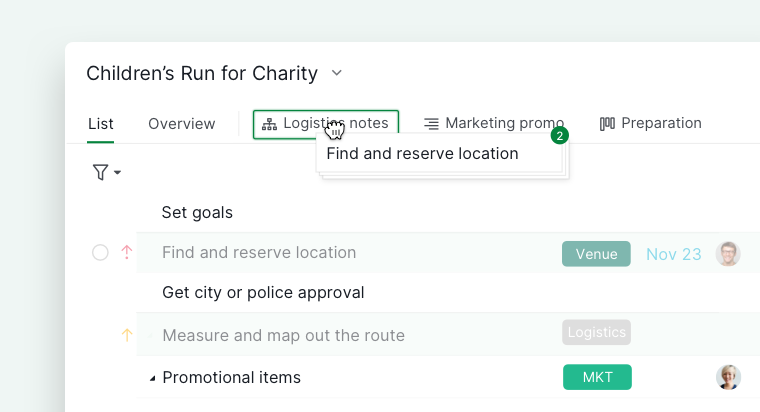
- Hover over the sublist tab to see details and remaining active tasks.

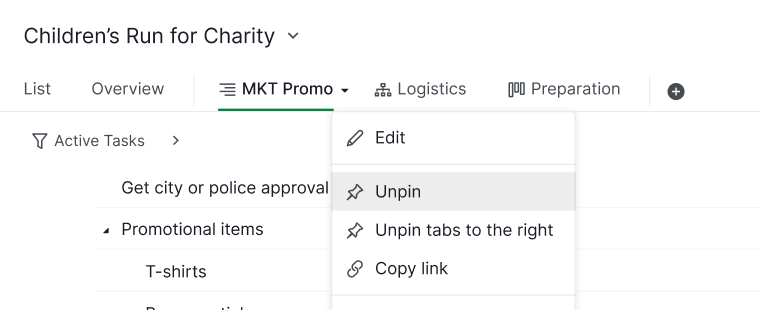
Pin or Unpin a Sublist
Click the dropdown menu icon next to the sublist.
- Newly created sublists are pinned by default.
-
Sublists created by others are unpinned by default.

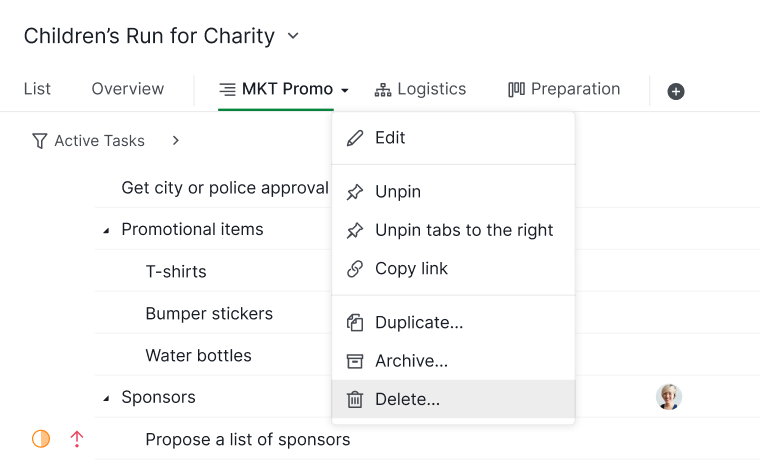
Manage a Sublist
Duplicate
- Click dropdown menu icon and select Duplicate.
- Change name, color, or icon if needed.
-
Save.


Archive
- Click dropdown menu icon and select Archive.
-
Archived sublists move to the Archived category.


Delete
- Click dropdown menu icon and select Delete.
- Deleted sublists are temporarily recoverable via More Options.
-
Tasks within the sublist remain in the main List tab.

Note: Review carefully before deletion; sublists are permanently removed after the limited recovery period.
Read more on our blog about Quire sublists in practice.
Frequently Asked Questions
What is a sublist in Quire?
A sublist is a personalized or filtered view of a project. It lets team members focus on their own tasks without seeing the entire project list, and changes in a sublist are reflected in the main List automatically.
What sharing options can I set when creating a sublist in Quire?
Choose from: All members, Admins only, Selected members, a specific External team, or Private. The Free plan allows up to 2 sublists per project.
How do I automatically add tasks to a sublist based on filter conditions?
Choose Filter tasks with pre-set conditions when creating a sublist and define your criteria. New tasks that meet the criteria are added automatically. To adjust filters later, right-click the sublist and select Edit tasks.
Can I add the same task to multiple sublists in Quire?
Yes. Hold Alt while dragging a task to copy it to multiple sublists simultaneously. Without Alt, the task moves out of its current sublist.
Does removing a task from a sublist delete it from the project?
No. Removing a task from a sublist only removes it from that view. The task remains in the main List tab.
How do I share a sublist URL with teammates?
Right-click the sublist name, select Edit details, then copy the URL. You can also reference a sublist using #=sublist_id (same project) or #{project_id=sublist_id} (different project) in descriptions, comments, or documents.
What happens to tasks when I delete a sublist in Quire?
Tasks remain in the main List tab. The sublist is temporarily recoverable via More Options before being permanently removed after the recovery period.