Add and Manage Tags in Quire Permalink
Setting tags helps you categorize tasks more effectively and organize long lists with filters. You can later use the filter bar to quickly narrow down tasks by tag.
Managing Tags
You can add, edit, or delete tags in both the main panel and the detail panel.
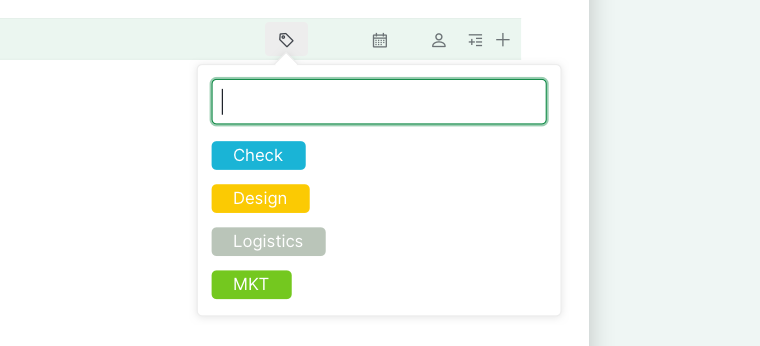
How do I add a new tag to a task?
- Click the tag icon on the task.
- Type your new tag name.
- Press Enter to save.

How do I add an existing tag to a task?
- Click the tag icon and select an existing tag.
- Or press # while the task is selected, then pick a tag with the arrow keys.

Tip: You can drag and drop tags after assigning them to a task to reorder them.
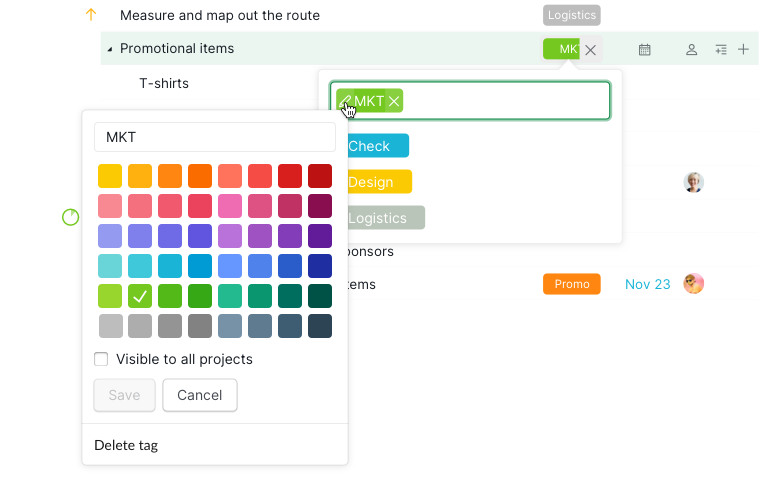
How do I edit or delete existing tags?
- Click on the tag.
- Select the Edit (pen) icon.
- Choose to:
- Change tag color
- Rename the tag
- Delete the tag

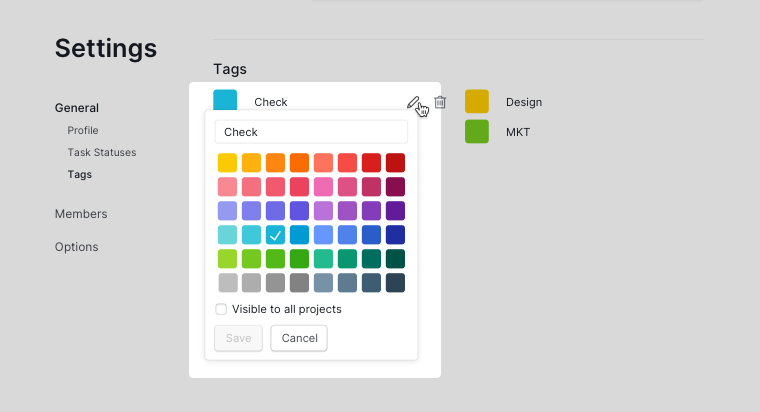
You can also manage all tags for a project from Project Settings → Edit tags.

Global Tags
Global tags can be used across multiple projects in the same organization.
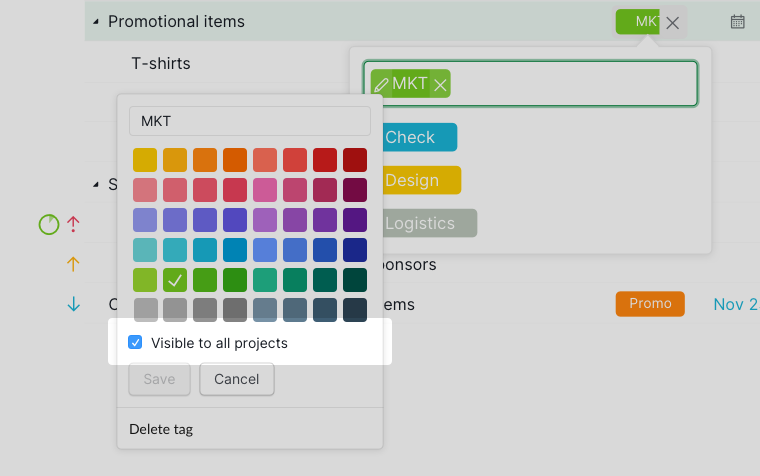
How do I turn a tag into a global tag?
- Click the tag.
- Click the Edit (pen) icon.
- Check Visible to all projects.

You can manage all global tags from Project Settings → Edit tags.

Note:
- If you uncheck Visible to all projects, the tag will be removed from other projects in your organization.
- Global tags will not appear in personal tasks in My Tasks.
Please contact us if you need more assistance.
