Manage Organization Members in Quire Permalink
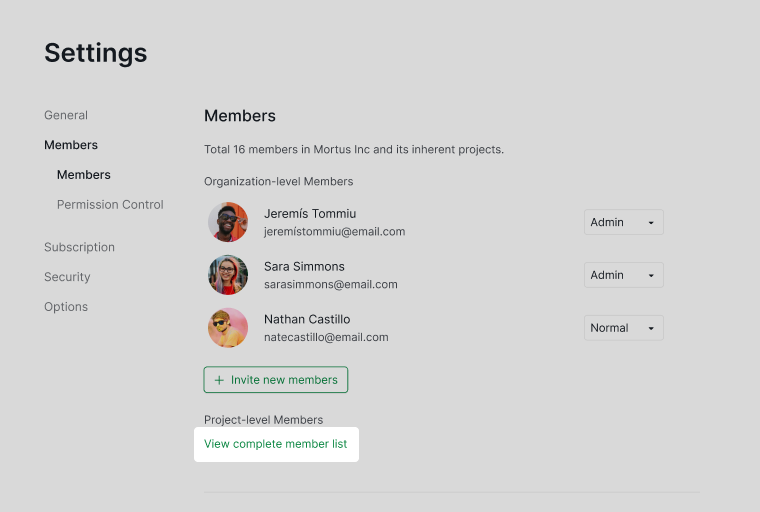
Organization members are Quire users invited to join a particular organization. Only organization admins can manage members, including adding/removing members or adjusting their permissions.
You can also view the total number of members across the organization and its projects at the top of the Members page.
Note: For the complete member list, visit the complete member list.
Learn more about Quire’s member levels.
Add and Invite Organization Members
How do I add new members to an organization?
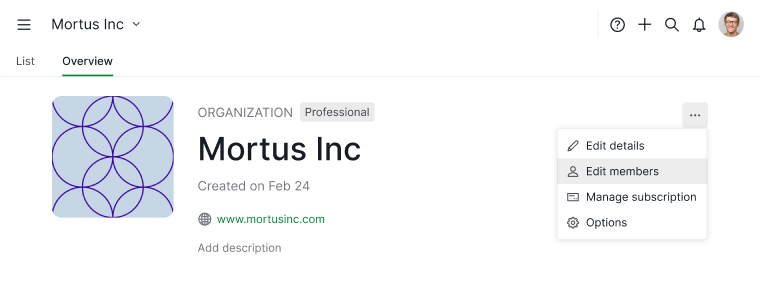
- Navigate to the Organization Overview page.
- Click the More Options icon in the upper-right corner, then select Edit members.
- Or:
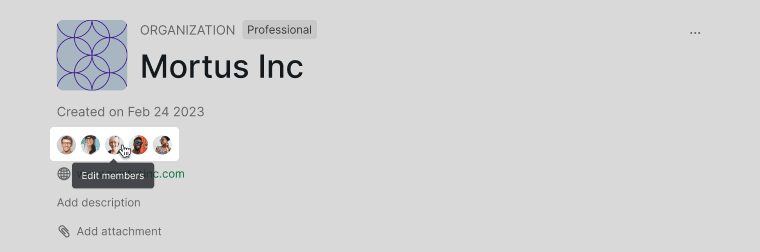
- Click the member profile pictures in the Overview tab.
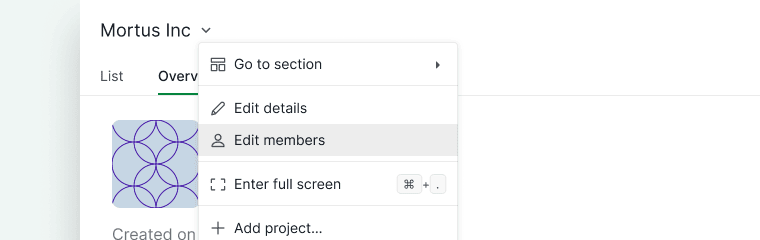
- Or click the dropdown menu icon next to your organization name and select Edit members.
- Click the member profile pictures in the Overview tab.
- Click + Invite new members.
- Enter the email addresses or usernames of the members you want to invite.
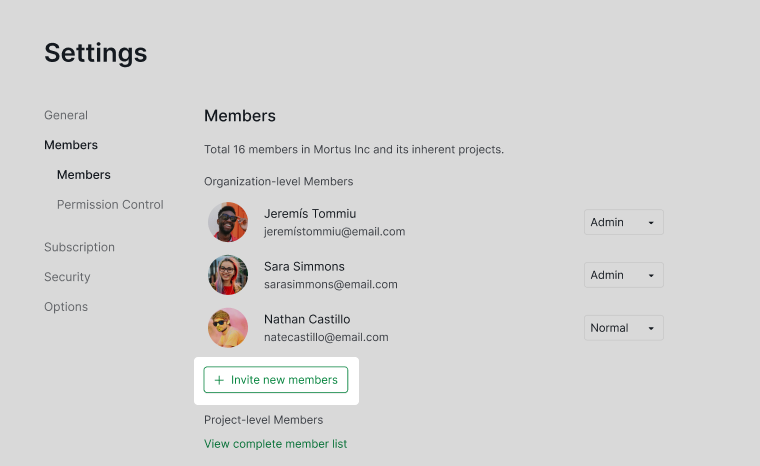
Note: Previously added members in the same project/organization will appear in the autocomplete dropdown.
Change Member Permissions
How do I change a member’s permission role?
- Click the dropdown menu icon next to your organization name and select Edit members.
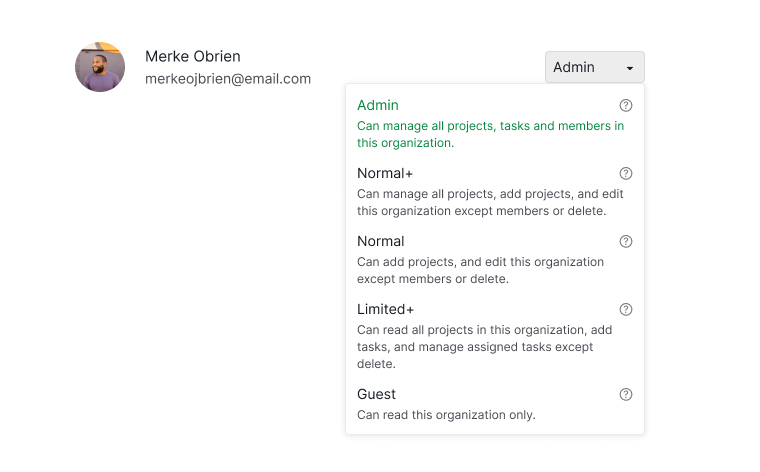
- In the Members tab, click on the member’s role you want to change.
- Click the ? icon to see full descriptions of each role.
Note: For Professional or higher plans, admins can customize default roles.
Customize Member Permissions
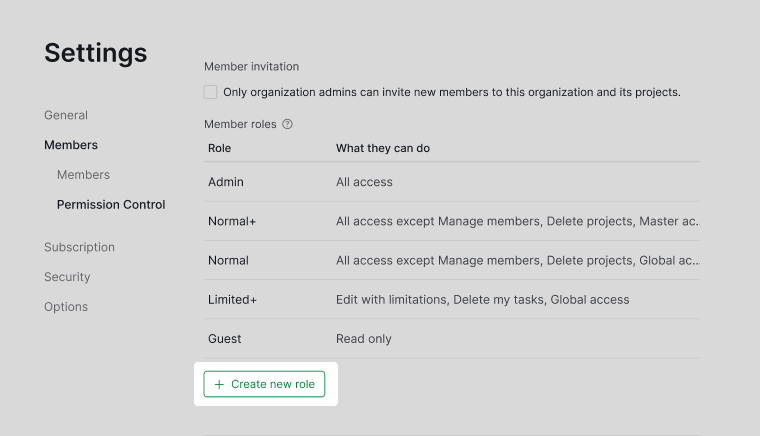
How do I control who can invite members?
- Click the dropdown menu icon next to your organization name and select Edit members.
- In Permission Control section, toggle the Member Invites option.
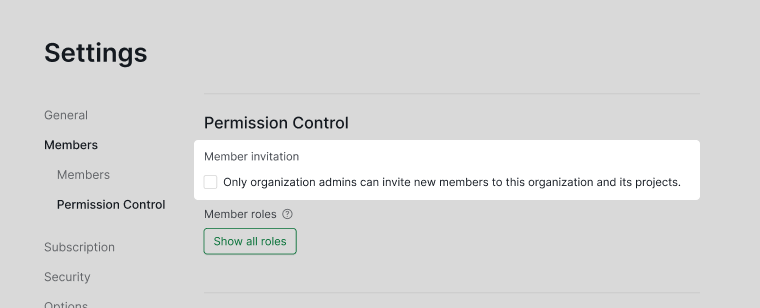
- Only organization admins can invite new members if this is enabled.
Project admins must ensure members exist at the organization level before inviting them to projects.
How do I customize permission roles?
Customizing the permission roles is only available in the Professional, Premium, Enterprise plans. More information can be found on our pricing page.
- Click the dropdown menu icon next to your organization name and select Edit members.
- In Permission Control section, under Member roles, click the edit (pen) icon next to a role (Admin role cannot be edited).
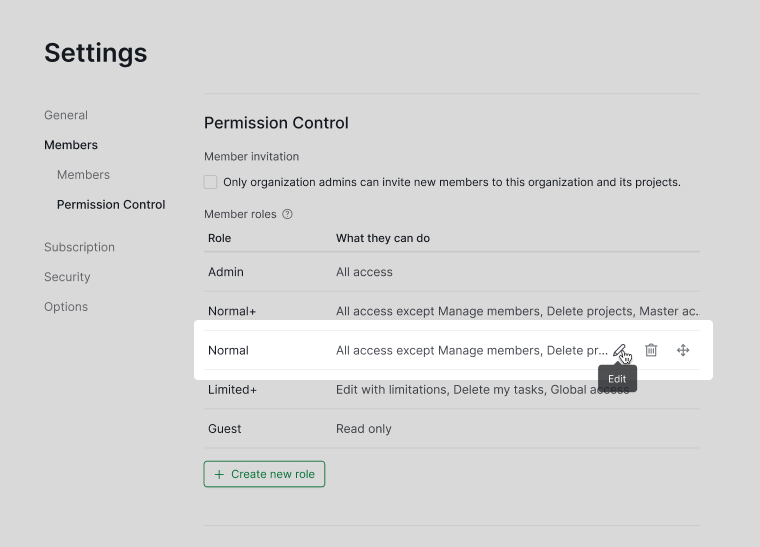
- Adjust permissions in the dialog.
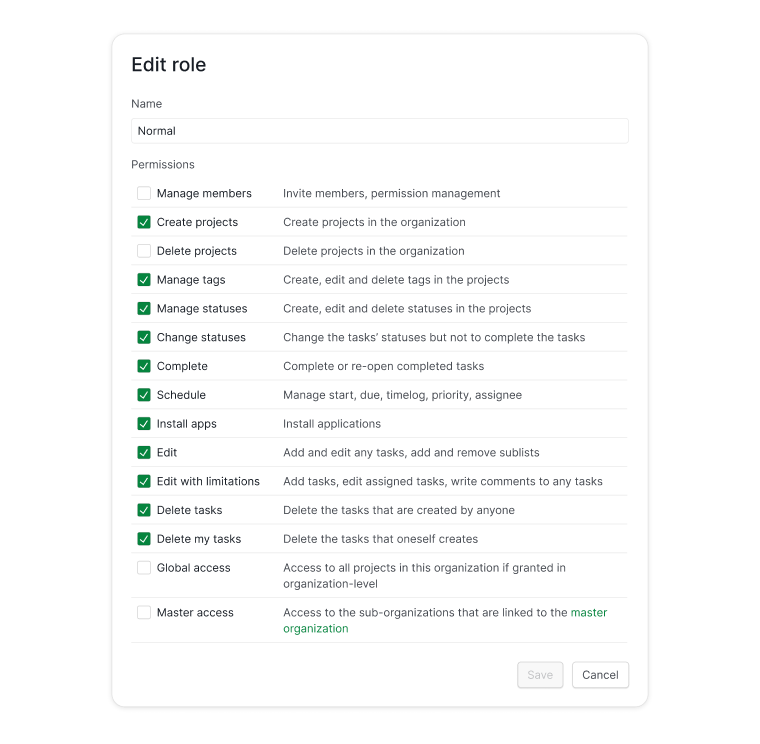
- To reset a customized role to default, click Reset to default.
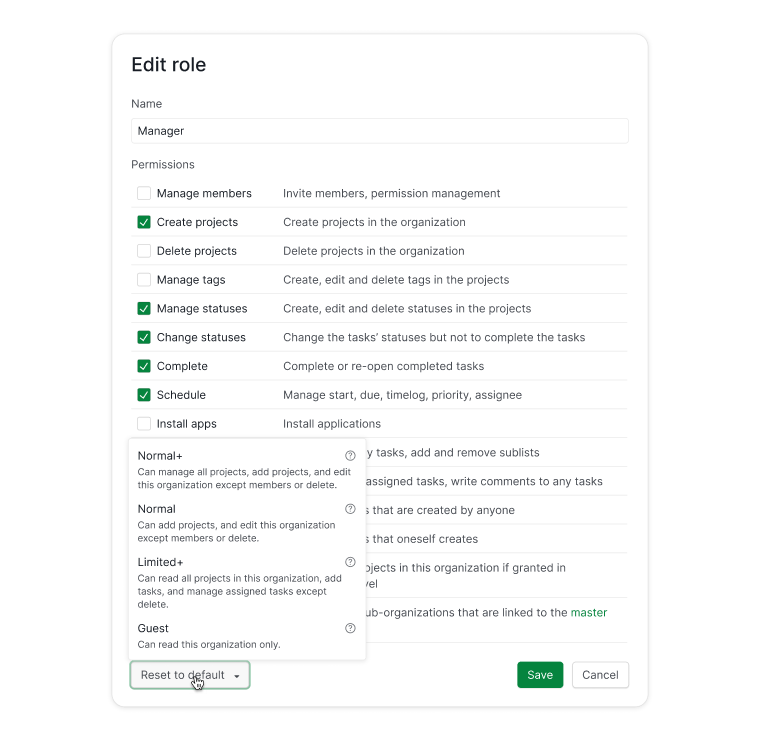
See all the Quire default permission roles.
How do I create new permission roles?
Creating and deleting the permission roles are only available in the Premium and Enterprise subscription plans. More information can be found on our pricing page.
- Click the dropdown menu icon next to your organization name and select Edit members.
-
In Permission Control section, under Member roles, click + Create new role.
- Adjust permissions in the dialog.
How do I delete a permission role?
- Click the dropdown menu icon next to your organization name and select Edit members.
- In Permission Control section, under Member roles, click the trash icon.
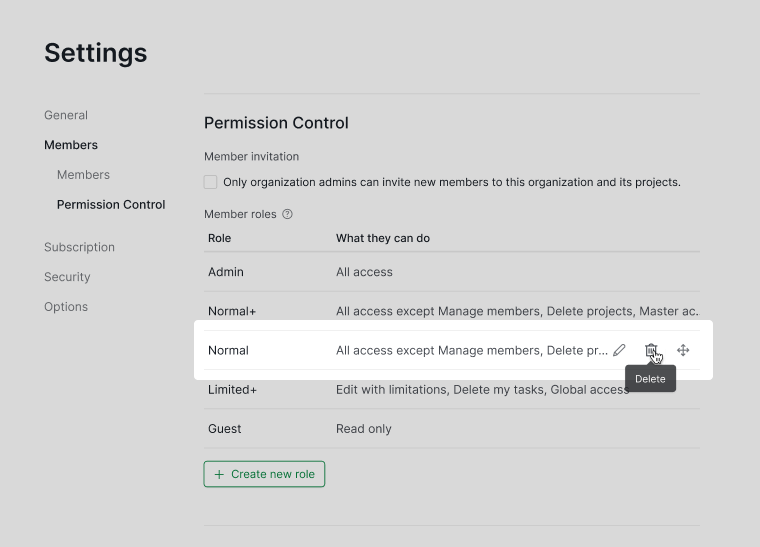
Note: You cannot delete a permission role that is currently assigned to any members. Once a role is deleted, it cannot be restored.
Remove Organization Members
How do I remove a member from the organization?
- Click the dropdown menu icon next to your organization name and select Edit members.
- In the Members tab, hover over the member.
- Click the trash bin icon to remove them from the organization.

Note: The member will still retain access to projects they were invited to individually.
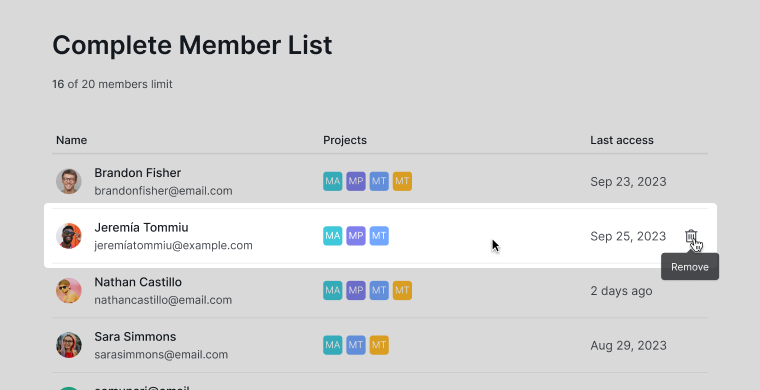
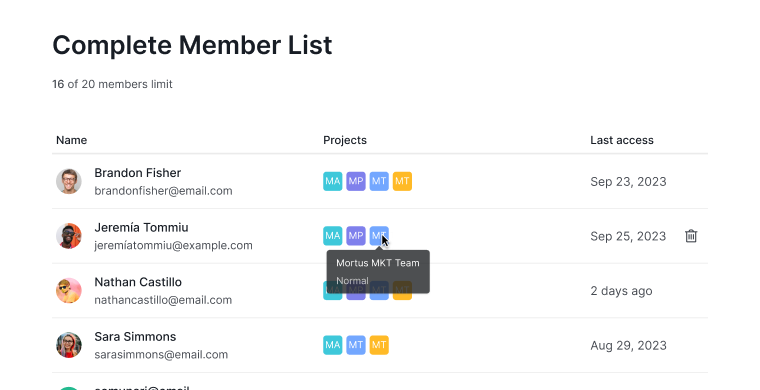
Complete Member List
How do I view the complete member list?
- Click the dropdown menu icon next to your organization name and select Edit members.
- In the Members tab, below + Invite new members, click Complete member list.
- This shows all members invited to the organization and all its projects.
Note: Only organization admins can access the complete member list.
Tip: Hover over a project icon to see the member’s role in that project.
How do I remove a member from all projects in the organization?
- Hover over the member in the Complete Member List.
- Click the trash bin icon to remove them from all projects in the organization.