Custom Fields in Quire Permalink
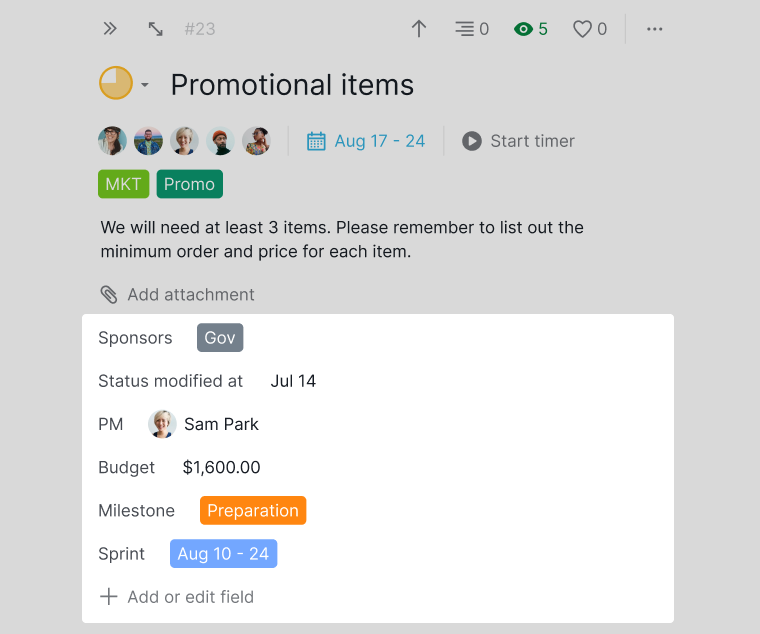
Custom fields let you add structured, project-specific information to tasks, beyond the default fields like assignees, due dates, tags, and descriptions. They are especially useful for tracking things like budgets, progress, or custom statuses across tasks.
In the Free subscription plan, you can create one custom field per project. Upgrade your subscription plan to add more custom fields. More information can be found on our pricing page.
Add Custom Fields
From the Detail Panel
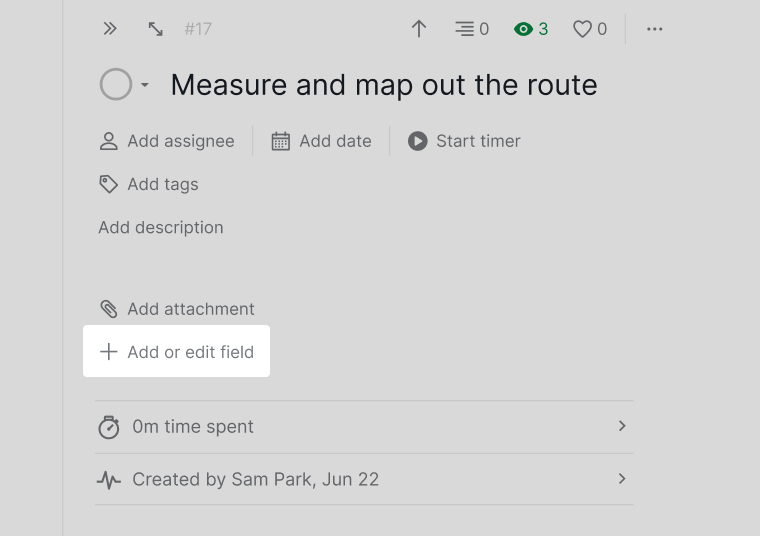
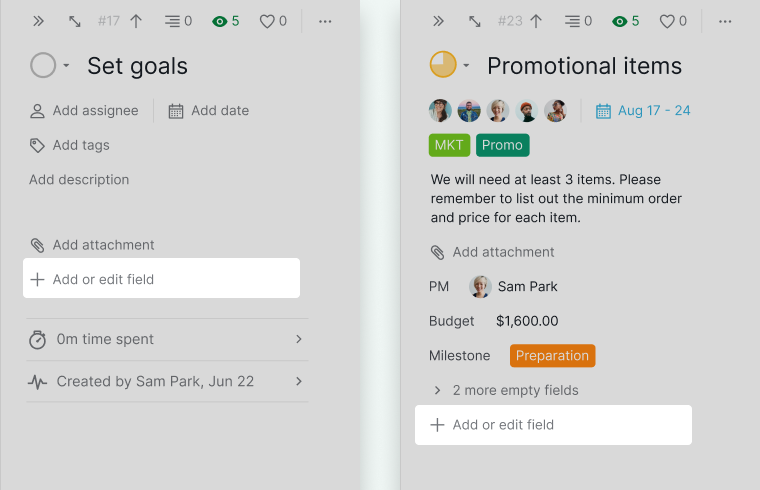
- Open a task to display the detail panel.
- Click + Add or edit field.
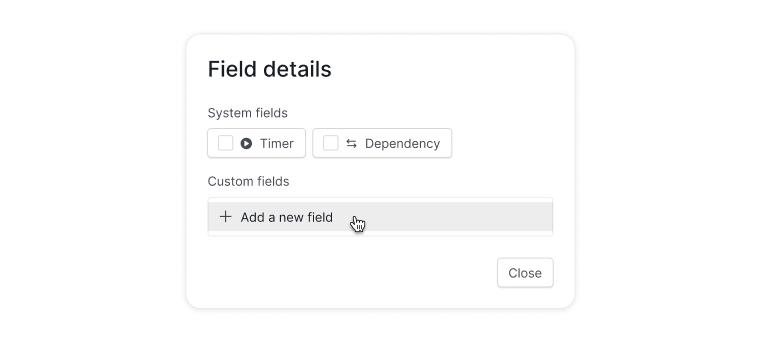
- Select + Add a new field.
- Enter the field name, choose a field type, and save.
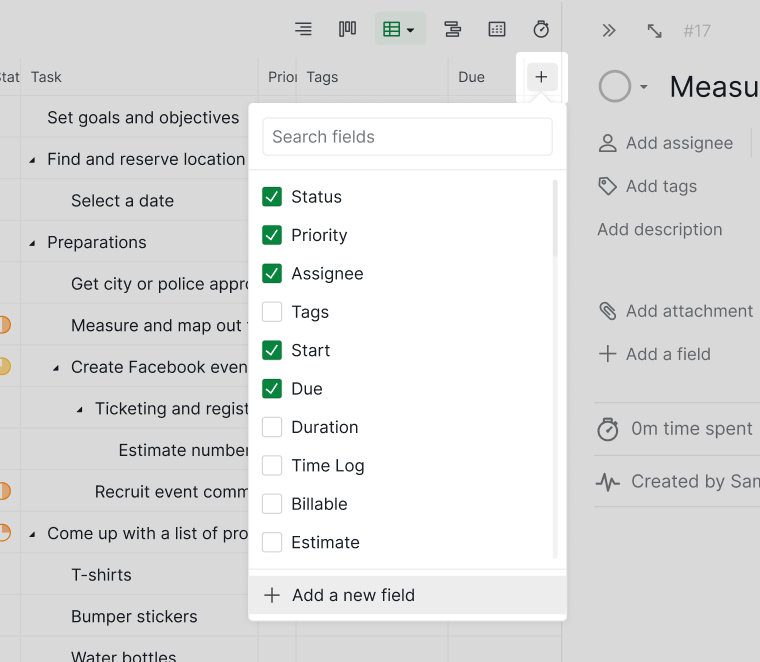
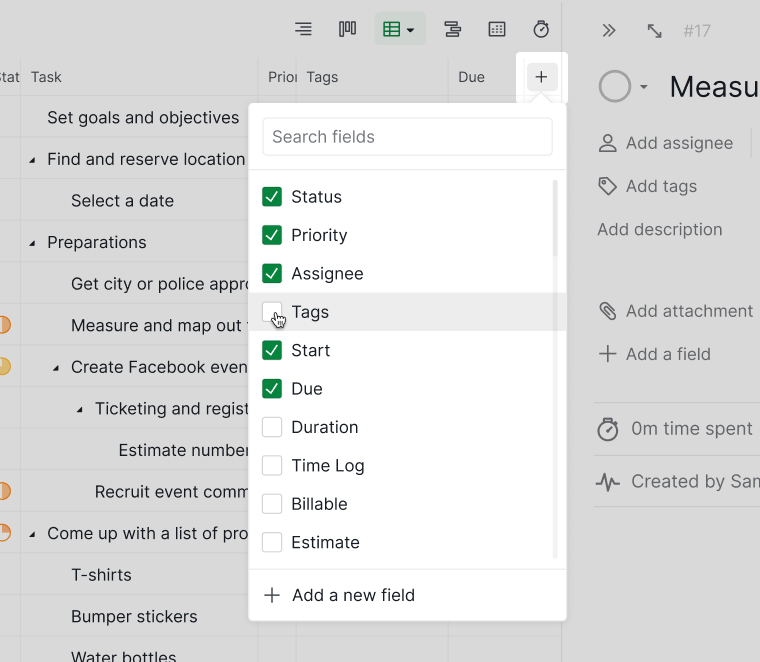
From Table View
- Switch to the Table view.
- Click the + icon at the right edge of the table.
- Select + Add a new field.
- Configure the field details and save.
From Project Settings
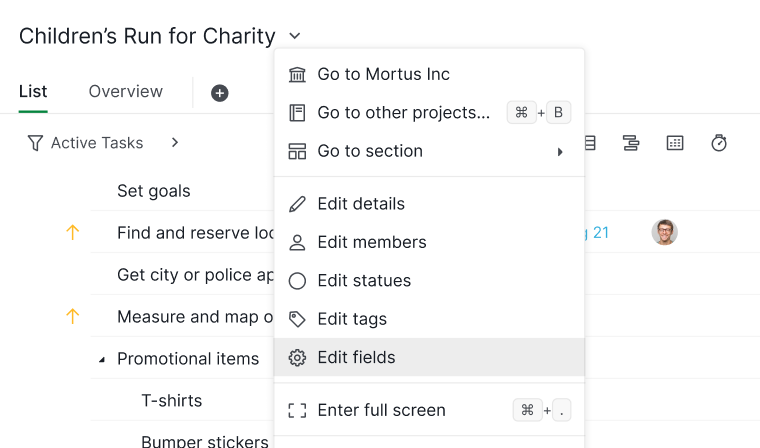
- Click the dropdown arrow next to your project name.
-
Select Edit fields.
-
Click + Add a new field.
- Configure the field and confirm.
Note: Field names cannot contain the following characters: quotation marks ", backslash \ and curly brackets { }.
Supported Custom Field Types
Quire supports a wide range of custom field types to fit different workflows:
- Text: Single-line text or multi-line paragraphs
- Number: Numeric values or percentages
- Currency: Monetary values with customizable currency symbols
- Date: Date picker with optional time
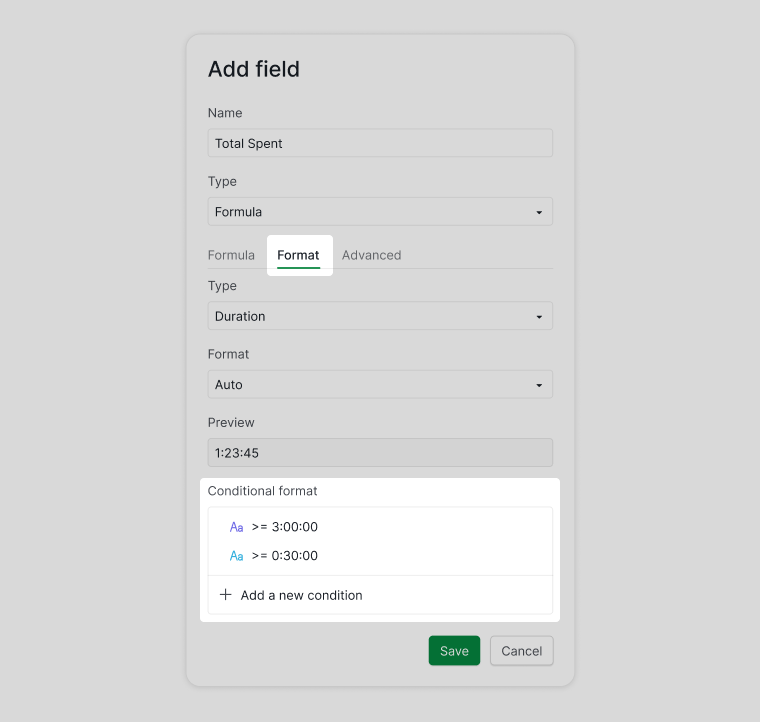
- Duration: Time format (hh:mm:ss)
- Selection: Single or multiple selectable options
- Checkbox: Yes/No or completed status
- User: Assign one or multiple project members
- Attachment: Upload files or images
- Email address: Clickable email links
- Task: Reference one or more tasks in the project
- URL: Clickable website links
- Formula: Perform calculations based on other fields
Edit Custom Fields
From the Detail Panel
- Open a task’s detail panel.
-
Click + Add or edit field.
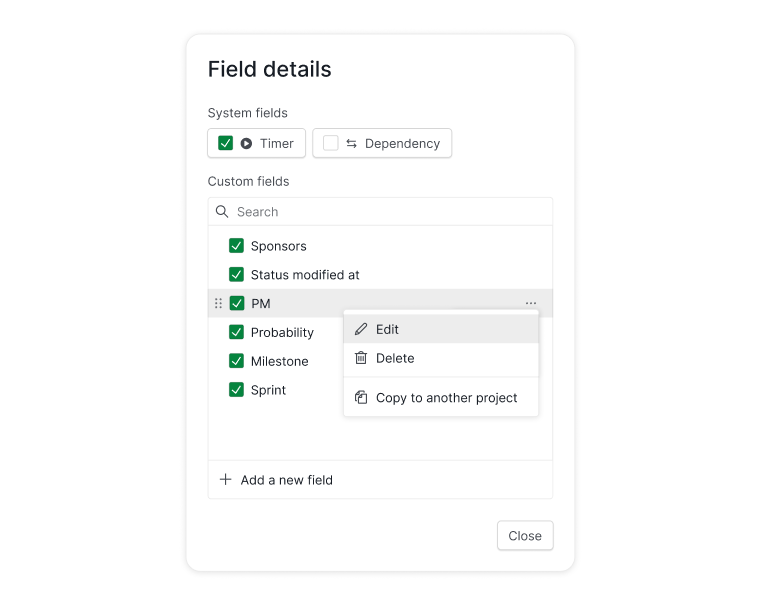
- Hover over the field and click the More Options icon to edit.
From Project Settings
- Open the project dropdown menu.
-
Select Edit fields.
- Hover over a field and click the More Options icon.
From Table View
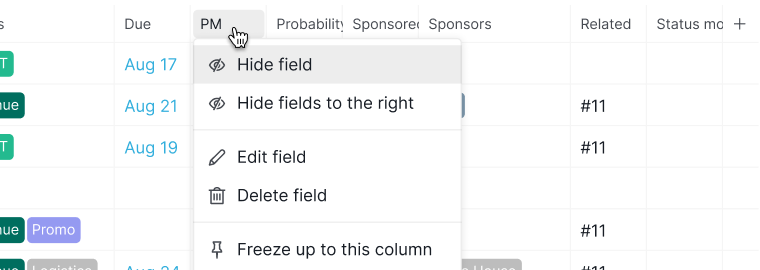
- Go to Table view.
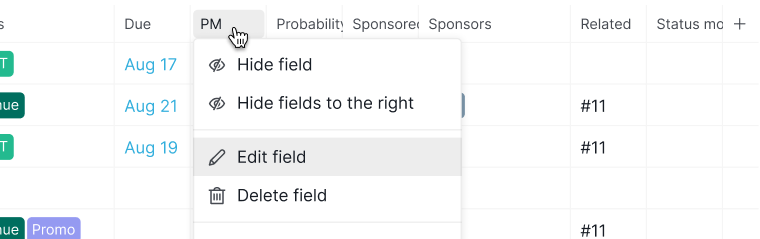
- Click the field name in the column header.
- Select Edit field.
Conditional Colors for Custom Fields
Conditional colors help you visually highlight important values based on rules you define.
Note: Setting conditional formats are currently only available for Date, Number, Currency, Duration and Formula custom fields type.
- Add or edit a custom field.
-
Click Add a new condition.
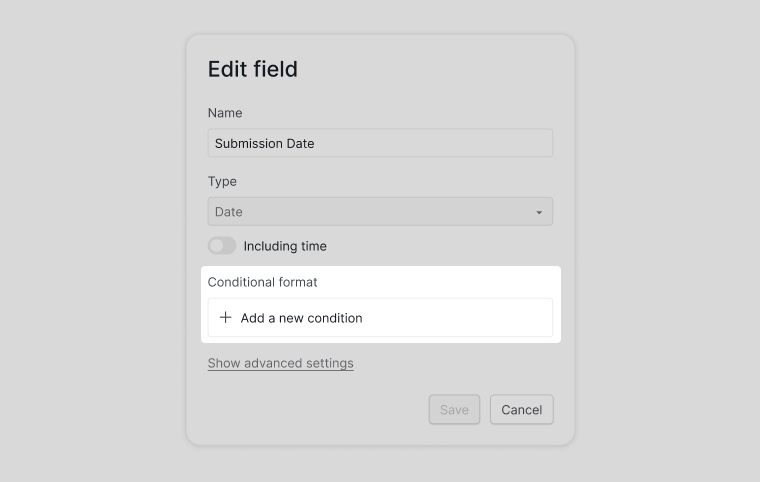
- Define the condition and choose a color.
- Click Save to apply.
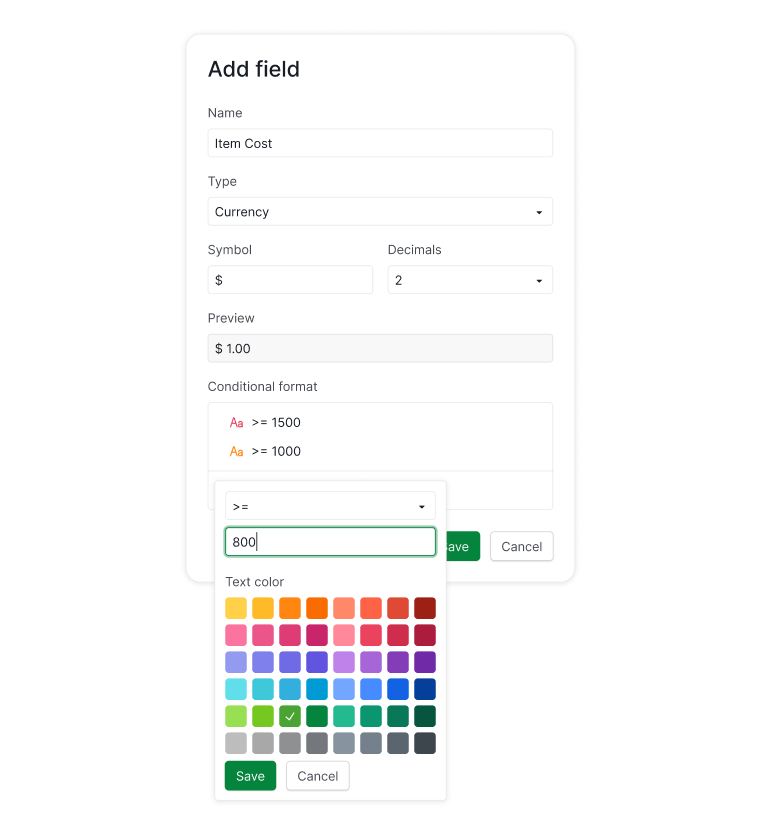
Note: Conditions are applied top to bottom. You can reorder them by dragging the six-dotted icon.

For Formula fields:
- Open the Format tab.
- Select a display format.
- Add conditional color rules.
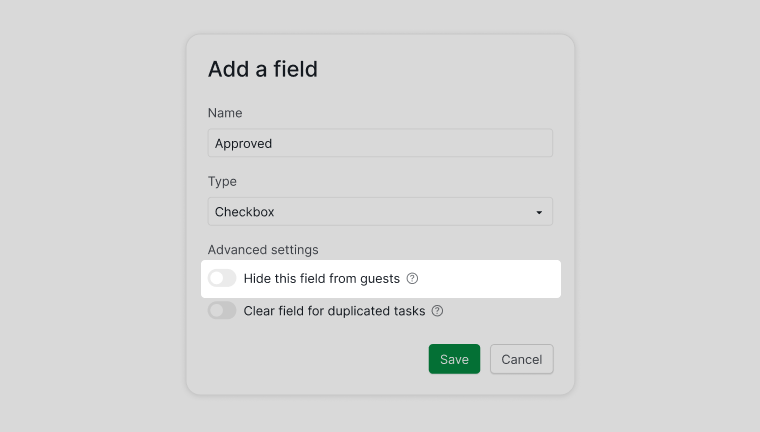
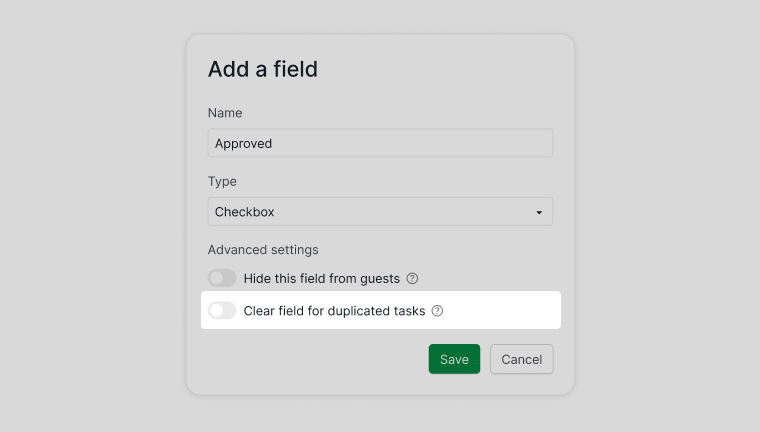
Advanced Settings for Custom Fields
Advanced settings give you more control over how custom fields behave.
-
Hide fields from Guests: Prevent guest users from seeing specific fields
-
Clear values on recurring or duplicated tasks: Avoid carrying over field values unintentionally
Learn more about the project member ‘Guest’ permission.
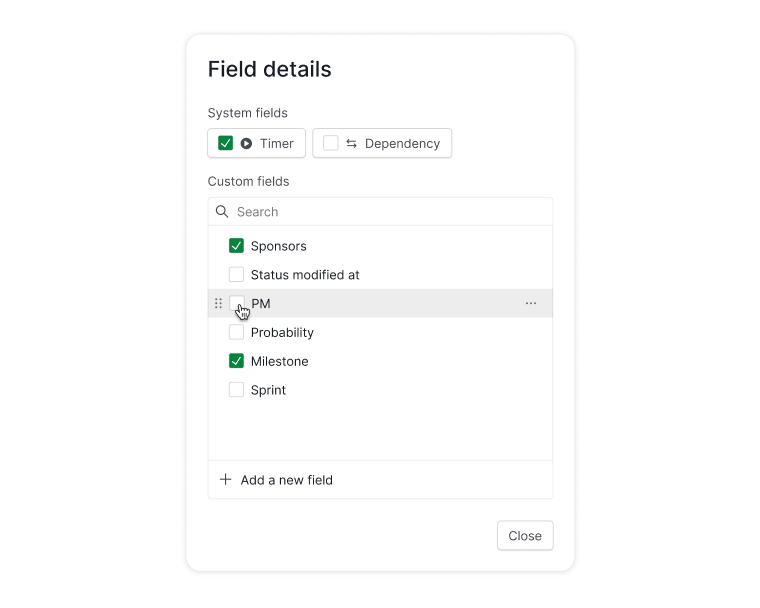
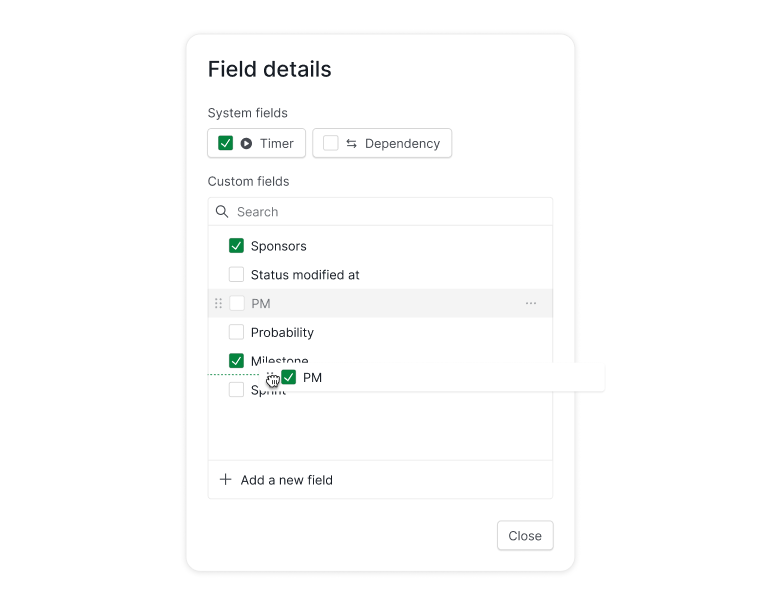
Show or Hide Custom Fields
From the Detail Panel
- Click + Add or edit field in the detail panel.
- Use the checkboxes to show or hide fields.
From Table View
-
Click the + icon at the right edge of the table and use the checkboxes to show or hide fields.
-
Or click a column header and select Hide field.
Rearrange Custom Field Order
Reorder Fields
- Click + Add or edit field in the detail panel.
- Drag the six-dotted icon next to a field.
- Drop it into the desired position.
Copy Custom Fields Between Projects
To avoid recreating the same fields across projects, you can duplicate them.
From the Detail Panel
- Click + Add or edit field.
- Hover over a field and click the More Options icon.
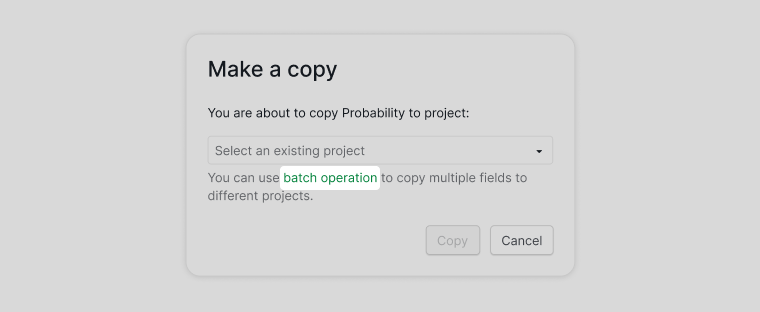
- Select Copy to another project.
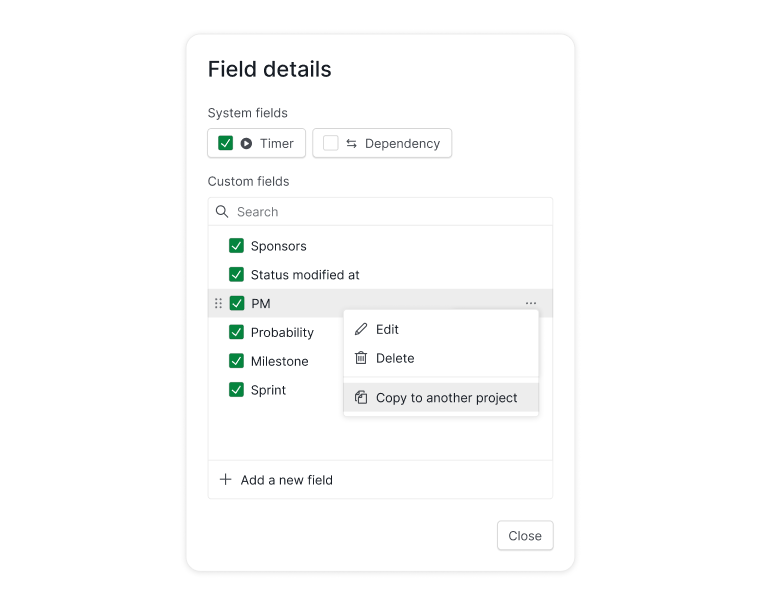
- Choose the destination project.
Tip: Use batch operations to copy multiple fields at once.
From Project Settings
- Open the project dropdown menu.
-
Select Edit fields.
- Hover over a field and click the More Options icon.
- Select Copy to another project.
Delete Custom Fields
From the Detail Panel
-
Click + Add or edit field.
-
Hover over the field click on the More Options icon then choose Delete.
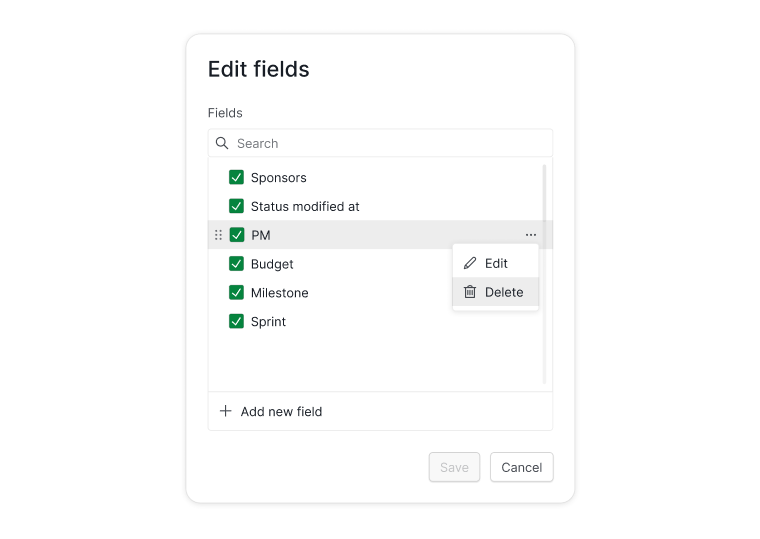
From Project Settings
- Open the project dropdown.
-
Select Edit fields.
- Hover over the field click on the More Options icon then choose Delete.
From Table View
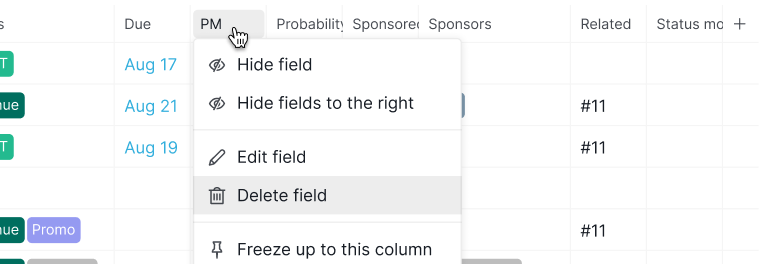
- Click the field name in the column header.
- Select Delete field.
Frequently Asked Questions
Which custom field type should I use for tracking budgets or calculations in Quire?
Use Currency for monetary values, Number for numeric values or percentages, and Formula for calculations based on other fields. Selection works well for custom statuses.
How do I add a custom field in Quire?
Detail panel > + Add or edit field > + Add a new field, or from Table view (click the + at the right edge), or project dropdown > Edit fields. The Free plan allows one custom field per project.
How do I edit a custom field in Quire?
Detail panel > + Add or edit field, hover over a field, and click the More Options icon. Also accessible from project dropdown > Edit fields, or in Table view via the column header > Edit field.
How do I show or hide custom fields in Quire?
Detail panel: + Add or edit field and use the checkboxes. Table view: click the + at the right edge, or click a column header > Hide field.
Can I apply color rules to custom fields in Quire?
Yes, for Date, Number, Currency, Duration, and Formula fields. In the field editor, click Add a new condition, define the rule, and choose a color. Conditions are applied top to bottom.
How do I copy custom fields to another project in Quire?
Detail panel > + Add or edit field, hover over a field > More Options > Copy to another project. Use batch operations to copy multiple fields at once.
How do I prevent custom field values from carrying over when duplicating tasks in Quire?
In the field’s Advanced settings, enable Clear values on recurring or duplicated tasks. The same panel also lets you hide specific fields from Guest users.