Chat in Quire Permalink
Overview
The chat feature provides a space for real-time discussions within your project. Whether you’re brainstorming ideas, sharing updates, or coordinating tasks, the chat feature helps your team stay aligned without leaving the Quire workspace. Each chat channel is tied to a specific project, allowing focused conversations and streamlined collaboration.

Create and Manage Chat Channels
How do I create a chat channel?
-
Click the + icon at the top of your project and select Add chat.

-
Enter a name for the chat channel. Optionally, customize the icon and color.
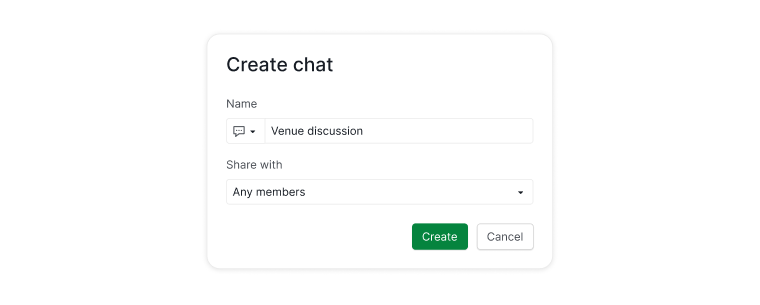
- Configure visibility settings to control who can access the channel:
- All project members
- Project admins only
- Specific members
- External team
- Private for yourself
- To start a conversation, type your message into the input field at the bottom.
- Mention members using
@usernameto automatically add them as followers of the chat channel.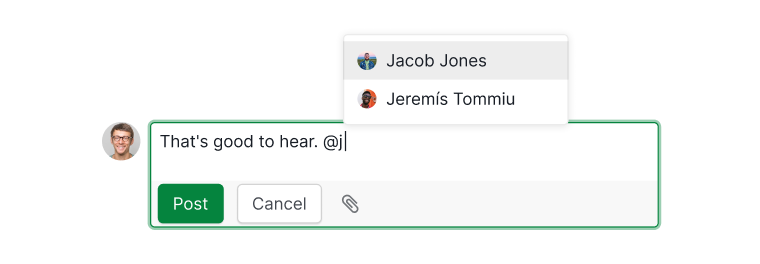
How can I edit a chat channel’s name and URL?
-
Right-click the chat channel name and select Edit details.
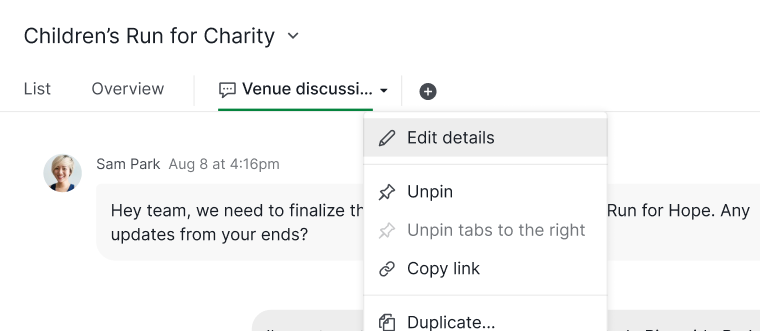
- Optionally, copy the channel URL and share it with team members.
- To reference a channel in a task or comment:
- Within the same project:
#>chat_id - From another project:
#{project_id>chat_id}
- Within the same project:

How do I pin a chat channel for easy access?
- Right-click on the chat channel tab and select Pin.
- Newly created channels are pinned by default. Channels created by other members are not.

How do I duplicate a chat channel?
- Right-click the channel tab and select Duplicate.
- Enter a new name for the duplicated channel.
- Click Save to confirm.
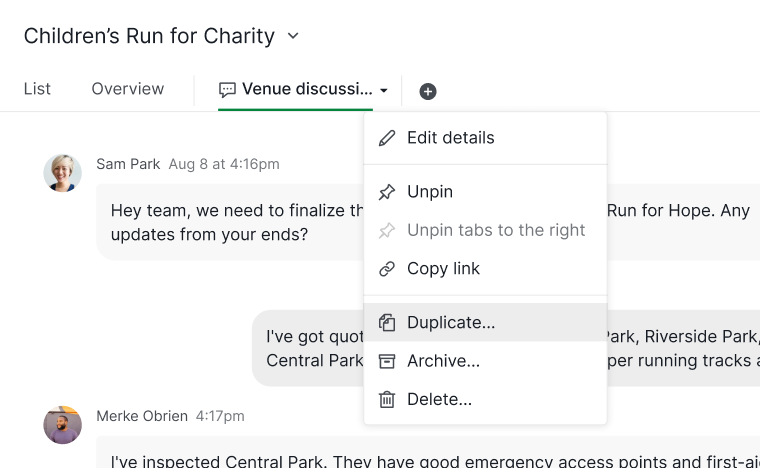
How do I archive a chat channel?
Right-click the chat channel tab and select Archive.

Note: Archived channels move to the Archived category for easy access.
How do I delete a chat channel?
Right-click the channel tab and select Delete.
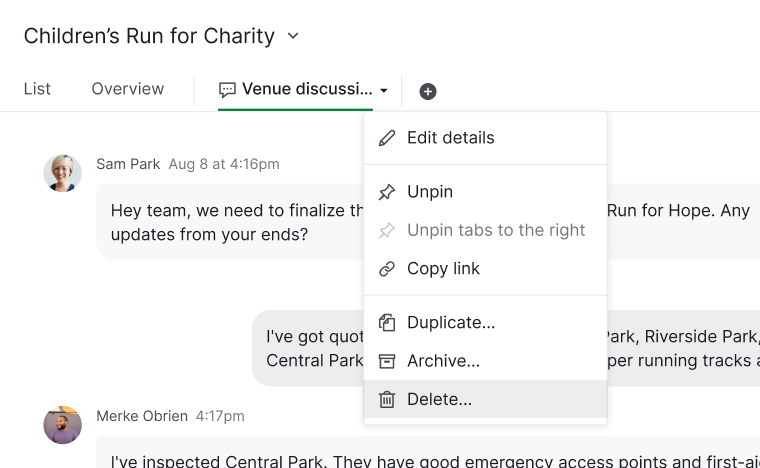
Note: Deleted channels can be restored for a limited time via the More Options menu. Review carefully before deletion. Please review carefully before proceeding with deletion.
Send and Format Messages in Chat
How can I style my messages in chat?
Highlight text in the comment area to access a menu of formatting options. You can:
- Change text color
- Add hyperlinks
- Apply bold, italics, headings, and more

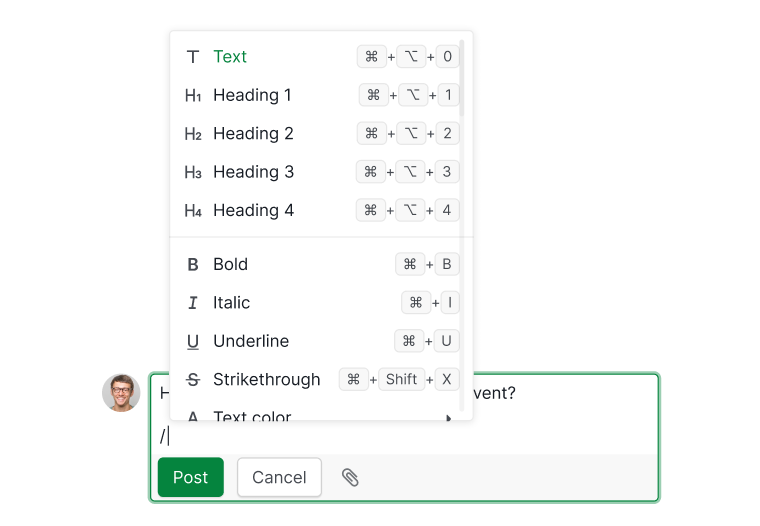
How do I use slash commands in Quire chat?
- Type / in the message area to open the slash command menu.
- Choose from options like headings, tables, checklists, mentions, or task references.
- As you type, the menu filters to match your input.
- Navigate the menu using the up and down arrow keys.
Interact With Chat Messages
How do I react to a chat message?
-
Hover over a message and click the emoji icon at the upper right corner.
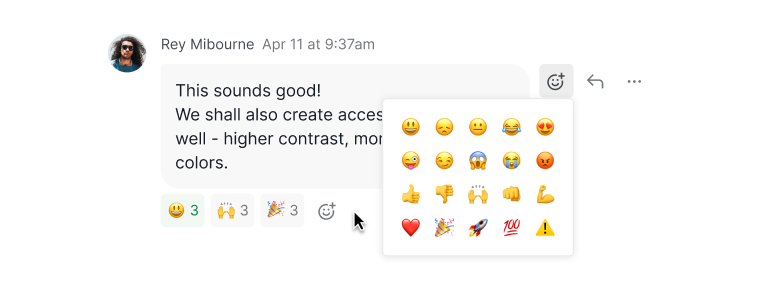
- Add as many emojis as you like, or click existing emojis to react with the same one.
-
Hover over an emoji to see who reacted.

- You’ll receive notifications when someone reacts to your messages.
How can I edit a message in chat?
- Click the More Options icon next to your message and select Edit.
- Or press the up arrow key while your cursor is in the Send message area.
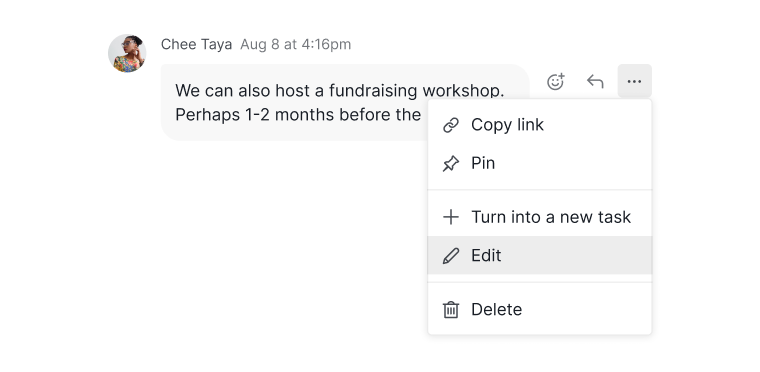
Note: You can only edit messages you’ve sent. Messages from other members cannot be modified.
How do I reply to a message?
- Click the Reply icon next to the message.
- To quote specific text:
- Highlight the text and press Alt + Q (Windows) or Ctrl + Q (Mac).
- The selected text will appear as a quote in your reply.

How do I pin or unpin messages?
-
Click the More Options icon next to the message and select Pin or Unpin.

-
View all pinned messages in the right-hand chat detail panel.

Convert Chat Messages Into Tasks
How do I turn a message into a task?
-
Click the More Options icon next to the message and select Turn into a new task.
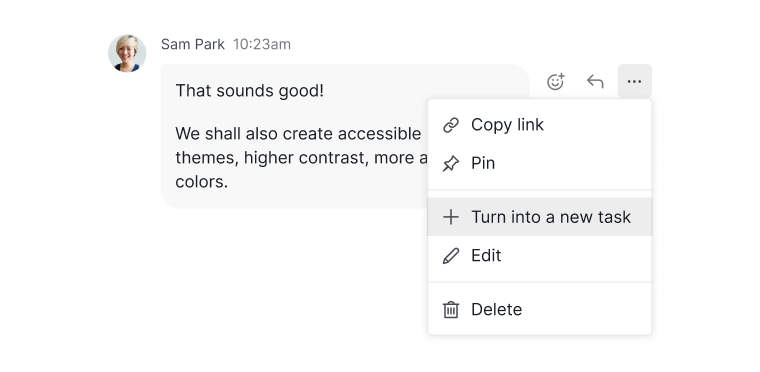
-
Edit the task title, description, and specify a parent task if needed.

-
The original message link is automatically added to the task description for reference.
Manage Message and Channel Cleanup
How do I delete a message?
- Click the More Options icon next to the message.
- Select Delete.
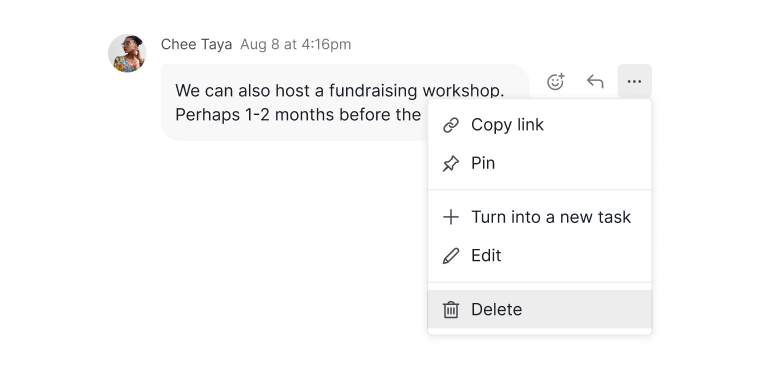
Note: Deleted messages can be restored within a limited time through the More Options menu. Review carefully before deleting.
Manage Chat Channel Followers and Notifications
How do I add followers to a chat channel?
- Click the eye icon in the upper right corner of the channel.
- Select members from the dropdown to follow the chat channel and receive notifications .

Note:
- The creator of a chat channel is automatically added as a follower.
- Following the entire project subscribes you to all associated chat channels.
- Both Admins and Normal members can manage followers.
Learn more about Quire’s Chat on our blog.