Documents in Quire Permalink
Overview
What are Documents in Quire?
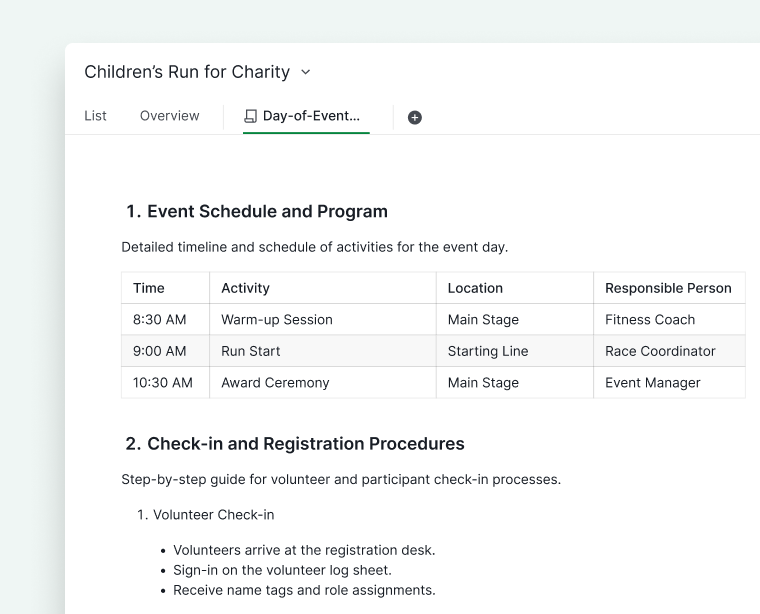
Documents in Quire provide a flexible space for adding notes and long-form content directly within your projects. They are designed to help teams capture and organize information alongside tasks, without needing to switch tools.
You can use documents to:
- Take meeting notes
- Record important decisions
- Draft project plans or specifications
- Store reference materials and documentation
How are documents organized within a project?
Each project can contain multiple document tabs, making it easy to organize different types of information within the same workspace.
Create and Edit Documents
How do I create a new document?
You can create document tabs in various locations, including projects, organizations, folders, smart folders, My Tasks, and even a member’s profile page.
- Navigate to the desired location (for example, a project).
- Click the + icon at the top.
-
Select Add document.
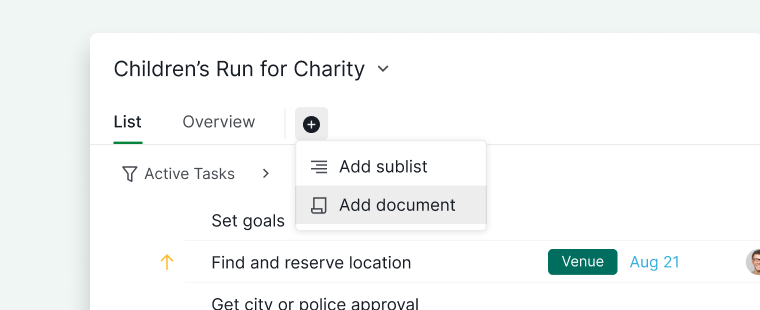
- Enter a document name.
- (Optional) Customize the icon and color.
- Set document permissions.
- Click Create.
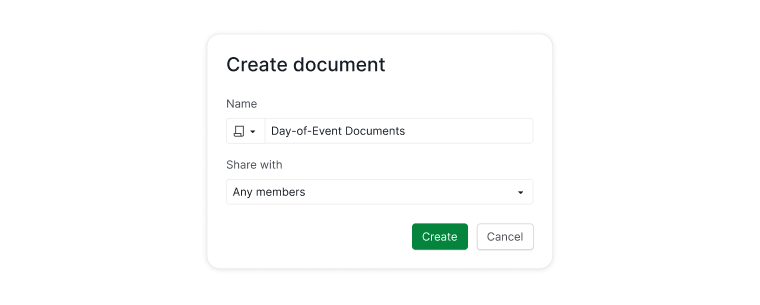
You can control who can access the document by choosing from different permission options, including:
- All project members
- Project admins only
- Selected members
- A specific External Team
- Private (only visible to you)
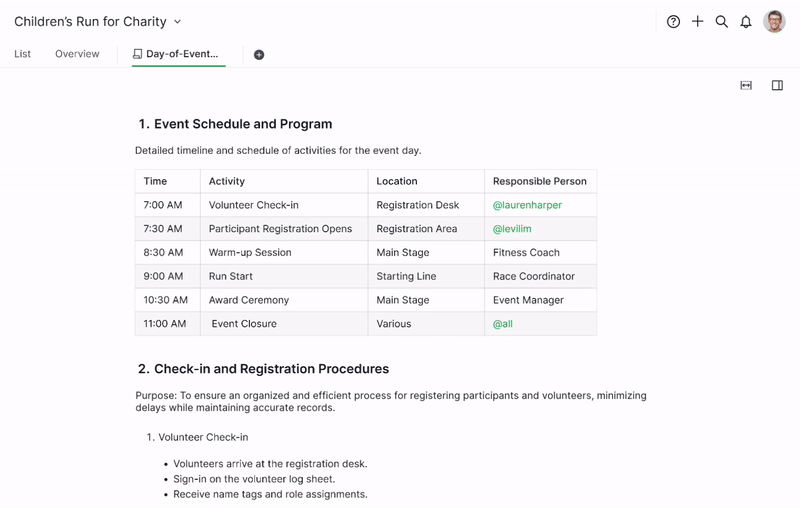
How do I write and format content in a document?
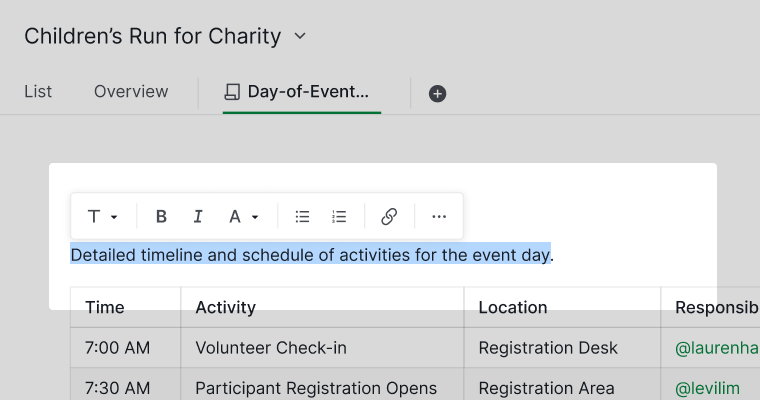
Once the document is created, you can start writing immediately.
- Highlight text to open the formatting toolbar
- Change text styles, colors, add links, and more
- Use rich text tools for structured documentation
Note: To view document activity and details, click the detail panel icon on the right side of the document, or press SPACE to open it quickly.
Use Slash Commands
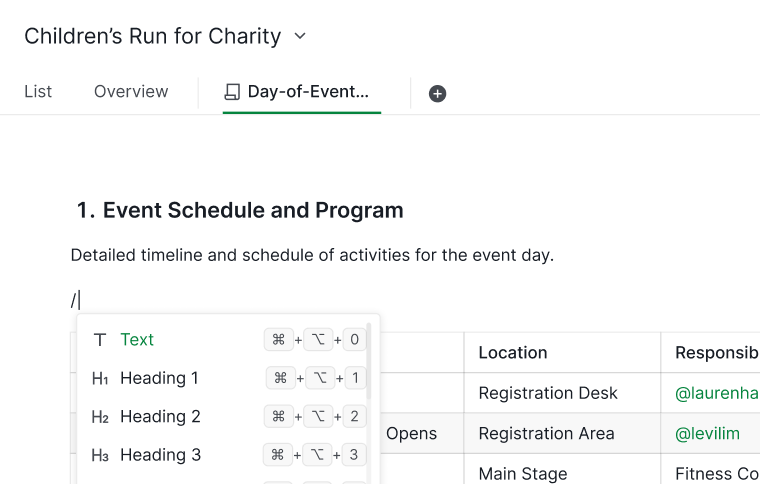
What are slash commands in Documents?
Typing the slash command / opens a menu of content blocks and formatting options you can insert into your document, including:
- Headings
- Tables
- Checklists
- Mentions of team members
- References to tasks
As you type after /, the list automatically filters. You can navigate the menu using the ↑ / ↓ arrow keys.
Adjust Document Layout
How do I use full-width mode in a document?
To focus on writing and view more content at once:
- Click the expand icon on the right side of the document.
- The document switches to full-width mode.
Follow and Get Updates
How do I follow a document?
Following a document allows you to receive notifications whenever changes are made.
- Click the detail panel icon on the right side.
- Click the eye icon at the top of the panel.
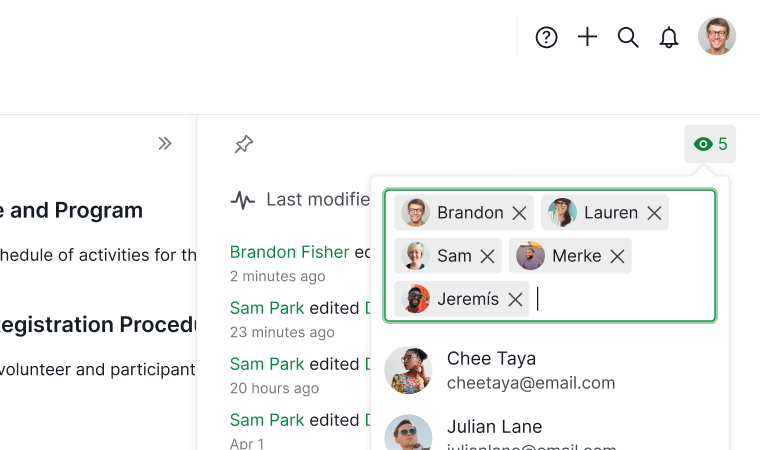
Note: Only project members can be added as followers.
Lock and Unlock Documents
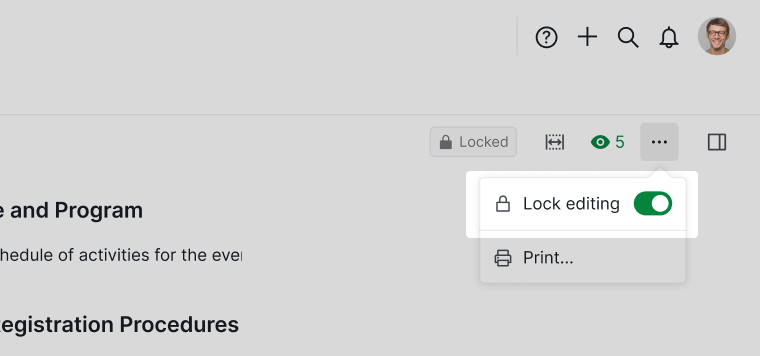
How do I lock a document to prevent editing?
Locking a document prevents accidental edits and makes it read-only.
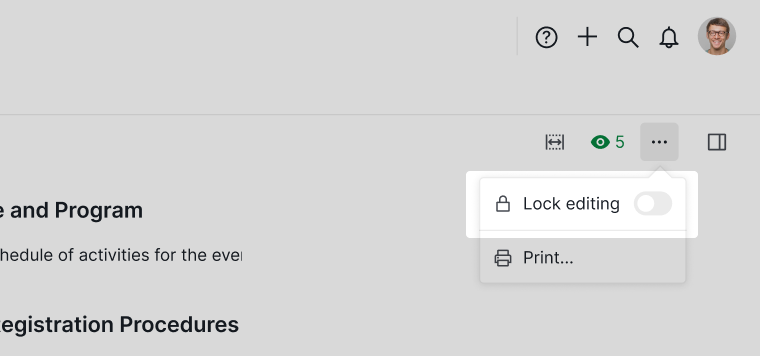
- Click the More Options icon in the upper-right corner.
- Select Lock editing.
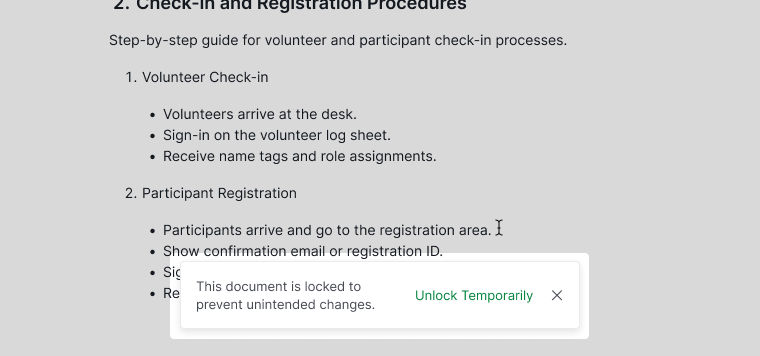
How do I temporarily unlock a locked document?
- Click Unlock temporarily to make quick edits
- The document automatically re-locks when you switch views or projects
How do I fully unlock a document?
- Click the More Options icon again.
- Deselect Lock editing.
Print and Share Documents
How do I print a document?
- Click the More Options icon in the upper-right corner.
- Select Print.

How do I edit a document name or copy its URL?
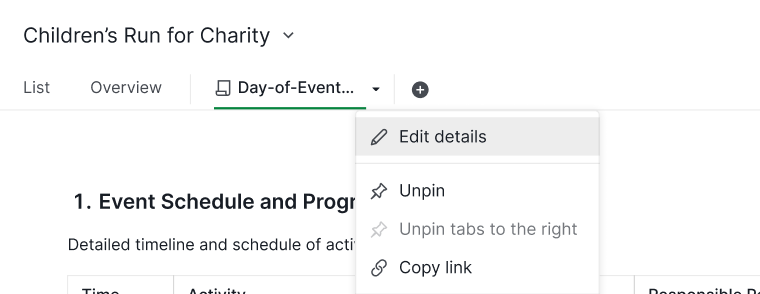
To rename a document:
- Right-click the document tab.
- Select Edit Details.
- Update the name.
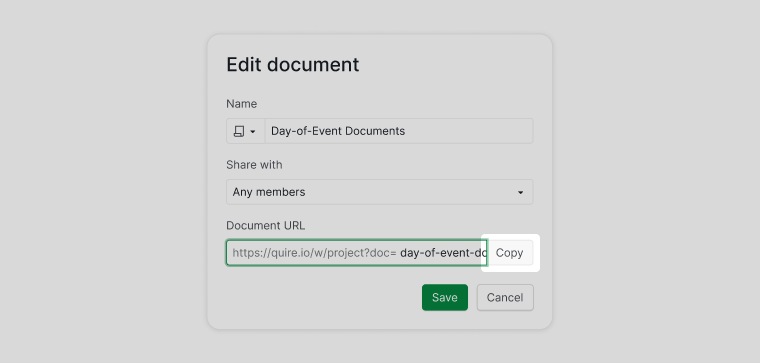
To share a document link:
- Click Copy URL
- Share the link with your team to open the document directly
Tip: You can reference documents anywhere using:
#:document_id(same project)#{project_id:document_id}(different project) Clicking the reference opens the document directly.
Organize Documents
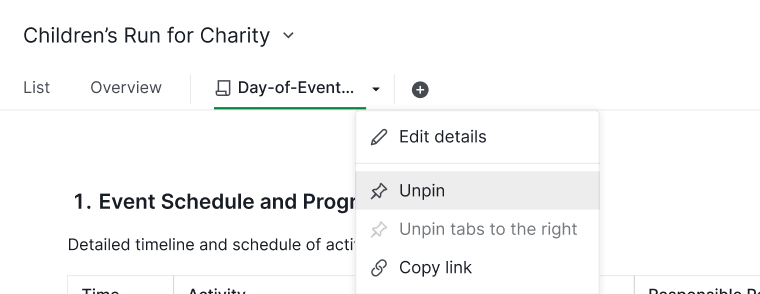
How do I pin or unpin a document?
Pinned documents stay easily accessible.
- Right-click the document tab.
- Select Pin or Unpin.
New documents you create are pinned by default.
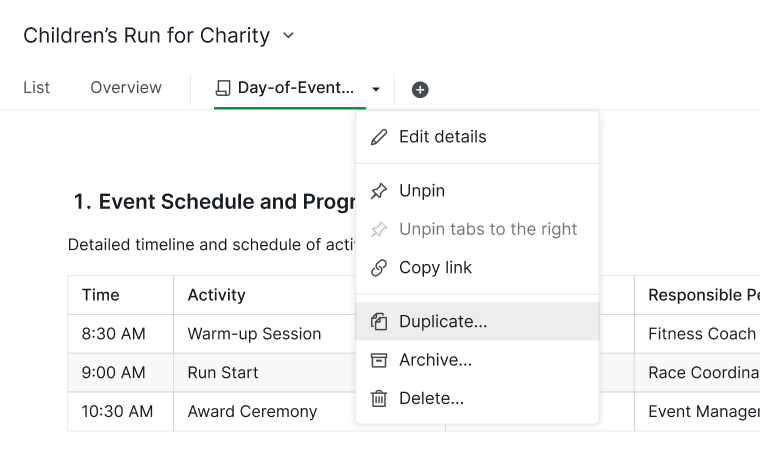
How do I duplicate a document?
- Right-click the document tab.
- Select Duplicate.
- Enter a new name.
- Click Save.
How do I archive a document?
Archiving hides documents you no longer need while keeping them accessible.
- Right-click the document tab.
- Select Archive.
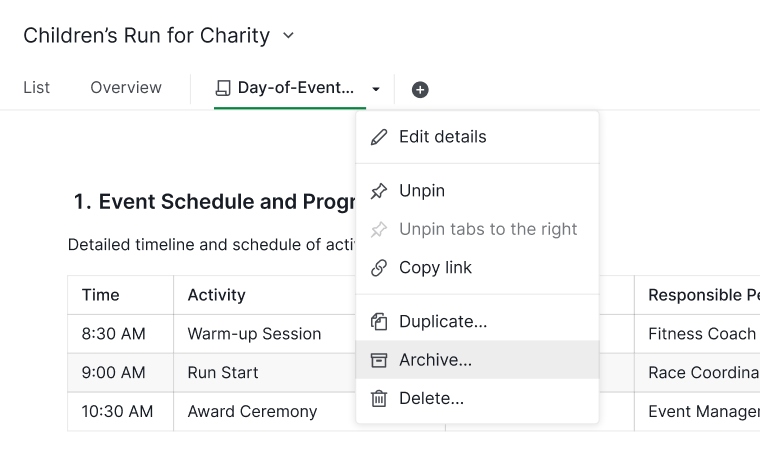
Note: Archived documents appear under the Archived category in the document menu.
How do I delete a document?
- Right-click the document tab.
- Select Delete.
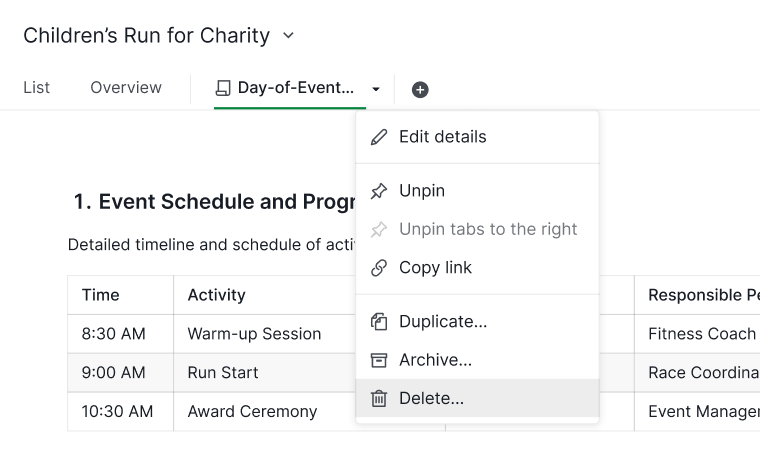
Note: Deleted documents can be restored for a limited time from the More Options menu before permanent removal. Please review carefully before proceeding with deletion.
Learn more about Quire Documents on our blog.