Install and Integrate Apps in Quire Permalink
Quire offers an App Directory where you can install official and community-built integrations to extend your workspace.
How can I browse and install apps in Quire?
- Visit the Quire App Directory to browse available apps.
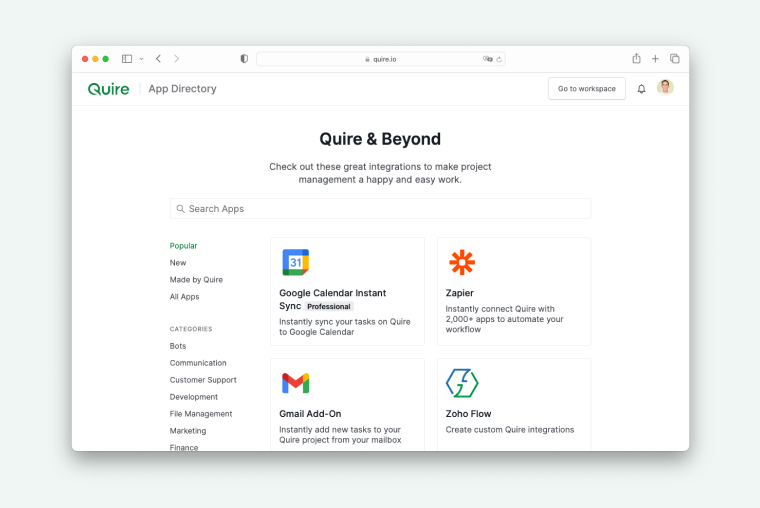
- Click the Install button on the top right corner of the app page. This will start the authorization process and add the app to your Quire workspace.
- Choose the access scope you want to grant the app. You can also decide if the app can access your team members’ email addresses.
- Click Allow to complete the installation. The app is now successfully added to your Quire workspace.
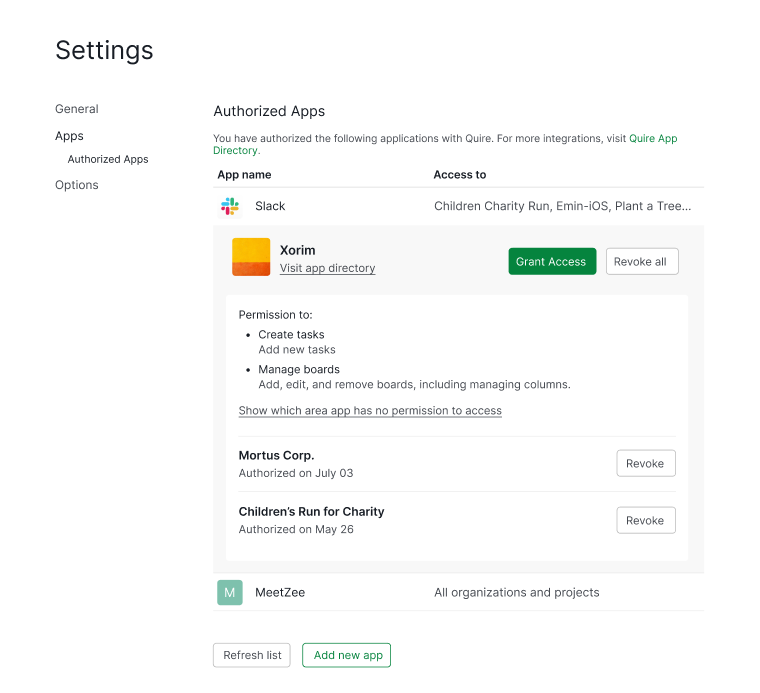
How do I view and manage authorized apps in Quire?
- Go to Apps in your Account Settings, or click your Profile photo and select My Apps.

- Review all apps that have access to your Quire account.
- To revoke or change permissions, click the app in the My Apps section.
Google Calendar Sync from Quire to Google
You can connect your Quire tasks with Google Calendar to view task schedules, track projects, and plan ahead.
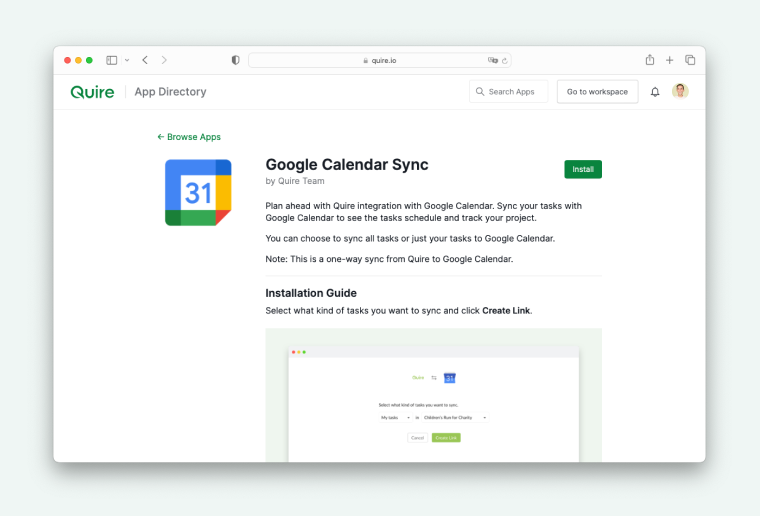
How do I sync Quire tasks to Google Calendar?
- Click Install on the app page to connect Quire with your Google Calendar.
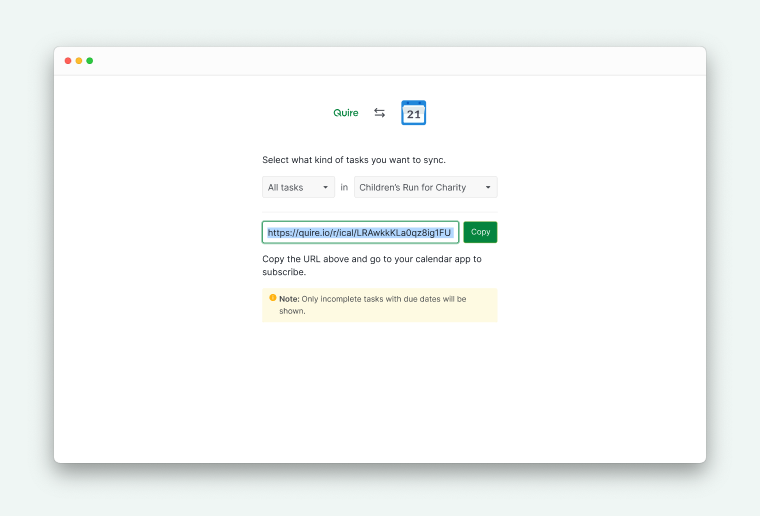
- Choose the type of tasks you want to sync to your Google Calendar.
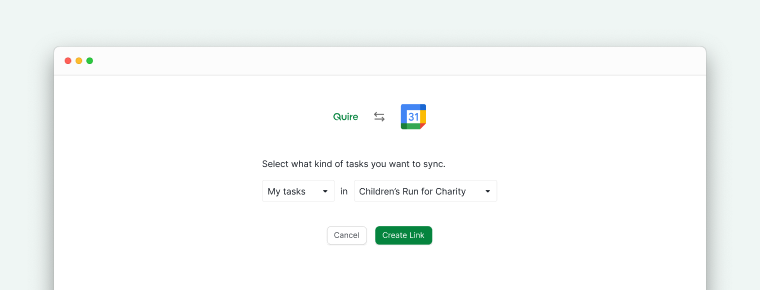
- Copy the link provided and follow the on-screen instructions to complete the sync. Only incomplete tasks with due dates will appear in Google Calendar.
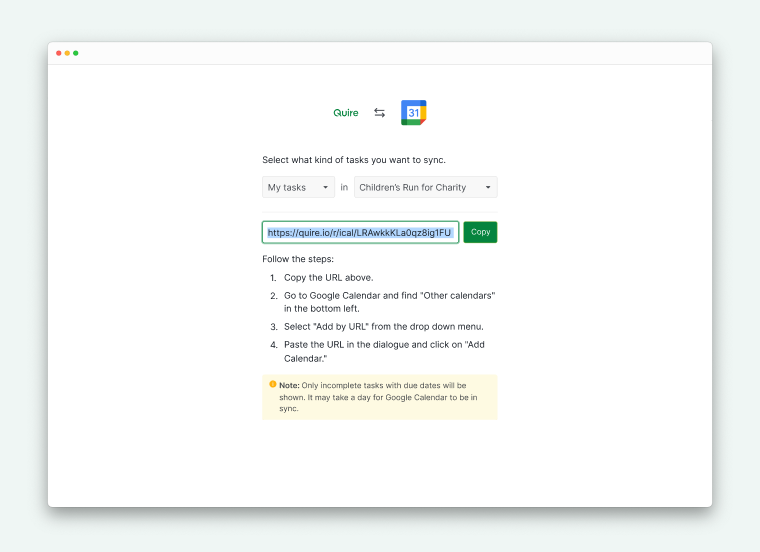
Note: This integration supports one-way sync from Quire to Google Calendar.
Tip: Looking for a two-way sync? Try this app.
How do I remove synced tasks from Google Calendar?
- Open Google Calendar and locate the synced calendar.
- Click the x icon next to the calendar name to delete it.
- Revoke access from your My Apps page to fully disconnect the integration.
Note:
- Deleting the calendar from Google Calendar will not remove tasks from your Quire project.
- If you only revoke permission via the My Apps page, the calendar will remain in Google Calendar.
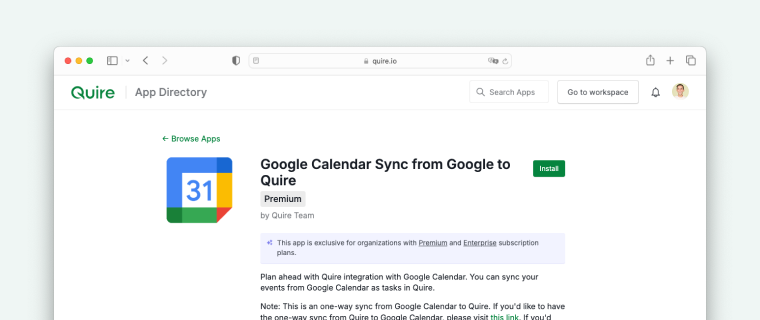
Google Calendar Sync from Google to Quire
Google Calendar Sync from Google to Quire is only available in the Premium and Enterprise plans. More information can be found on our pricing page.
This integration allows you to sync events from Google Calendar and convert them into tasks in Quire.
How do I set up Google Calendar to Quire sync?
- Click Install to connect Quire with your Google Calendar.
- Select a Quire project where you want Google Calendar events to appear as tasks.
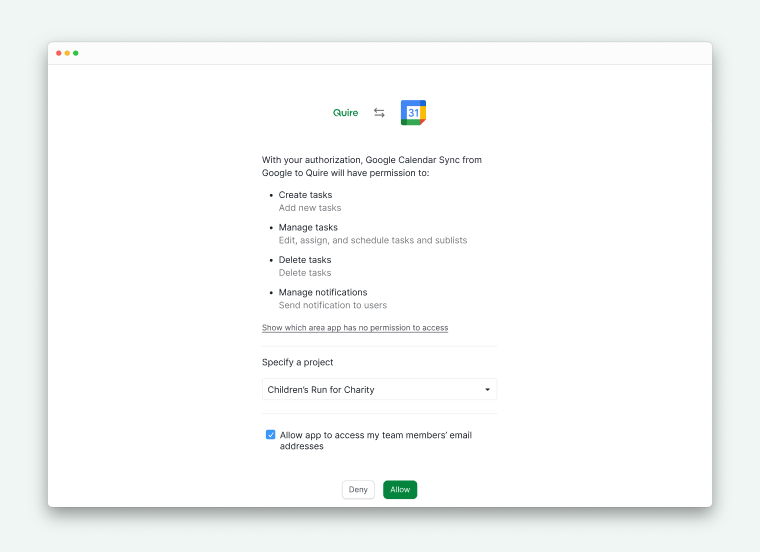
- Follow the authorization steps to link your Google Account.
- Choose the type of tasks to sync.
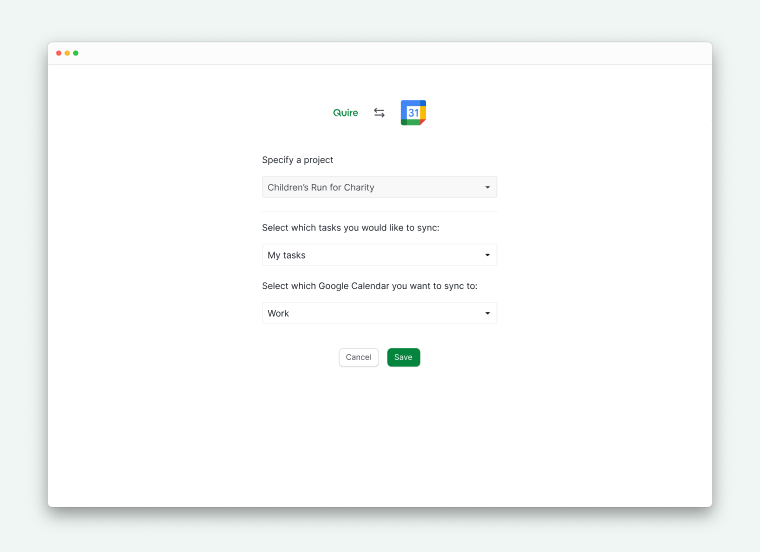
- Optionally, create separate calendars in Google Calendar for different Quire projects, or sync multiple Quire projects to a single calendar.
Note:
- This integration supports one-way sync from Quire to Google Calendar.
- If your project is already synced with Google Calendar using the two-way sync, one-way sync from Google to Quire will be automatically disabled. Only one integration can be used at a time.
Tip: Looking for a two-way sync? Try this app.
Google API Disclosure: Quire uses Google APIs when you sign in or use Quire apps and services. We follow the Google API Services User Data Policy, including Limited Use requirements.
How do I remove synced tasks from Google Calendar?
- Open Google Calendar and locate the synced calendar.
- Click the x icon next to the calendar name to delete it.
- Revoke access from your My Apps page to fully disconnect the integration.
Note:
- Deleting the calendar from Google Calendar will not remove tasks from your Quire project.
- If you only revoke permission via the My Apps page, the calendar will remain in Google Calendar.
Google Calendar Instant Sync
Google Calendar Instant Sync is only available in the Professional, Premium, Enterprise plans. More information can be found on our pricing page.
This integration lets you sync your Quire tasks with Google Calendar instantly, allowing you to track project schedules in real time. Any changes made to Quire tasks will reflect immediately in Google Calendar.

How do I set up Google Calendar Instant Sync?
- Click Install to connect Quire with your Google Calendar.
- Sign in to your Google Account and complete the authorization process.
- Select the Quire project you want to sync with Google Calendar.
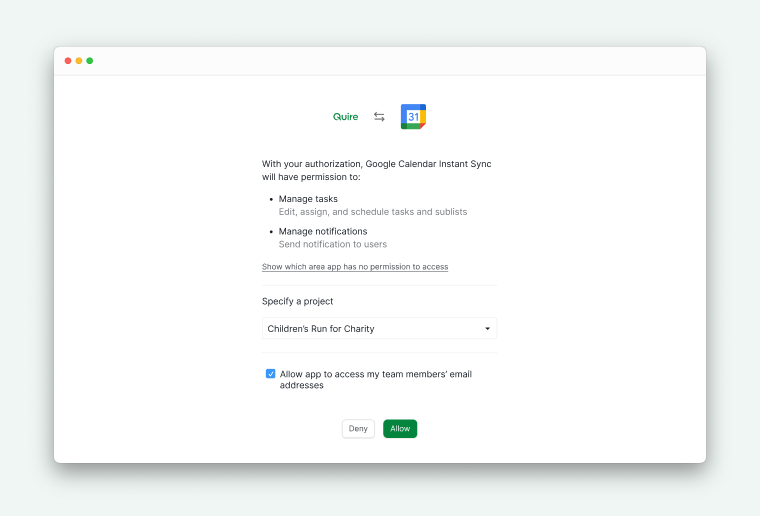
How do I choose which tasks to sync?
After selecting a project, you can decide which tasks will appear in Google Calendar.
- Choose the type of tasks to sync.
- If you select My Tasks, only tasks assigned to you in the selected Quire project will be synced.

- You can link different Quire projects to separate Google Calendars, or sync multiple projects to a single calendar if needed.
Note: This integration supports one-way sync from Quire to Google Calendar.
Tip: Looking for two-way sync? Check out this Google Calendar two-way sync app.
Google API Disclosure: Quire uses Google APIs when you use your Google account to sign in and use Quire apps and services. Our use of information received from Google APIs will adhere to Google API Services User Data Policy, including the Limited Use requirements.
How do I remove synced tasks from Google Calendar?
If you no longer want Quire tasks to appear in Google Calendar, you can remove the sync by following these steps:
- Open Google Calendar and locate the calendar created by Quire.
- Click the x icon next to the calendar name to delete it.
- Go to your My Apps page in Quire and revoke access to fully disconnect the integration.
Note:
- Deleting the calendar from Google Calendar will not remove tasks from your Quire project.
- If you only revoke permission via the My Apps page, the calendar will remain in Google Calendar.
Google Calendar Two-Way Sync
Google Calendar Two-Way Sync is only available in the Premium and Enterprise plans. More information can be found on our pricing page.
Google Calendar Two-Way Sync allows you to sync tasks between Quire and Google Calendar in both directions. Any changes made in Quire or Google Calendar will stay up to date automatically, helping you manage schedules and tasks from either tool.
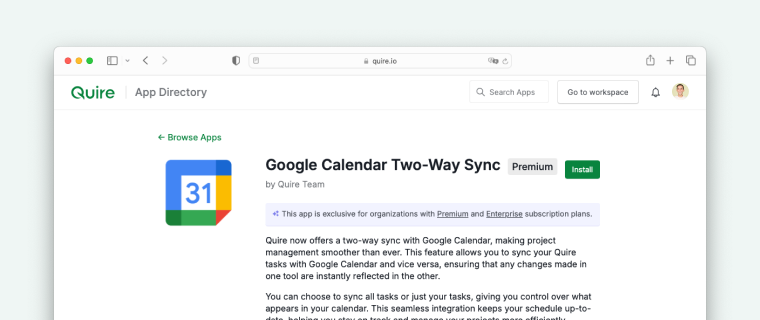
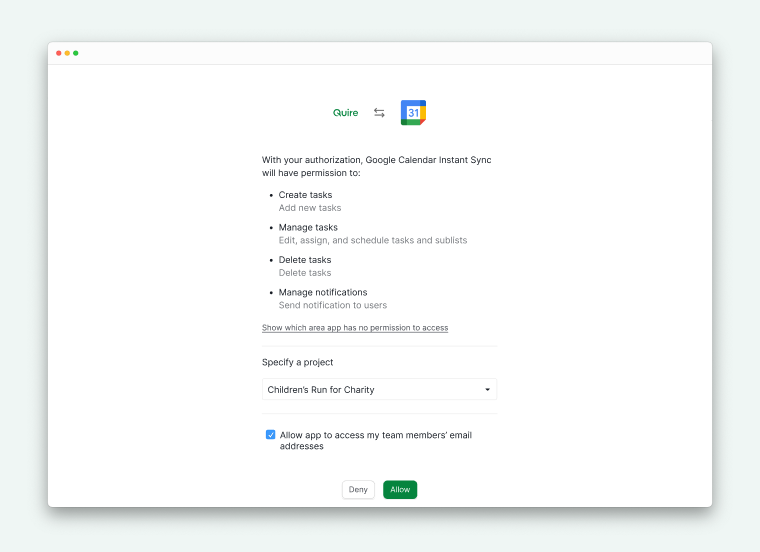
How do I set up Google Calendar Two-Way Sync?
- Click Install on the Google Calendar Two-Way Sync app.
- Sign in to your Google Account and complete the authorization process.
- Select the Quire project where Google Calendar events should be synced as tasks.
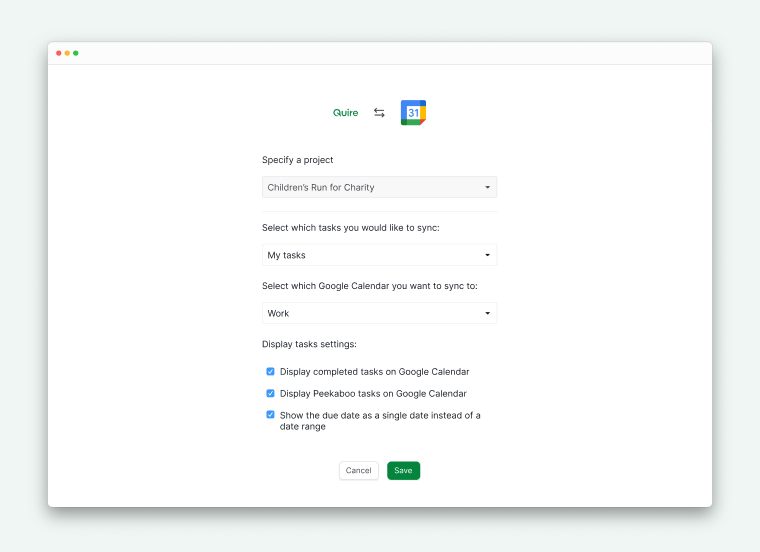
How do I choose which tasks and calendars to sync?
After connecting your account, you can customize what gets synced between Quire and Google Calendar.
- Choose whether to sync all tasks or My Tasks only.
- If My Tasks is selected:
- Events imported from Google Calendar will be automatically assigned to you in Quire.
- Only tasks assigned to you will appear in the synced Google Calendar.
- Select which Google Calendar to sync with the chosen Quire project.
- Customize how tasks are displayed in Google Calendar, then click Save to finish setup.
You can link different Quire projects to separate Google Calendars, or sync multiple Quire projects into a single calendar, depending on your workflow.
Google API Disclosure: Quire uses Google APIs when you use your Google account to sign in and use Quire apps and services. Our use of information received from Google APIs will adhere to Google API Services User Data Policy, including the Limited Use requirements.
How do I remove synced tasks from Google Calendar?
If you no longer want Quire tasks to appear in Google Calendar, you can remove the sync by following these steps:
- Open Google Calendar and locate the calendar created by Quire.
- Click the x icon next to the calendar name to delete it.
- Go to your My Apps page in Quire and revoke access to fully disconnect the integration.
Note:
- Deleting the calendar from Google Calendar will not remove tasks from your Quire project.
- If you only revoke permission via the My Apps page, the calendar will remain in Google Calendar.
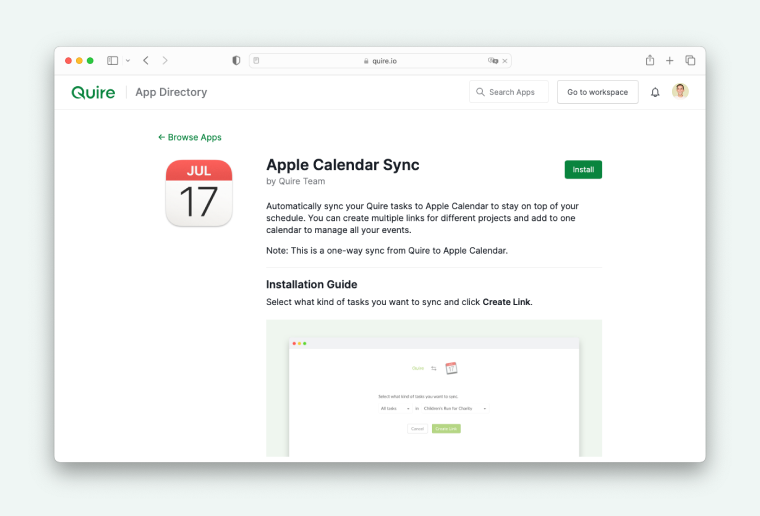
Apple Calendar Sync
Sync your Quire tasks with the Apple Calendar to track your project, plan ahead, and see your task schedule in one place. You can create multiple links for different projects within a single calendar. Keep in mind that updates flow only from Quire to Apple Calendar.
How do I sync Quire tasks with Apple Calendar?
- Click Install on the Apple Calendar Sync app.
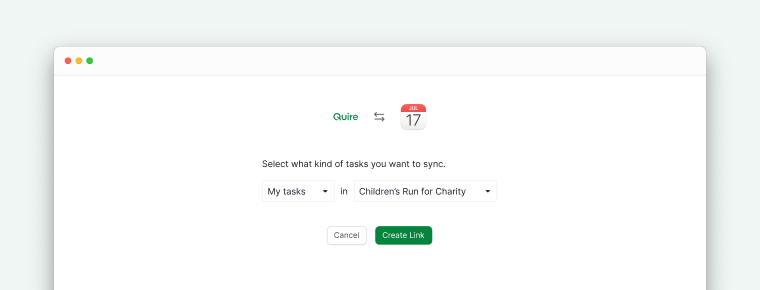
- Choose the type of tasks you want to sync and click Create Link.
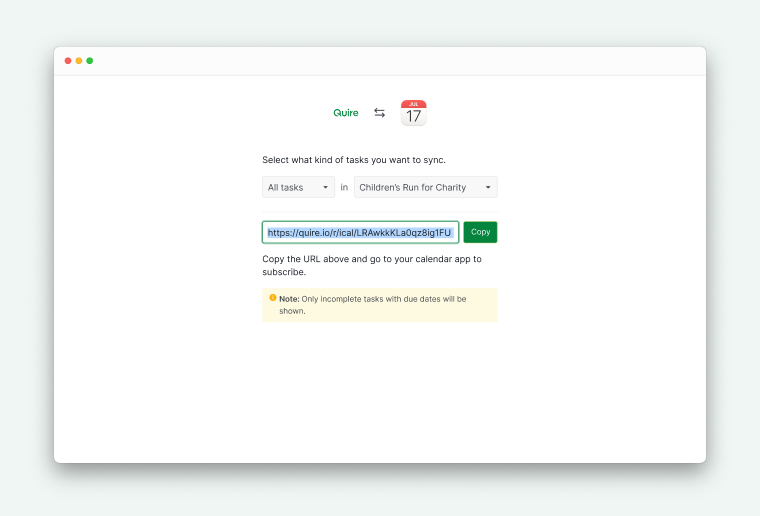
- Copy the URL provided.
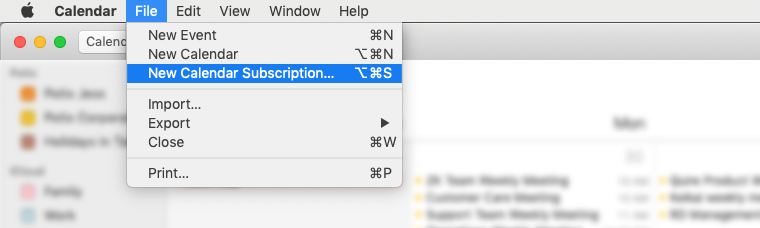
- Open the Apple Calendar app. In the top menu bar, click File → New Calendar Subscription.
- Paste the URL copied from Quire into the Calendar URL field and click Subscribe.
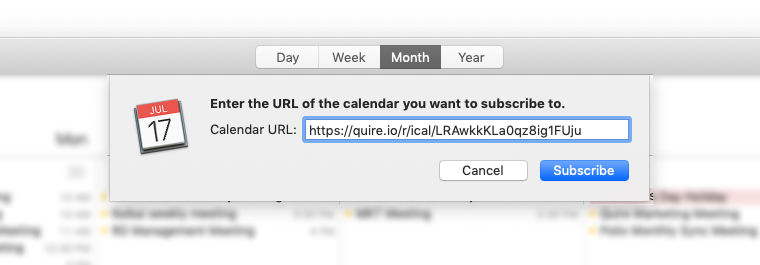
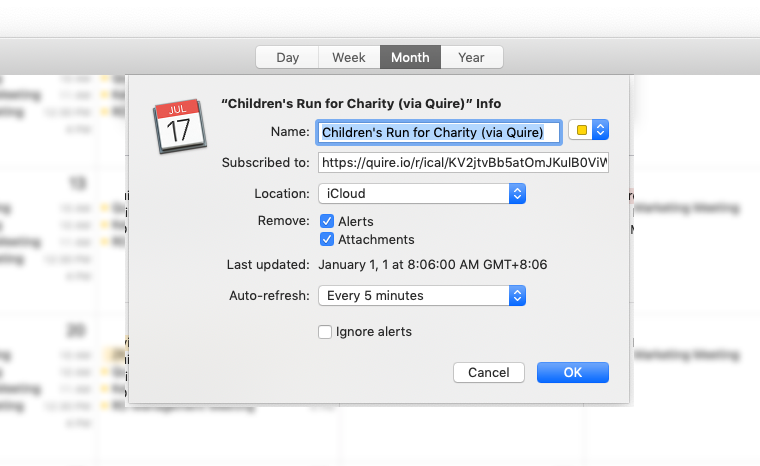
- Configure preferences, including setting auto-refresh to Every 5 minutes, then click OK.
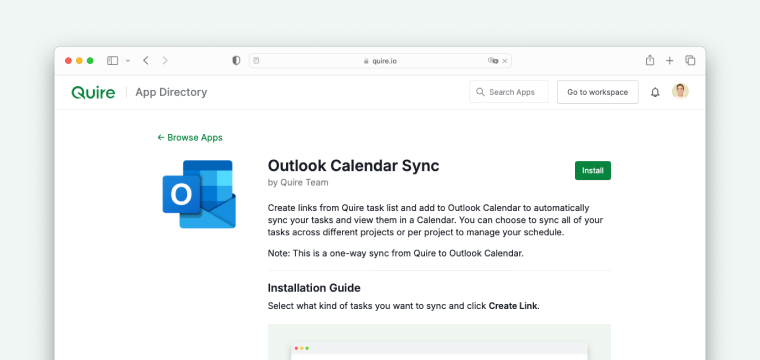
Outlook Calendar Sync
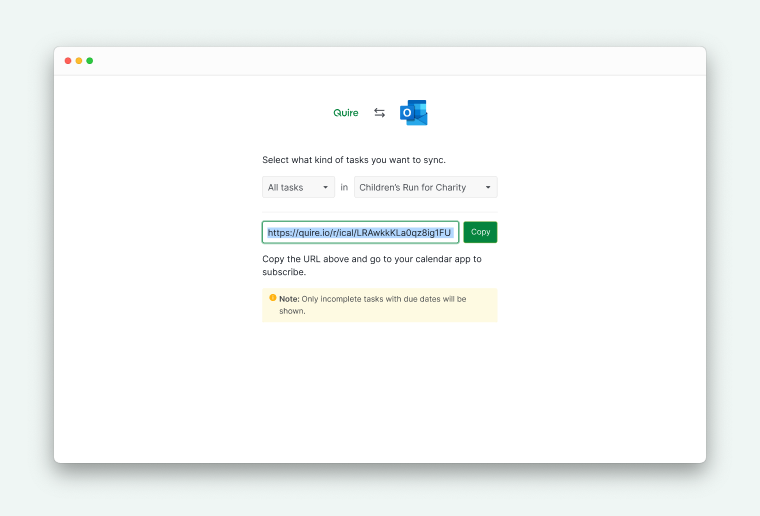
Sync your Quire tasks with the Outlook Calendar to manage your schedule and stay on top of project deadlines. You can sync all tasks or only tasks from specific projects. Updates go from Quire to Outlook and may take up to 24 hours to reflect; changes in Outlook will not sync back to Quire.
How do I sync Quire tasks with Outlook Calendar?
- Click Install on the Outlook Calendar Sync app.
- Choose the type of tasks to sync and click Create Link.
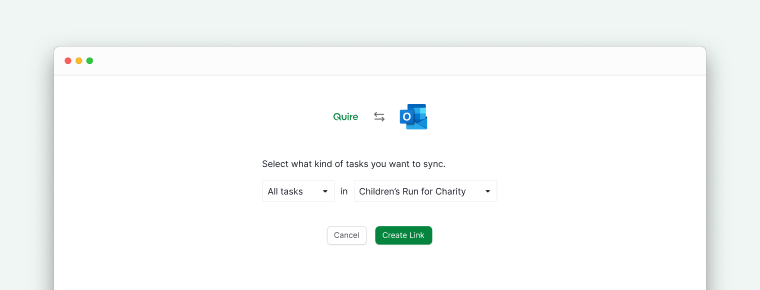
- Copy the URL provided.
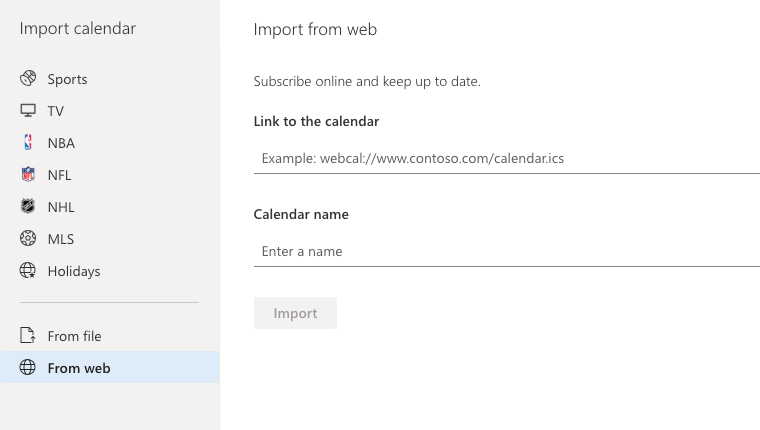
- Open Outlook Calendar, click Add Calendar → From Internet.
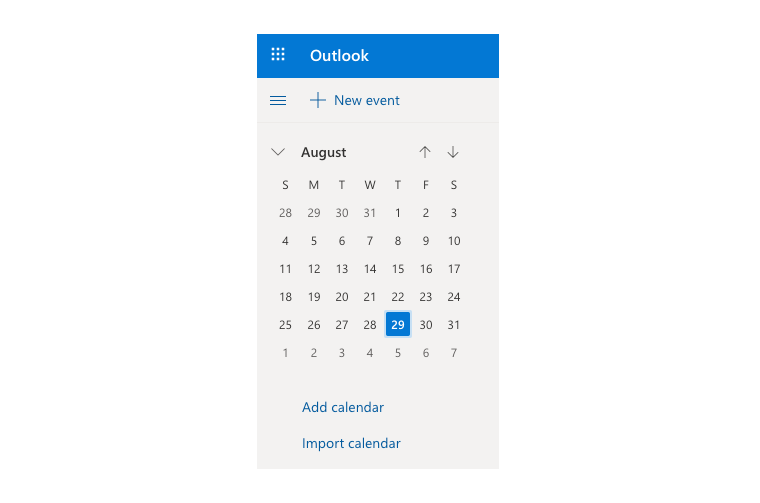
- Paste the Quire URL into the Link to the calendar field, name your calendar, and click Import.
Calendar / Other Calendar Apps
Sync your Quire tasks with any iCalendar-compatible app to monitor your schedule and manage projects efficiently. You can sync tasks from one or multiple projects. Changes in Quire will automatically appear in your calendar, but your calendar changes won’t be reflected back in Quire.
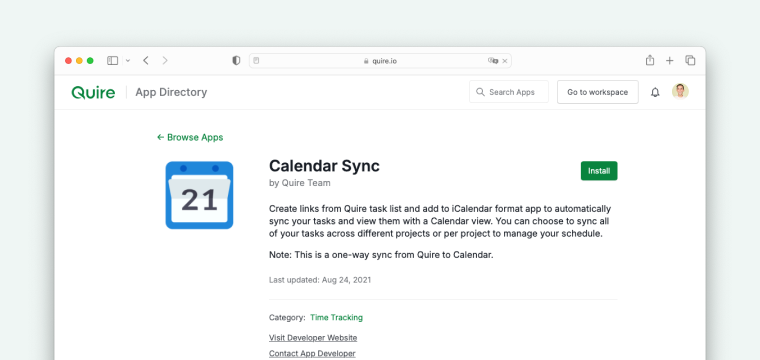
How do I sync Quire tasks with any iCalendar-compatible app?
- Click Install on the Calendar Sync app.
- Choose the type of tasks you want to sync and click Create Link.

- Copy the generated URL.
- Use the URL to subscribe to your iCalendar-compatible app.
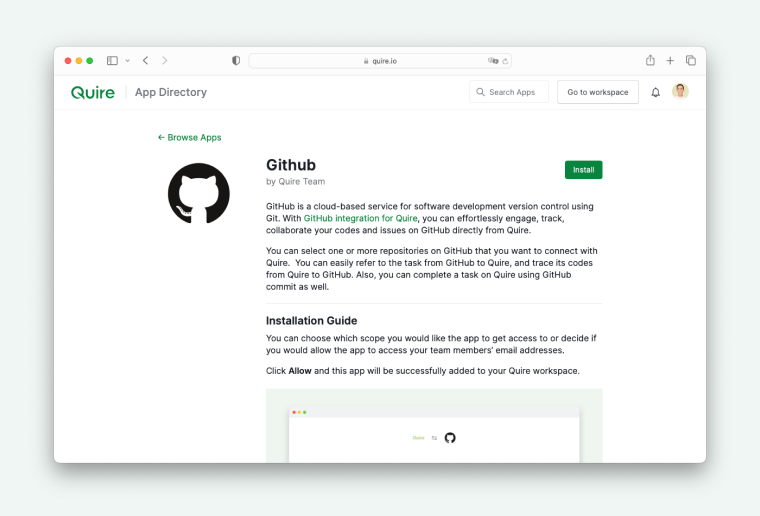
Github
You can keep track of your team’s code changes by connecting GitHub to Quire. Once integrated, commits can be linked directly to tasks for better project tracking.
How do I link GitHub commits to my Quire tasks?
- Open the GitHub integration page in Quire and click Install.
- Select the permission scopes you want to grant the app, such as access to repositories or team members’ email addresses.
- Click Allow to authorize the integration.
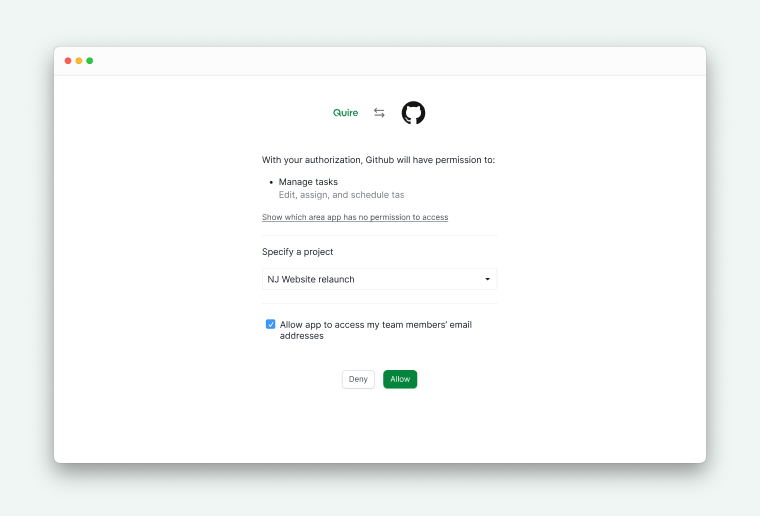
- The GitHub app will now be successfully added to your Quire workspace, and you can start linking commits to tasks.
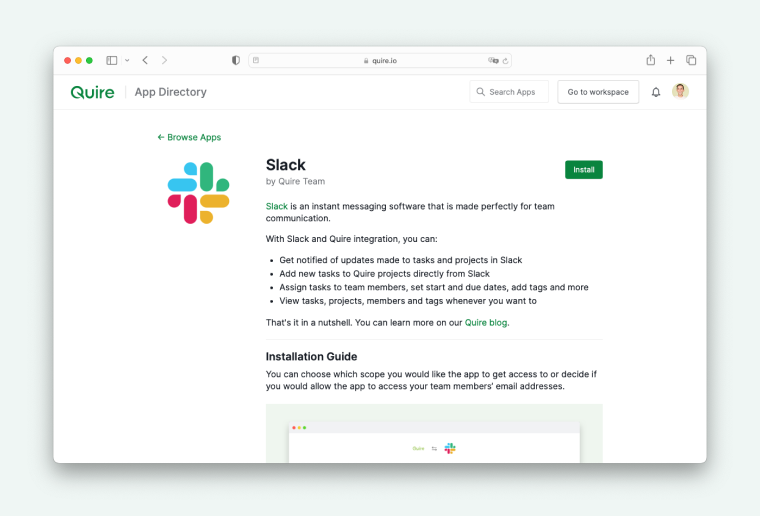
Slack
You can receive updates about your Quire projects, add tasks to a project, add comments on tasks, and many more inside a Slack channel.
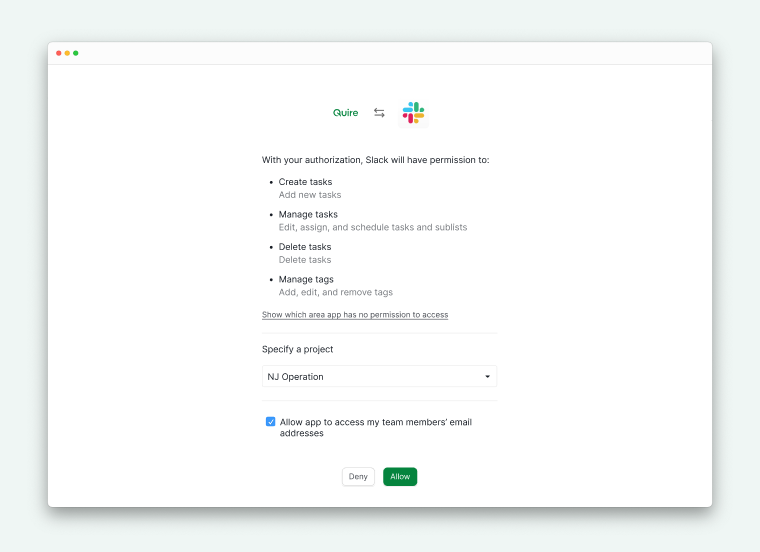
How do I integrate Quire with Slack?
- Go to the Slack integration page in Quire and click Install.
- Select the level of access you want to grant, including whether the app can access your team members’ email addresses.
- Click Allow to authorize the integration.
How do I link a Slack channel to a Quire project?
- Open the Slack channel where you want to link a Quire project.
- Type the command:
/quire link [project ID or project URL]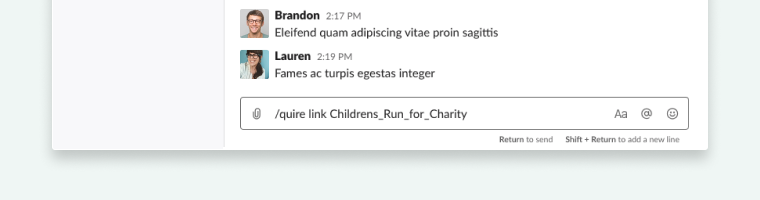
What Slack commands can I use with Quire?
Basic commands for channel and task management:
- Link a channel to a project:
/quire link [project ID or project URL] - Unlink a channel from a project:
/quire unlink - Add a task:
/quire add [task name] - Assign members, priority, tags, and due dates:
/quire assign [task ID] [@team member name] [!priority] [#tag] [<due>] - Comment on a task:
/quire comment [task ID] comment - Complete tasks:
/quire complete [task ID 1] [task ID 2] - Follow or unfollow tasks for notifications:
/quire [follow or unfollow] [task ID 1] [task ID 2] - Follow or unfollow projects for notifications:
/quire [follow or unfollow] project [project ID 1] [project ID 2] - Follow or unfollow tasks assigned to you:
/quire [follow or unfollow] --mine [task ID 1] [task ID 2] - Follow or unfollow projects with tasks assigned to you:
/quire [follow or unfollow] project --mine [project ID 1] [project ID 2]
Note: To only receive notifications for tasks related to you, configure Task activities under Project Settings → Notifications to Task assigned to me only.
Help commands:
- Simple Help:
/quire - Complete Help:
/quire help
How do I remove Quire from Slack?
- Go to the Quire app page in the Slack App Directory.
- Navigate to the Configuration tab.
- Click Remove App to uninstall Quire from your Slack workspace.
Find the complete command list for Slack integration on our blog.
Microsoft Teams
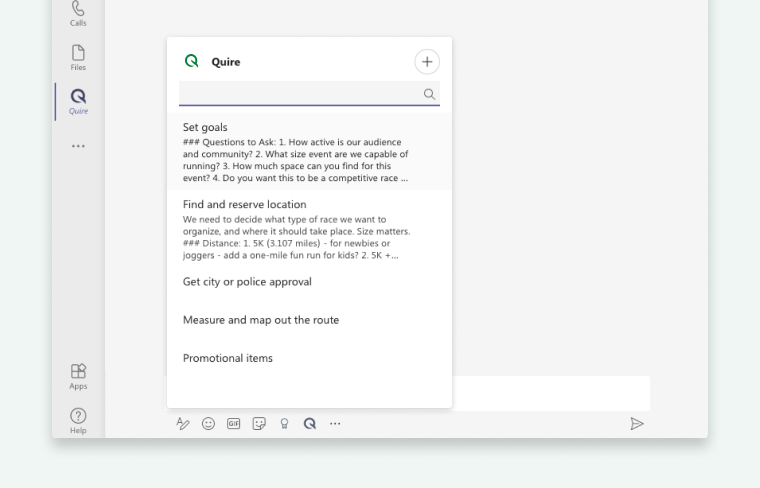
Microsoft Teams is a conversation-based collaboration platform that provides chat and cross-functional teams with the ability to work together and share information via a common space. This integration with Quire lets users communicate with teammates while directly working on the Quire project.
How do I install Quire in Microsoft Teams?
- Open Microsoft Teams and navigate to the Apps tab.
- Search for Quire.
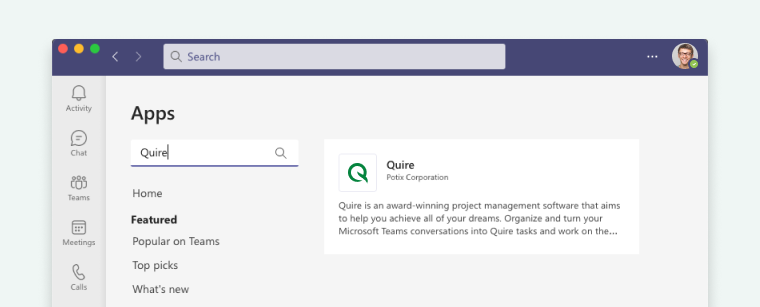
- Click the Quire logo and select Add to install the app.

Tip: You can search for Quire task to narrow down the results in the Teams app.
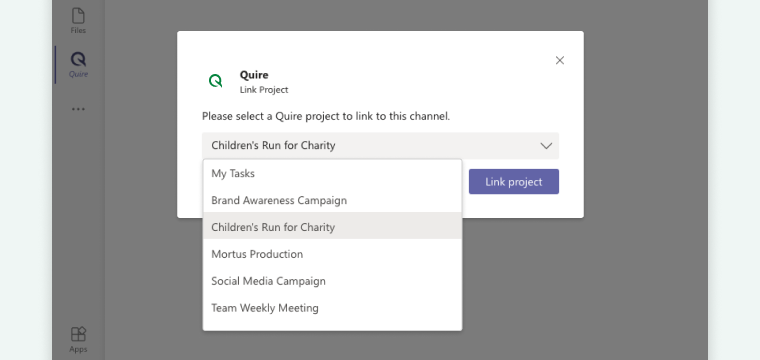
How do I link my Quire workspace to Microsoft Teams?
- After installing, you will be directed to a 1:1 chat with the Quire bot.
- Log in to your Quire account or sign up for a new account. You can also type
Loginto access the login button.
- Select the Quire workspace you want Teams to access, then click Allow to grant permission.
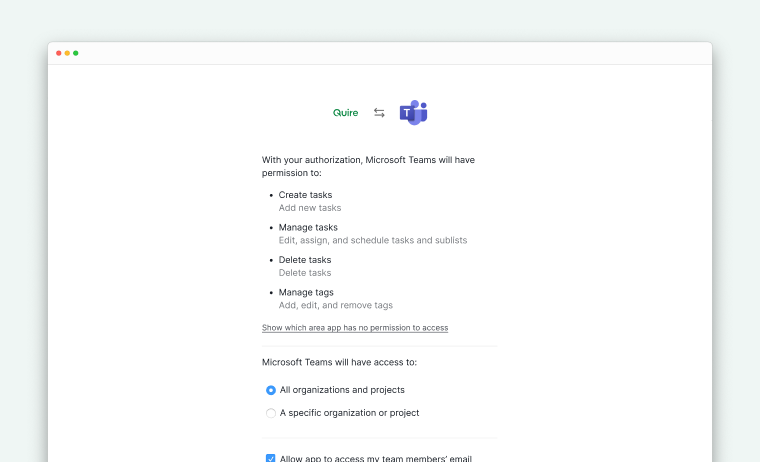
- Connect a specific Quire project that Microsoft Teams should access.
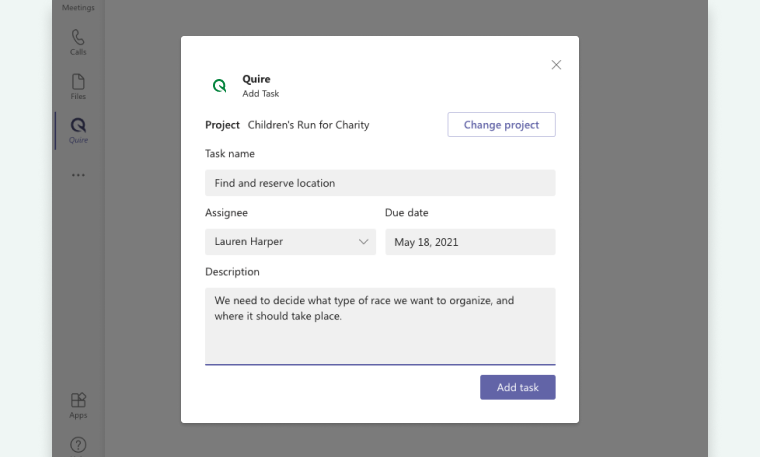
How do I create a Quire task via Microsoft Teams?
- In the message composer, type Add task and select the Add task button.
- Enter the task details.
- Click Add task to confirm.
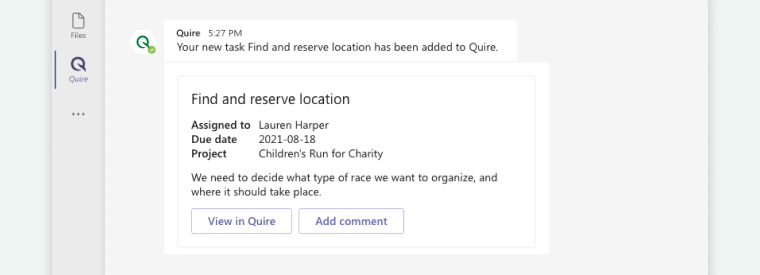
- View the newly created task in Quire or add comments directly using the options shown.
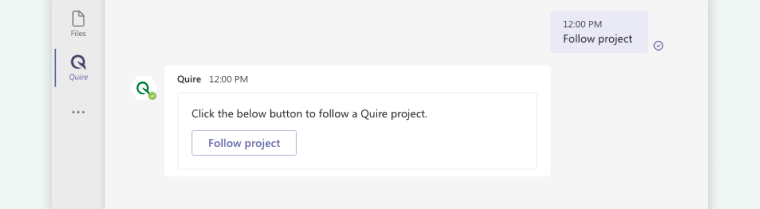
How do I follow a Quire project to get updates in Teams?
- In the message composer, type
Follow project. - Select the project you want your channel to follow.
You and your team will receive notifications in Microsoft Teams whenever changes are made in the Quire project.
How can I search for Quire tasks in Microsoft Teams?
- Click the Quire logo in the message composer.
- Type the name of the task you want to find.
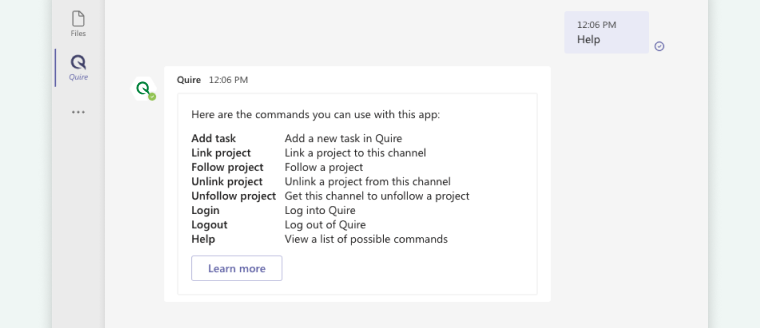
How do I get help from the Quire bot in Microsoft Teams?
- In the message composer, type
Help. - A list of available commands for the Quire-Microsoft Teams integration will appear.
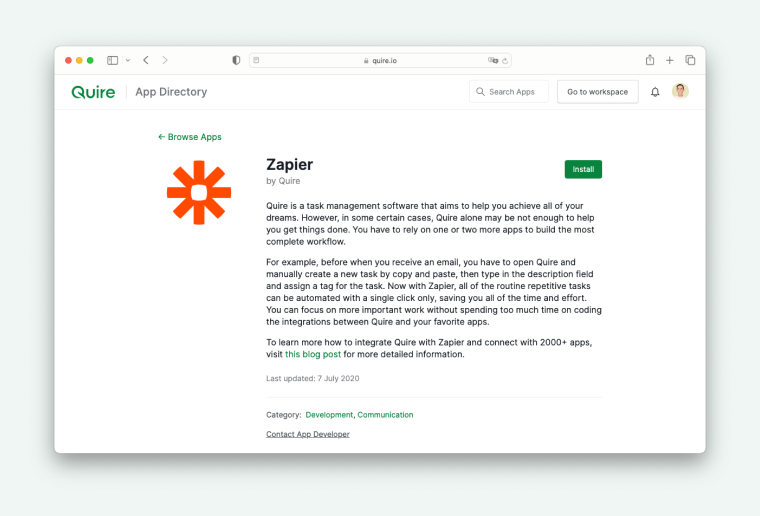
Zapier
You can connect with thousands of other apps with Quire and automate all of the routine repetitive workflow using Zapier.
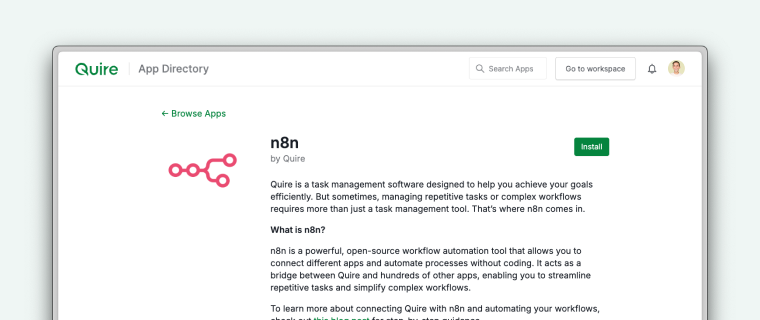
n8n
With n8n, you can integrate Quire with a wide range of apps and services to automate workflows, streamline repetitive tasks, and enhance team productivity.
What do I need before integrating Quire with n8n?
- A Quire account
- An n8n instance (self-hosted or cloud)
- Administrative access to your n8n instance
How do I create a Quire app for n8n authentication?
-
Create a Quire app to obtain Client ID and Client Secret for API access.
- Follow this tutorial on creating a Quire app.
- Set the Redirect URL in your Quire app settings to:
https://your-n8n-instance.com/rest/oauth2-credential/callback
Note: Do NOT activate “Public Distribution” if this app is for personal use only, as this will make your app visible in the Quire App Directory.
How do I install the Quire node in n8n?
- Click your user icon in the bottom-left corner of n8n and select Settings.
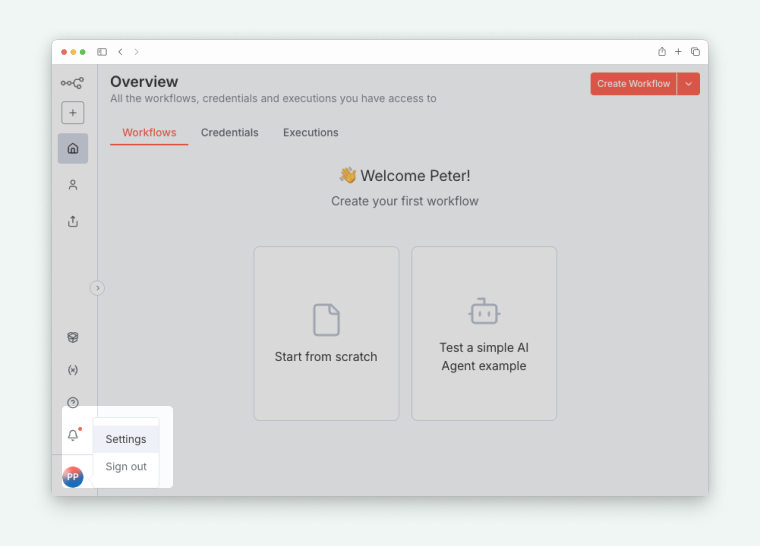
- Navigate to the Community Nodes tab.
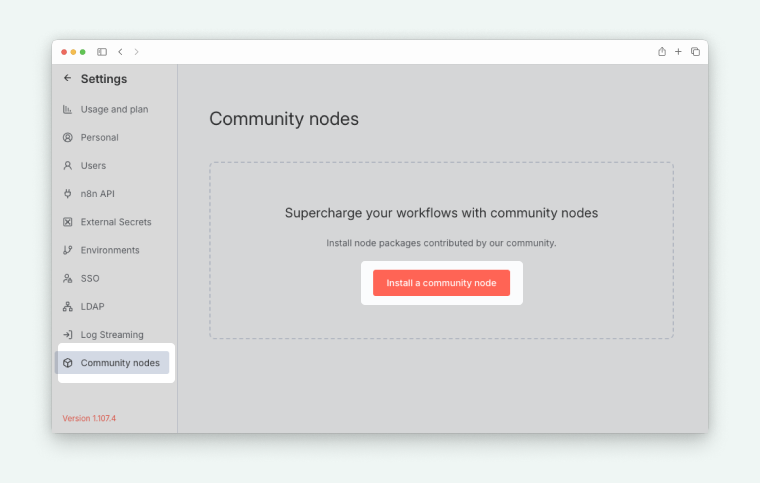
- Enter the npm package name:
@quire-io/n8n-nodes-quireand click Install. 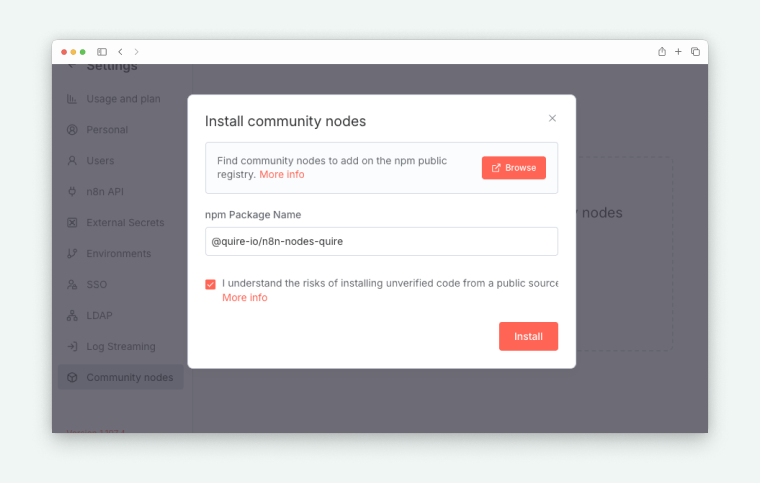
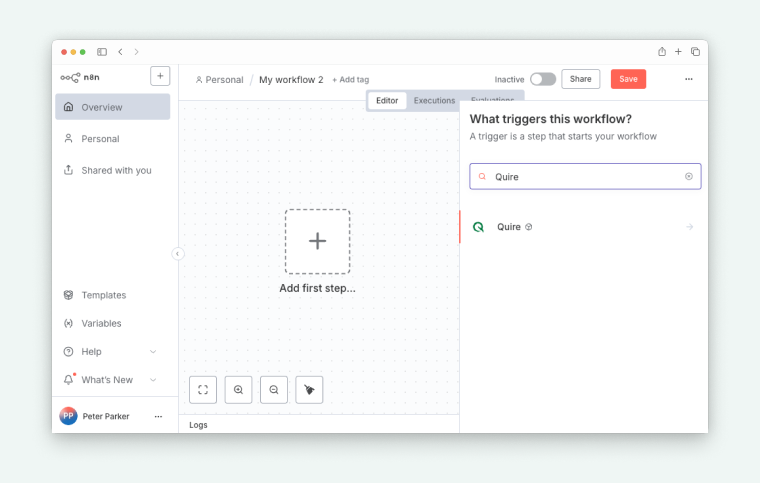
- Once installed, the Quire node will appear in your node panel.
How do I set up Quire OAuth credentials in n8n?
Next, you will need to set up authentication credentials to allow n8n to securely access your Quire account.
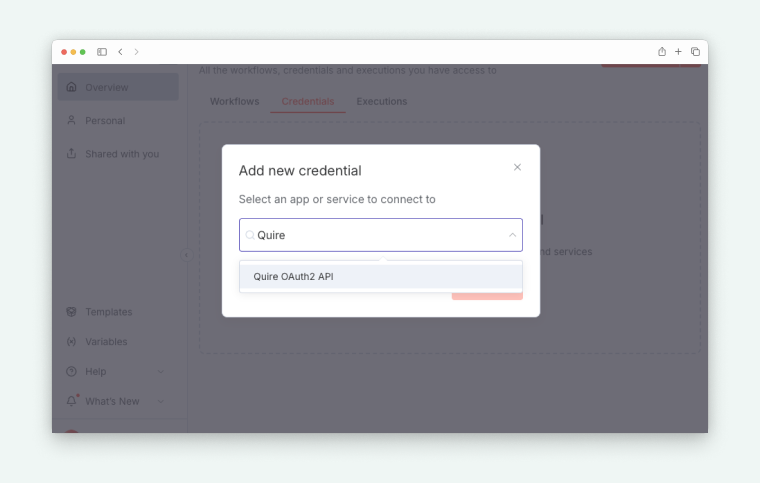
- Navigate to the Credentials section in your n8n workspace.
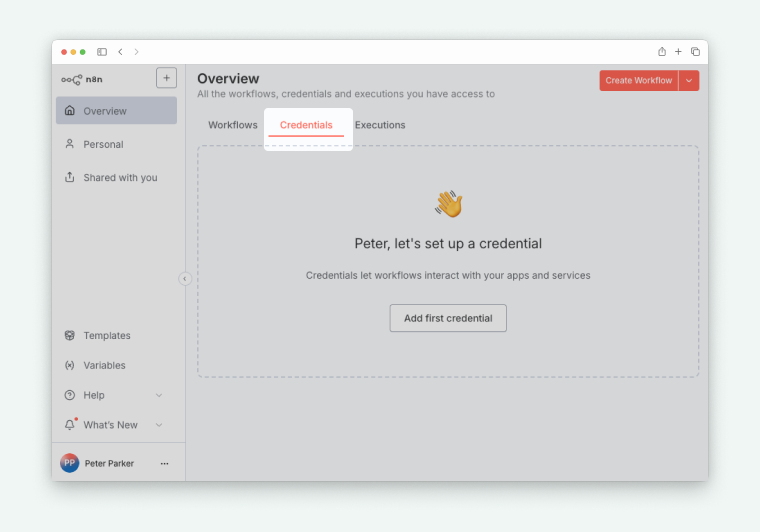
- Click Create credential and search for Quire OAuth2 API.
- Enter your Client ID and Client Secret from your Quire app.
- Ensure the Redirect URL matches the one in your Quire app settings.
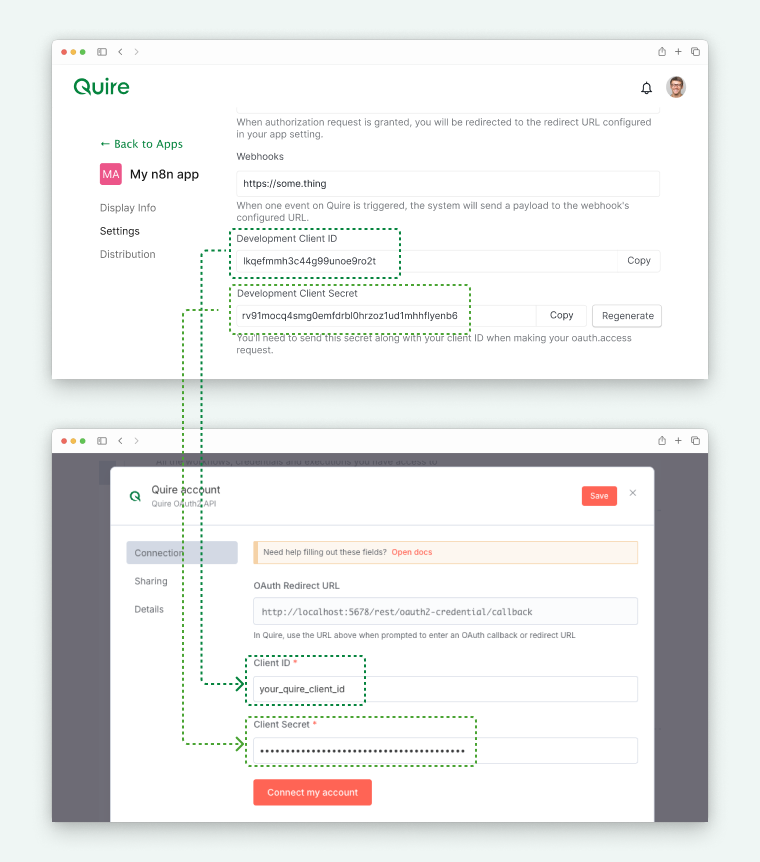
- Click Connect my account and select which Quire projects to grant access.
How do I receive real-time updates from Quire in n8n?
The Quire node includes a Quire Event Trigger that can receive real-time updates from your Quire projects.
- Go to your Quire app settings page and navigate to Webhooks.
- Enter your n8n instance host URL (e.g.,
https://your-n8n-instance.com). 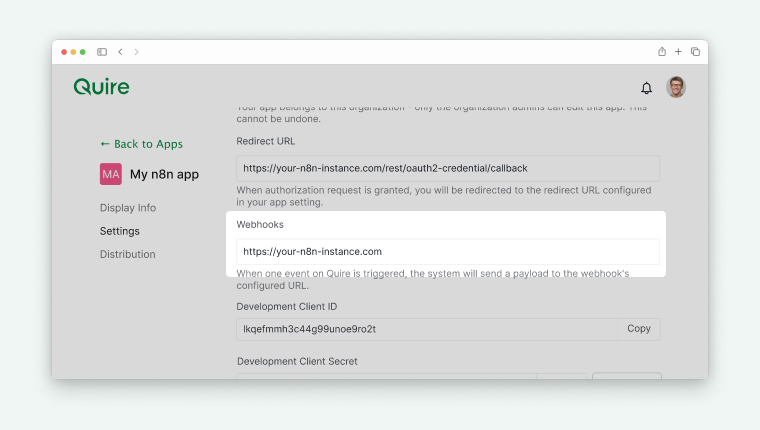
Your Quire node is now fully configured and ready to be used in n8n workflows for automating tasks and integrating Quire with other apps.
Read more about n8n on our blog.
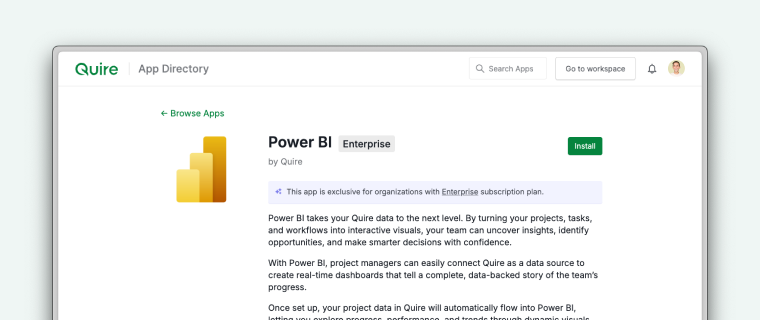
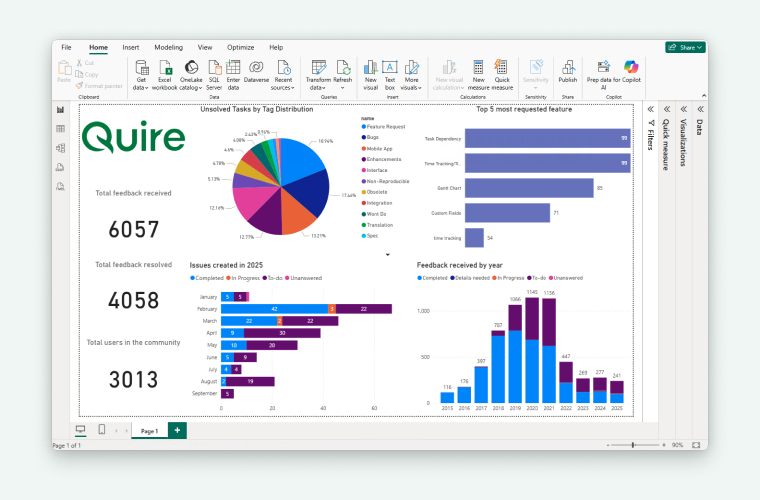
Power BI
Power BI integration is only available in the Enterprise plan. More information can be found on our pricing page.
Power BI takes your Quire data to the next level. By turning your projects, tasks, and workflows into interactive visuals, your team can uncover insights, identify opportunities, and make smarter decisions with confidence.
With Power BI, project managers can easily connect Quire as a data source to create real-time dashboards that tell a complete, data-backed story of the team’s progress.
What do I need before integrating Quire with Power BI?
- Power BI desktop
- Quire connector beta file: please email info@quire.io to get the beta file.
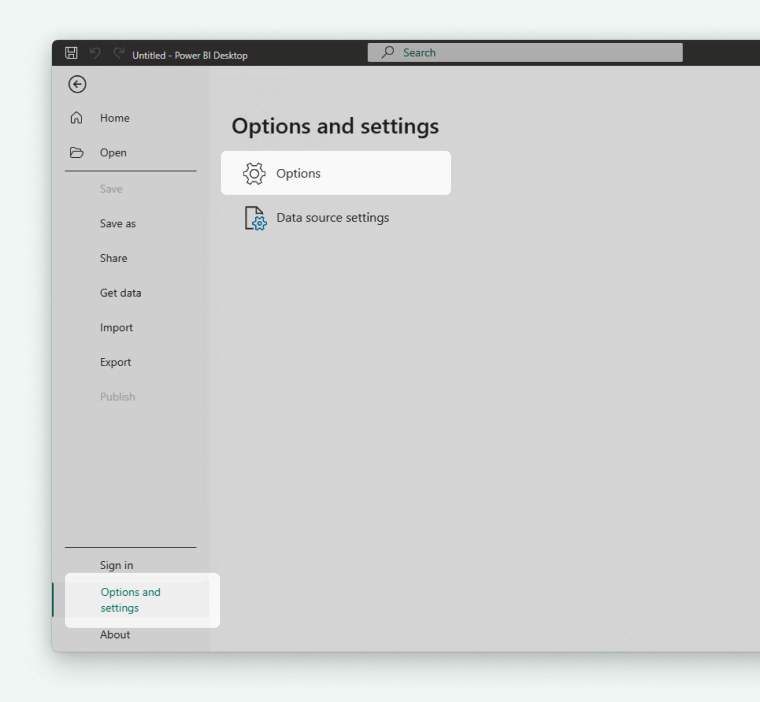
How do I configure security settings in Power BI?
- Open Power BI Desktop.
- Navigate to File > Options and settings > Options > Security.
- Under Data Extensions, select:
(Not recommended) Allow any extension to load without validation or warning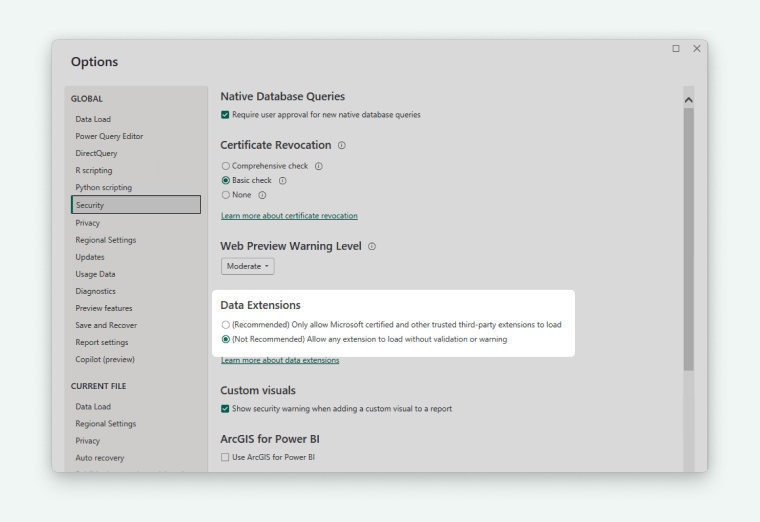
How do I install the Quire connector for Power BI?
- Go to your Documents folder and create the directory:
Power BI Desktop\Custom Connectors - Place the QuirePBI_BETA.mez file into this folder.
Standard Windows path:
C:\Users\YourName\Documents\Power BI Desktop\Custom Connectors\QuirePowerBI_BETA.mez - Restart Power BI Desktop to enable the connector.
How do I connect Power BI to Quire to retrieve data?
- Open Power BI Desktop and go to Home > Get Data > More….
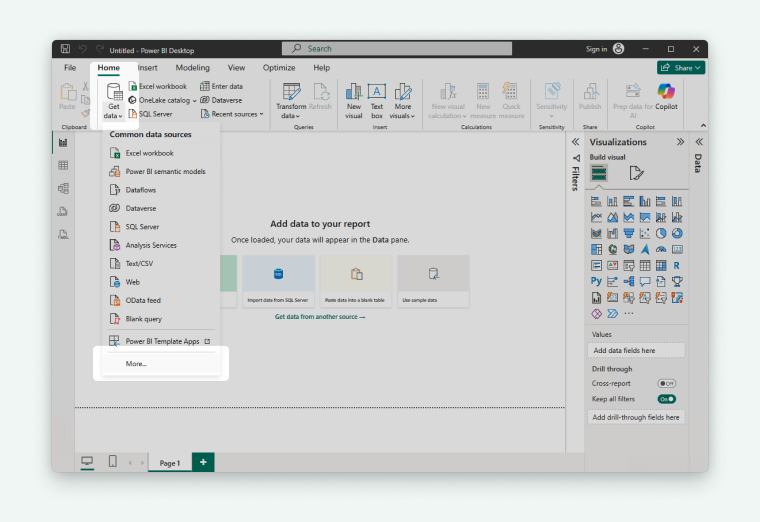
- Navigate to Other > Quire (Beta) (Custom) or search for “Quire”.

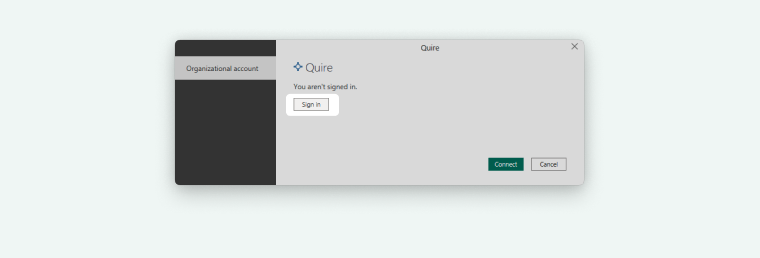
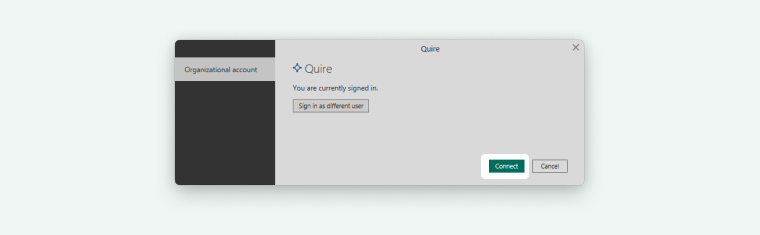
- Click Connect. If it’s your first time or your token has expired, sign in using your Quire account.
- On the Quire API authorization page, select:
- Specific organization/project OR
- All organizations/projects you have access to
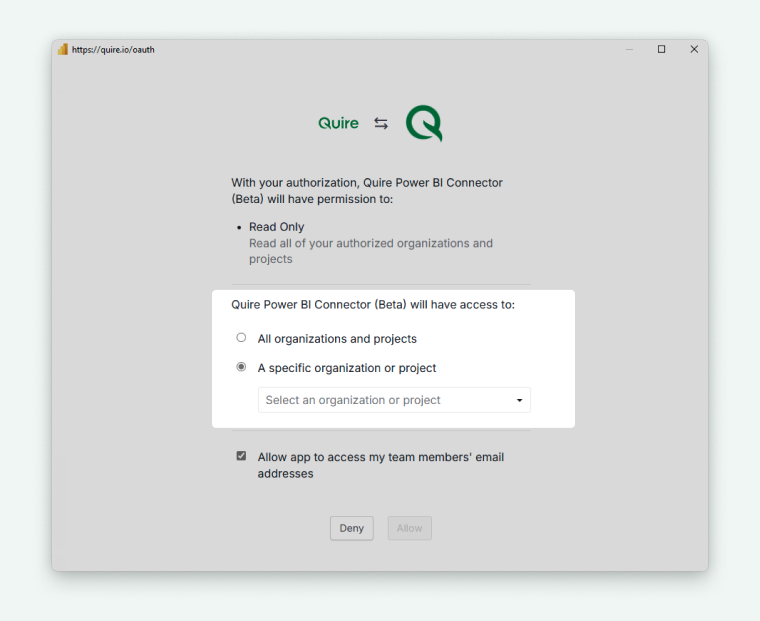
- Click Allow then Connect to start retrieving data.
Which Quire tables should I use in Power BI?
- Select the project you want to analyze.
- Choose the relevant data tables for your report.
- Regular tables: recommended for relationships and structured reports
- Raw Data table: optional, less structured
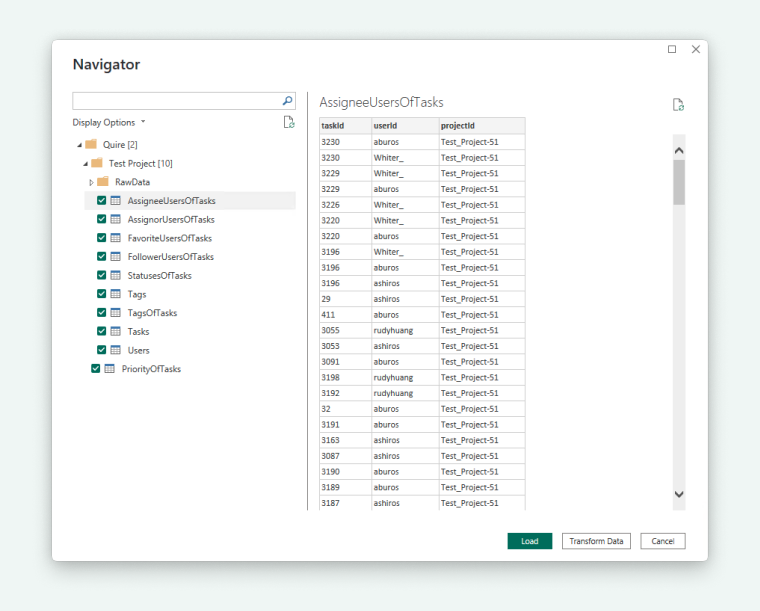
- Click Load to import the data into Power BI.

Note: Depending on your team size and number of projects, loading may take a few seconds to several minutes.
How do I create a dashboard in Power BI with Quire data?
- Once the data is loaded, your Quire tables appear in the Fields panel.
- Drag and drop fields into charts, tables, or visuals to build interactive dashboards.
- Transform or clean the data as needed to fit reporting goals.
Your Quire data now syncs with Power BI, enabling real-time insights into your team’s projects and progress.
Read more about Power BI on our blog.
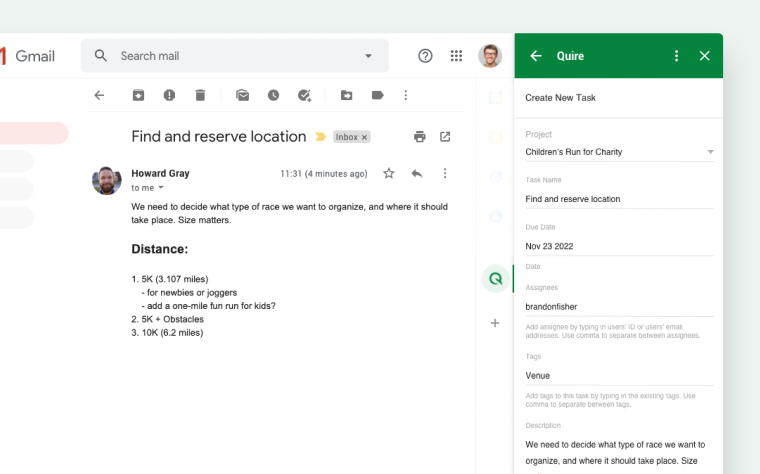
Gmail Add-on
Quire for Gmail Add-on lets you turn your emails into tasks without leaving your mailbox.
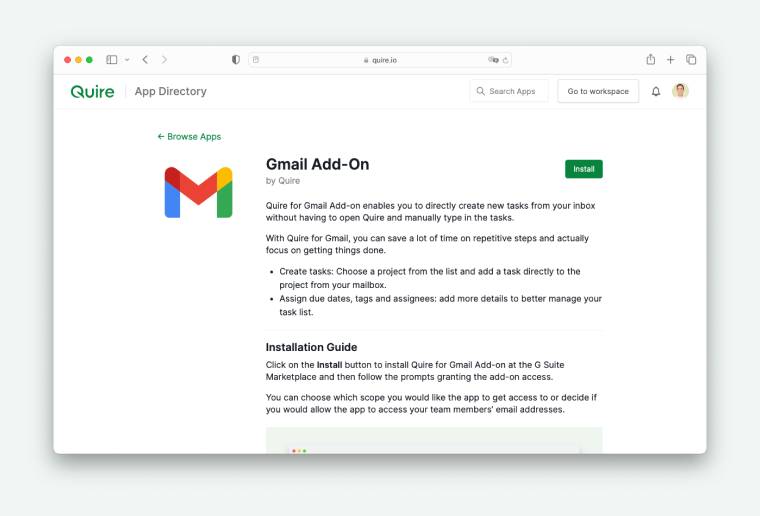
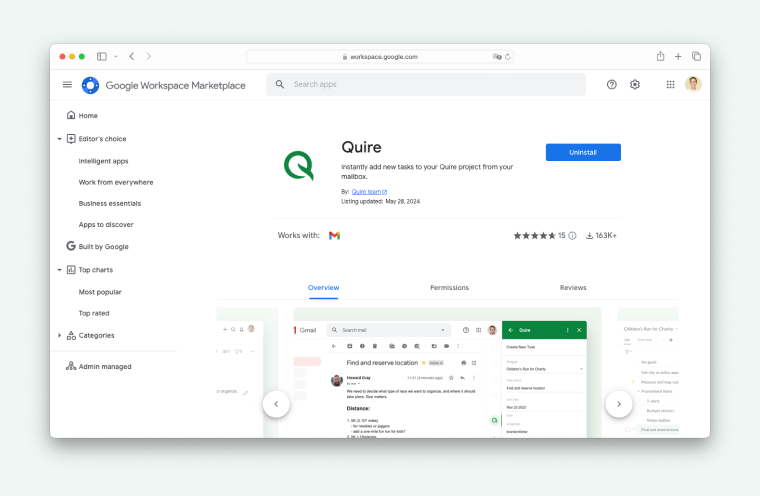
How do I install the Quire Gmail Add-on?
- Click Install on the G Suite Marketplace page for Quire Gmail Add-on.
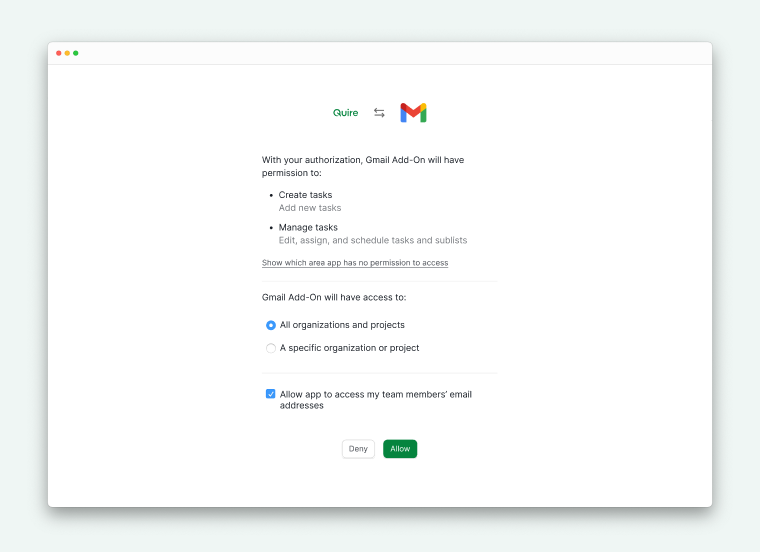
- Follow the on-screen prompts to grant the add-on access to your Gmail account.
- You can choose the access scope for the add-on, including whether it can access your team members’ email addresses.
- Alternatively, click the plus icon on the right side of your Gmail inbox to open the G Suite Marketplace and follow the prompts to install.
How do I turn an email into a Quire task?
- Open Gmail and select the email you want to convert.
- The Gmail Add-on will automatically load the email subject as the task name and the email body as the task description in the right panel.
- Select the Quire project you want to add the task to.
- Add additional details such as:
- Due dates
- Assignees (must already exist in your Quire project)
- Tags (must already exist in your Quire project)
- Click Create Task to add it to your Quire project.
Note: The Gmail Add-on cannot create new users or new tags. It only recognizes existing user IDs, email addresses, and tags in your Quire project.
How do I remove the Quire Gmail Add-on?
- Go to Manage Apps in the G Suite Marketplace.
- Click the three-dot menu icon on the Quire Gmail Add-on.
- Select Uninstall to remove the add-on from your account.
Outlook Add-in
Quire Outlook Add-in allows you to create new tasks directly from your inbox without the need to open Quire and manually input tasks.
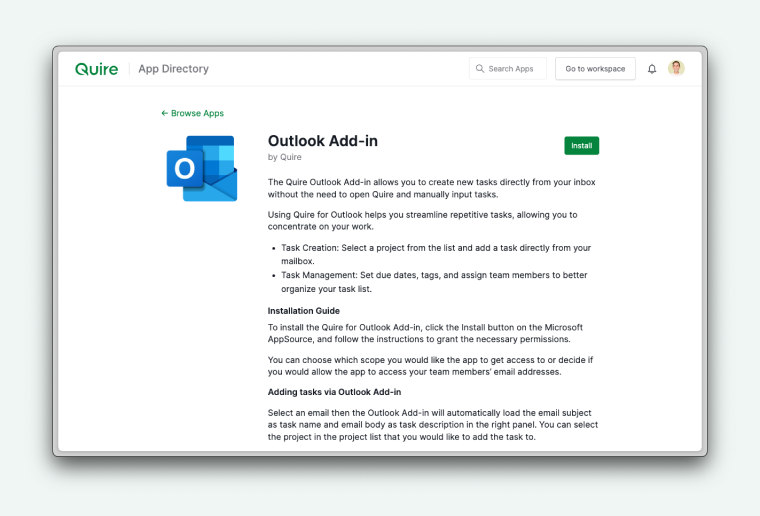
How do I install the Quire Outlook Add-in?
- Go to Microsoft AppSource and locate the Quire Outlook Add-in.
- Click Install.
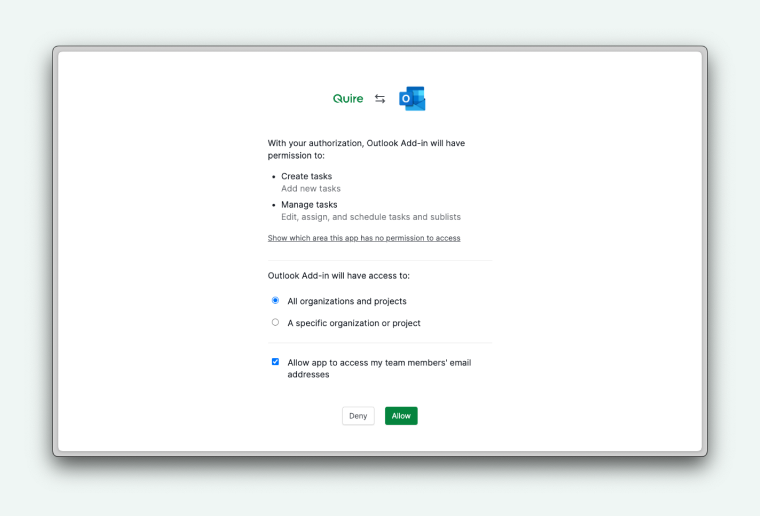
- Follow the prompts to grant the add-in the required permissions for your account.
- You can choose which access scopes the add-in will have, including whether it can access your team members’ email addresses.
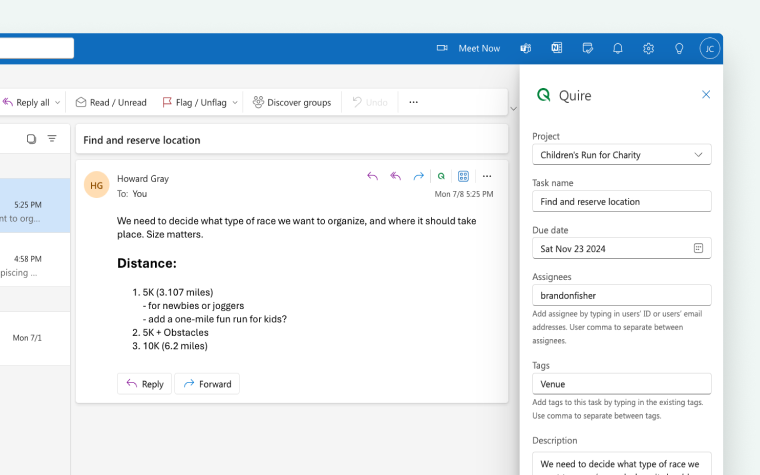
How do I create a Quire task from an Outlook email?
- Select the email you want to convert into a task.
- The Outlook Add-in will automatically load the email subject as the task name and the email body as the task description.
- Choose the Quire project where you want the task to be added.
- Optionally, add more details such as:
- Due dates
- Assignees (must already exist in your Quire project)
- Tags (must already exist in your Quire project)
- Click Create Task to add it to your Quire project.
Note: The Outlook Add-in cannot create new assignees or tags. It only recognizes existing user IDs, email addresses, and tags in your Quire project.
Read more on our blog about Quire API.