
Dashboard Permalink
Dashboard view turns your task data into a visual overview using widgets, making it easier to track progress without opening individual tasks.
Dashboard view is only available in the Professional, Premium, Enterprise plans. More information can be found on our pricing page.
Learn more about the widget types available in Quire Dashboard view.

Create a Dashboard
You can create Dashboard tabs in various locations, including projects, organizations, folders, Smart Folders, My Tasks, and even a member’s profile page.
- Navigate to the desired location (for example, a project).
- Click the + icon at the top.
- Select Add dashboard.
- Enter a name for the Dashboard tab.
- Select a permission to determine who can access this dashboard tab.

Add Widgets
You can add up to 7 widgets per dashboard on the Professional plan, or 21 widgets on the Premium plan. The Enterprise plan supports unlimited widgets. More information can be found on our pricing page.
When you create a new dashboard, Quire suggests a set of widgets to get you started.
- Hover over a suggested widget block.
- Click the + icon in the upper-right corner to add it to your dashboard.
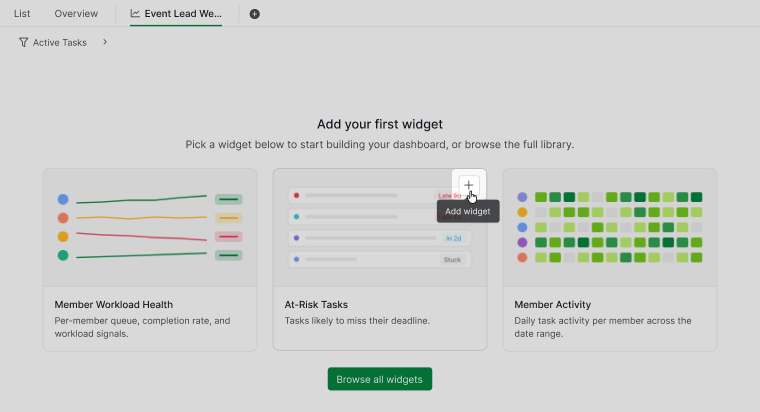

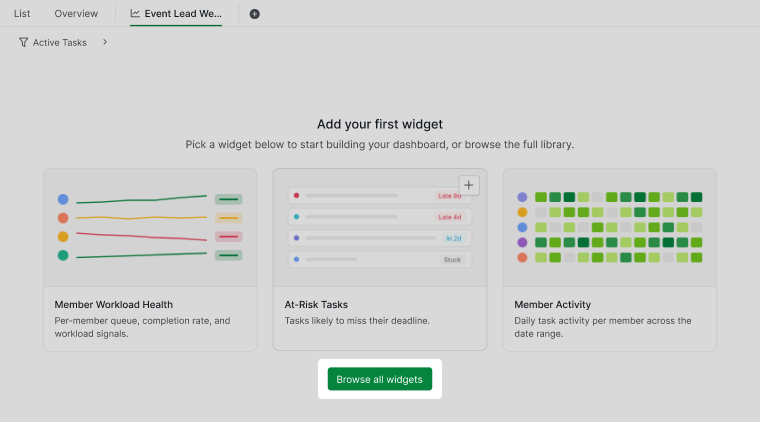
To choose from more widgets:
- Click Browse all widgets.
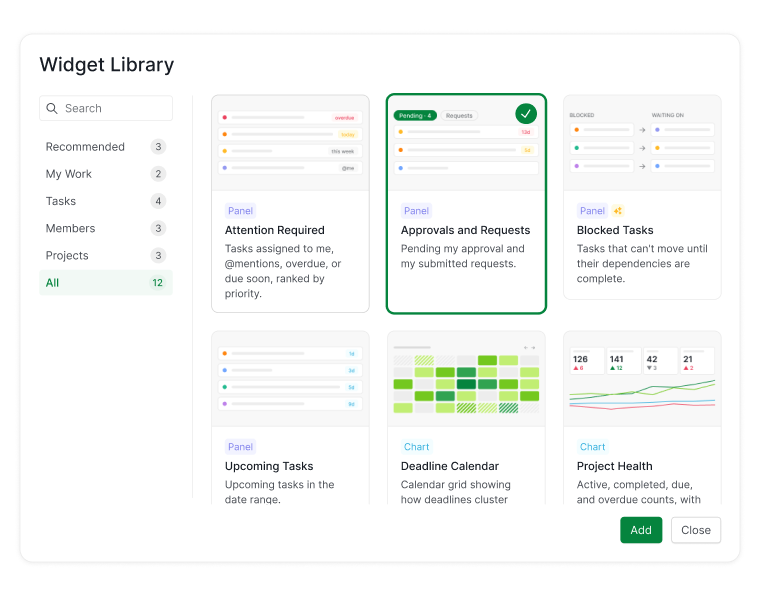
- Select a widget from the Widget Library. Learn more about the available widget types.


To add more widgets after your dashboard is set up:
- Click the + icon at the bottom of the dashboard.
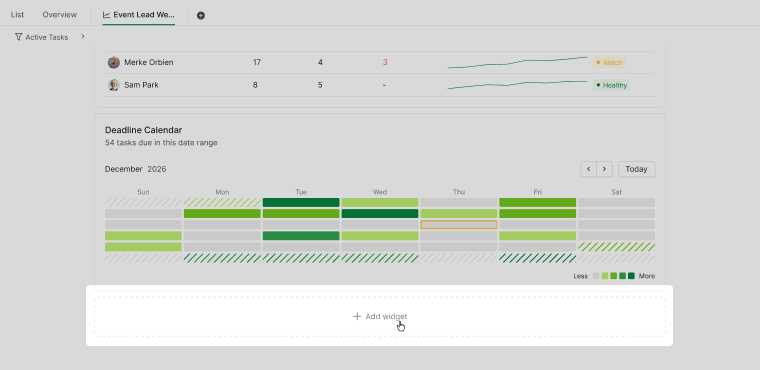
- Select a widget from the Widget Library.

Drag a widget to a new position to rearrange your dashboard layout.

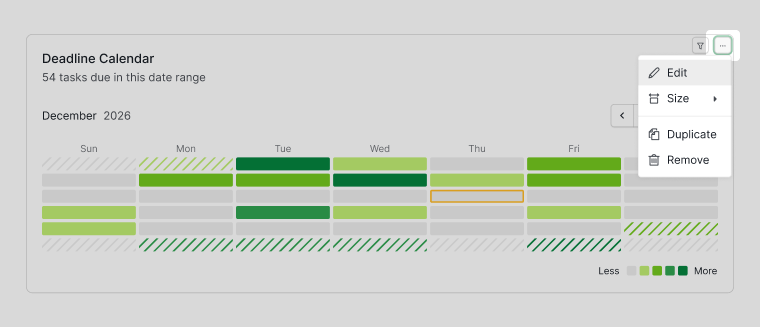
Edit a Widget
- Hover over the widget to reveal the More Options icon.
- Click the More Options icon.
- Select Edit.

Resize a Widget
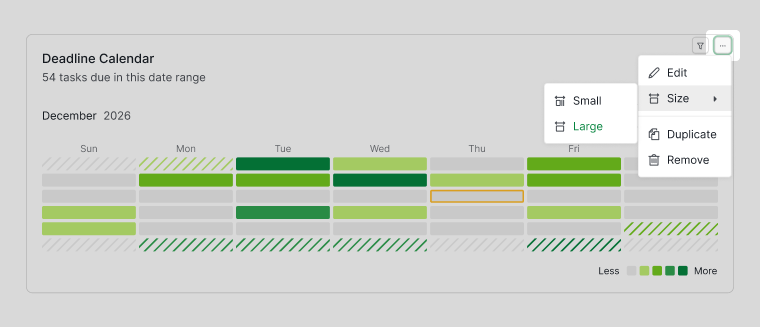
- Hover over the widget to reveal the More Options icon.
- Click the More Options icon.
- Select Size.
- Choose Small or Large.

Duplicate a Widget
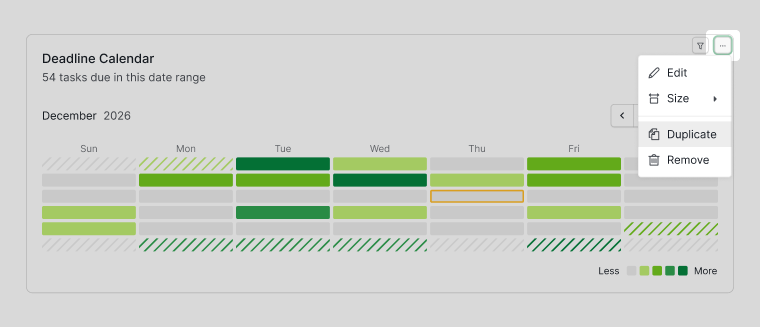
- Hover over the widget to reveal the More Options icon.
- Click the More Options icon.
- Select Duplicate.

Remove a Widget
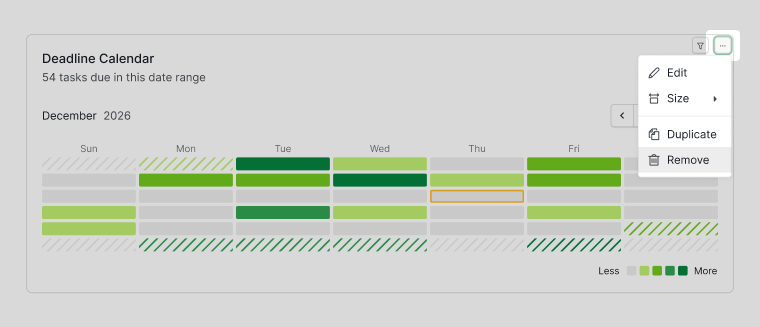
- Hover over the widget to reveal the More Options icon.
- Click the More Options icon.
- Select Delete.

Filter Dashboard Data
Filter All Widgets
A filter bar at the top of the dashboard lets you filter data across every widget at once, the same way filters work in List or Table view.
- Click the filter icon at the top of the dashboard.
- Select filter options such as Priority, Tags, Date, Status, Assignee, etc.
- Click the + icon in the filter dropdown to add multiple filter conditions.

Filter a Single Widget
Each widget can also be filtered on its own, independent of the dashboard-wide filter, the same way you filter an individual chart.
- Hover over the widget.
- Click the filter icon.
- Apply your desired filter conditions.
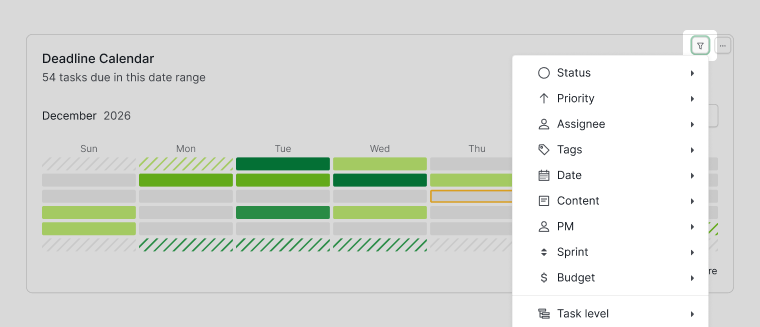

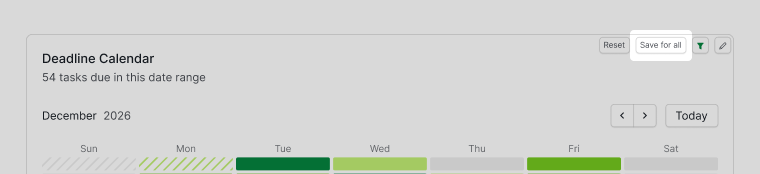
After applying filters:
- Click Save for all to keep the filtered view as the widget’s default.
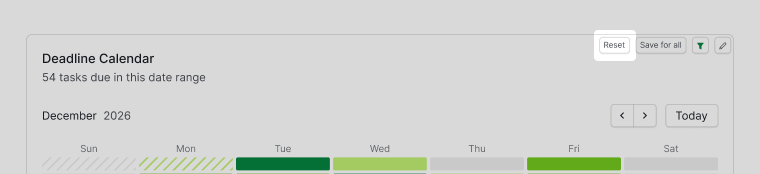
- Click Reset to remove the filters and return to the original saved view.


Edit Dashboard Details
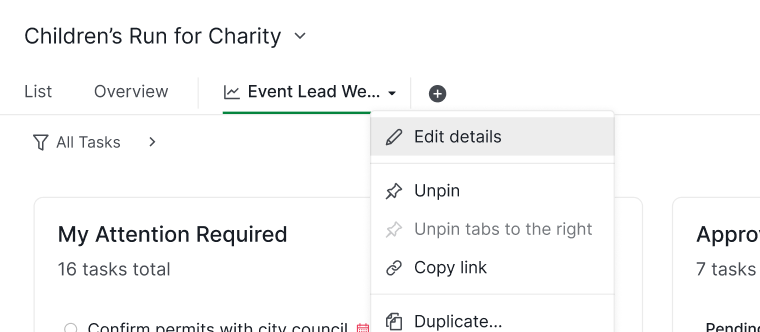
- Right-click the Dashboard tab.
- Select Edit details.
- Edit the dashboard name, description, share with, or URL.
- To reference a dashboard in a task or comment:
- Within the same project:
#|dashboard_id - From another project:
#{project_id|dashboard_id}
- Within the same project:

Organize Dashboards
Duplicate Dashboard
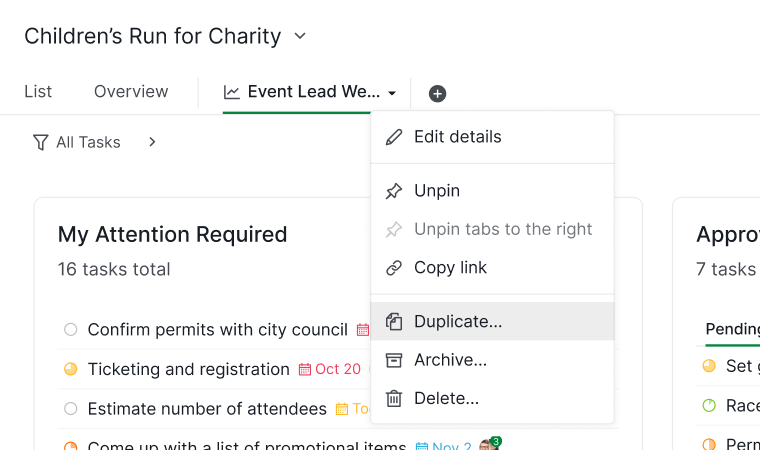
- Right-click the Dashboard tab and select Duplicate.
- Enter a new name for the duplicated dashboard.
- Click Save to confirm.

Archive Dashboard
Right-click the Dashboard tab and select Archive.

Note: Archived dashboards move to the Archived category, accessible from the More Options icon in the top bar, for easy access.

Delete Dashboard
Right-click the Dashboard tab and select Delete.

Note: Deleted dashboards can be restored for a limited time via the More Options menu. Please review carefully before proceeding with deletion.

Learn more about Quire’s Dashboard view on our blog.
Frequently Asked Questions
What is a project dashboard and why do teams use one?
A visual summary screen built from widgets that shows metrics like completion, workload, and progress trends at a glance, without opening individual tasks or reports.
What is Dashboard view in Quire?
A project tab that turns your task data into a visual overview using widgets, so you can track progress without opening individual tasks.
What plan do I need to use Dashboard view in Quire?
Dashboard view requires the Professional, Premium, or Enterprise plan.
How do I create a Dashboard in Quire?
Click the + icon at the top of your project, organization, folder, Smart Folder, My Tasks, or member profile page, then select Add dashboard, name the tab, and set a permission.
How do I add a widget to a Quire Dashboard?
Hover over a suggested widget and click its + icon, or click Browse all widgets to pick from the Widget Library.
How do I resize a widget in a Quire Dashboard?
Hover over the widget, click the More Options icon, select Size, then choose Small or Large.
How do I duplicate a widget in a Quire Dashboard?
Hover over the widget, click the More Options icon, then select Duplicate.
Where do archived Quire Dashboards go?
Archived dashboards move to the Archived category, accessible from the More Options icon in the top bar.
Can I restore a deleted Quire Dashboard?
Yes, for a limited time via the More Options menu.